MOTORSPORTS ATTIRES

Welcome to all Motorsports fans.

MOTORSPORTS ATTIRES

Welcome to all Motorsports fans.

MOTORSPORTS ATTIRES

Welcome to all Motorsports fans.

MOTORSPORTS ATTIRES

Welcome to all Motorsports fans.

MOTORSPORTS ATTIRES

Welcome to all Motorsports fans.

WELCOME TO ALL MOTORSPORTS FANS

Sunday 30 December 2012

HOW TO PREP A CAR FOR POLISHING
HOW TO PREP A CAR FOR POLISHING
As detailing enthusiasts look through posts outlining a complete detail of a car, they’re always impressed with before and after photos showcasing the fine polishing skills and products being used. We as professional detailers do our best to make them as informative and educational as we can, and sometimes we even get lucky by adding a bit of humor while we’re at it to keep the readers’ attention.
Many times however, these posts can skip over some of the most important steps in the process…proper preparation of the vehicle and the paint to get it ready for the crucial polishing. If we fail to properly prepare, we may not produce the best results, or worse yet we risk damaging the vehicle. That’s what you call ready – fire – aim!
Because I want to make sure that enthusiasts and detailers alike don’t fire before they aim, I decided to put together an outline for vehicle preparation to make sure that you are getting the most out of your polishing session and achieving the best results.
I know you’re anxious to pick up your polishers for a full-blown beautification session on your car, but put it back on the work bench for now because we’ve got some very important topics to cover first. I realize that the prep stage isn’t the fun part, but don’t worry…we’ll get to polishing.
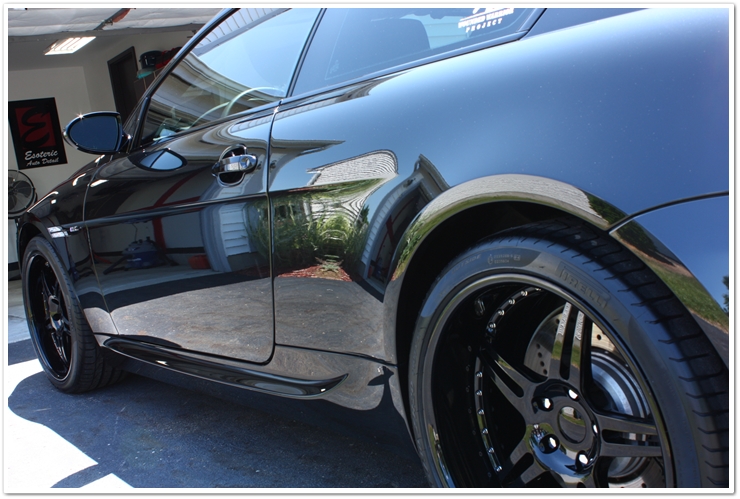
Before we can achieve this:
Polished BMW M6
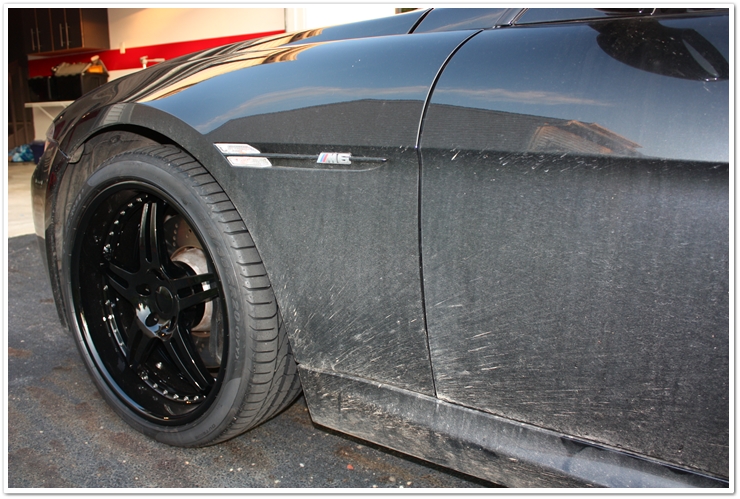
We first need to deal with the realities of this:
Dirty BMW M6

Washing and Decontamination

First up is the washing stage. I know this sounds obvious, but stick with me here because I’m going to try to cover some critical information why this is all important. If you haven’t already read through my washing and drying tutorial as well as my Grit Guard method article, now would be a good time to check them out so you get a better understanding of how the process works. It’s OK, really…we’ll all stay right here and wait for you to get back.
We’re waiting, and waiting…
Alright, you’re back! Did you pick up on anything that you may have been missing before? There’s some great information in those articles, right? (meanwhile Todd strains shoulder while patting self on back).
Despite the fact that we’re getting ready to polish, we still want to use the same safe techniques as we would when doing a normal maintenance wash. There’s no reason to cause any more damage by improper washing techniques just because we’re getting ready to polish. We’re going to be spending enough time with a buffer in our hands…no need to create more.
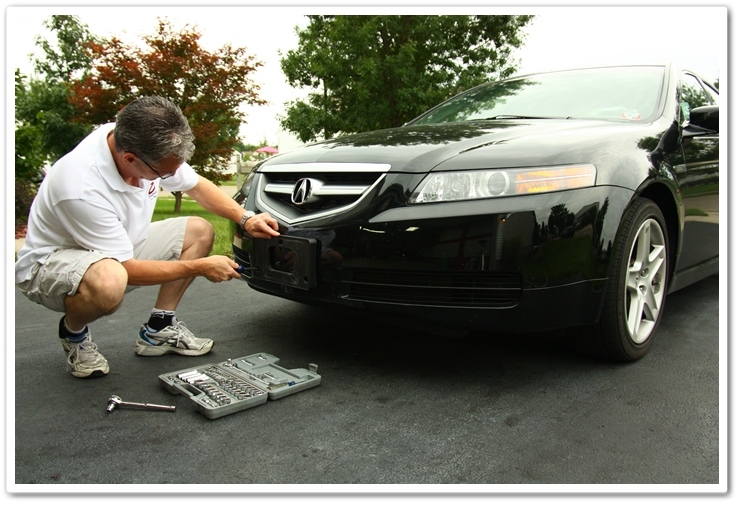
Before starting your wash, remove license plates and brackets whenever possible. First of all these are hiding places for gritty dirt, and secondly they get in the way when polishing. It only takes a few moments to remove and re-install them, but you could spend a whole lot more time taping and trying to polish around them if you don’t.
Removing license plate from Acura
Be sure to thoroughly clean the vehicle to remove any and all dirt, debris, bugs, leaves, etc. All of this gets in the way of polishing, and if there’s any dirt or debris left on the surface, it can get caught in the pad while polishing and you could risk doing more damage than good.
Not only do we need to remove all the potentially abrasive dirt and debris from the car, but we also need to make sure that the surface is free from any previous wax, sealants, grease, tar, etc. I know that the grease and tar examples are obvious, but do you know why it’s important to remove wax and sealants before polishing? It’s because some of these products can run interference with the the polish and pad. Just think of it as a barrier that rests between the paint that you want to polish, and the polishing media itself. There are some products out there (silicones in particular) that will make the polishing process extremely difficult, if not impossible.
Do your normal wash process with your buckets and use your sheepskin wash mitt.
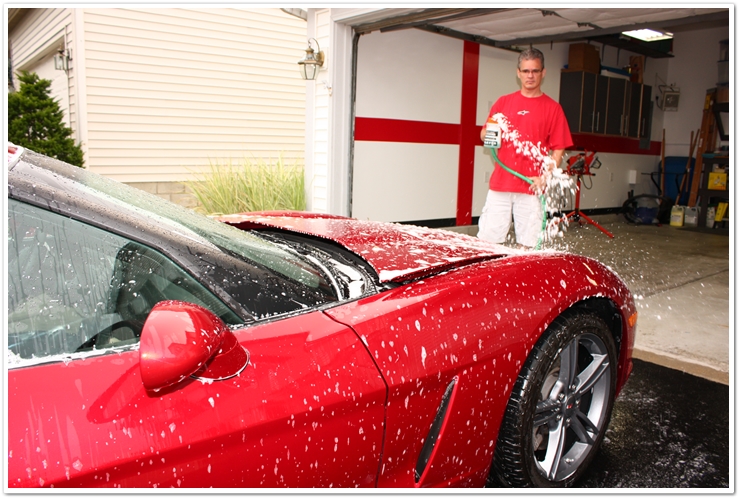
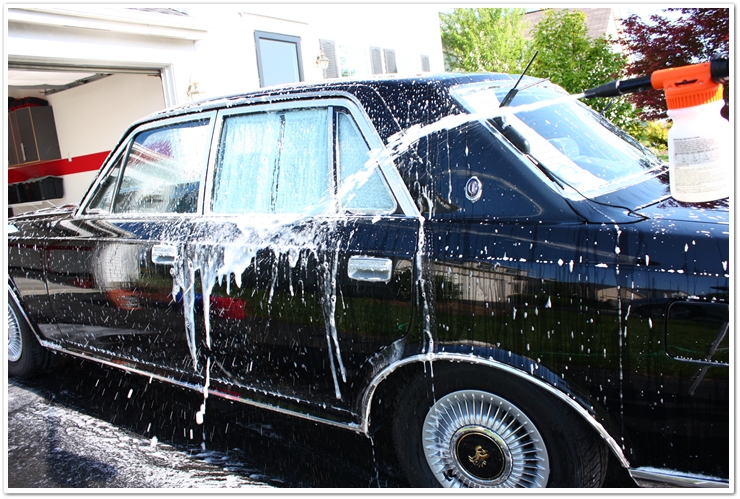
Gilmour Foam Gun spraying shampoo for car wash
Spraying Gilmour Foam Gun
So how do you know whether the vehicle still has a good layer of a wax and/or sealant? Well the easiest way to tell is spray the surface with your hose, and see if the water beads. The tighter the beading, the better the protection is (in most cases). If there’s no beading whatsoever, then shame on you for not keeping a good layer of protection on your car. :)
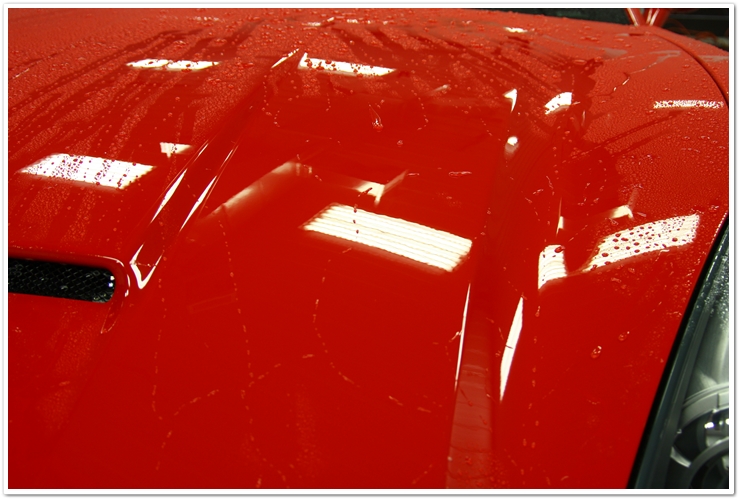
If you look at this picture, you’ll notice how the water is beading nicely, indicating a coat of wax or sealant on the surface that needs to come off.
Water beading
P21S Total Auto Wash washing off sealant and wax

Claying

Now that we have the car squeaky clean and free from waxes and sealants, it’s time to move on to the next stage of paint decontamination which is claying. If you’re read through my how to use a clay bar (another shameless plug of a previous article!), you understand how clay works to remove all of the embedded contaminants from the surface. This is all the stuff that sticks to your paint, but won’t come off in the normal washing process. While I’m washing the vehicle I’ll typically run my hands across the paint in a variety of areas to check for a gritty feeling. This will give me a good indication of how much claying will be required.
The claying process is very important, and it needs to be done with care as well. If your clay gets abrasive debris caught in it, and you’re not regularly kneading the clay to expose a fresh surface, then you can potentially scratch the surface pretty badly. If you follow my tutorial however, you should be good to go.
Use a fresh clay bar (fine grade clay is all that is needed most of the time) to ensure a clean surface completely free of potentially abrasive contaminants prior to polishing.
Claying with Dodo Juice Born Slippy
This photo will give you an idea of the level of contaminants that the claying process can remove.
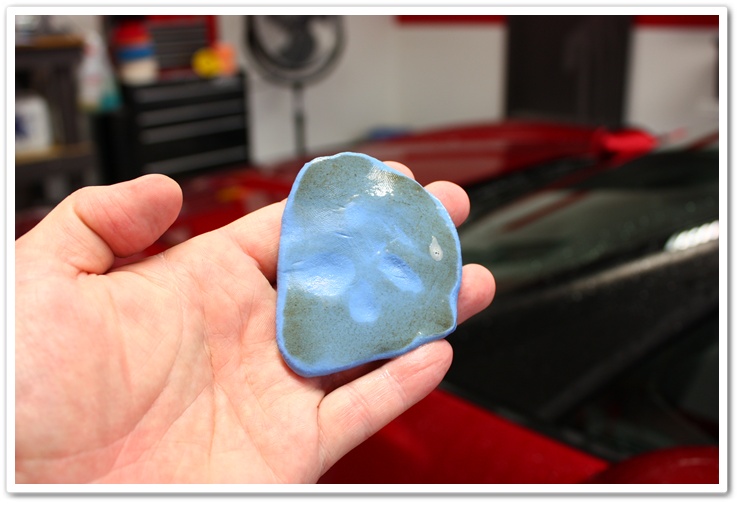
Contaminants picked up by clay bar
If the finish of the car required a lot of claying, or if you used a quick detailer as a clay lube which left a “slick” surface, then I would recommend washing the vehicle one more time to remove any of the residue. At the very least, wipe down each panel with isopropyl alcohol.

Taping

OK, now we’re ready for polishing right? Well actually no, we are not. We prepped the surface by thoroughly cleaning and claying it; now we need to tape it to protect delicate materials and edges that could potentially get damaged if they come in contact with the buffer (especially if we’re using a rotary).
When we’re looking at places to tape, we want to protect sharp items that could get caught by the buffer pad (emblems), rubber that could get damaged or stained (window seals), places where uneven body panels/seams meet, or simply items that stick out and can easily get hit by a buffer (door handles, underneath sides of mirrors, etc).
For most of the work I do I use 3/4″ tape, and 1/4″ for the edge of protective film (3M Clear Bra or Venture Shield). Just make sure that the surfaces are completely dry because the tape will come off and leave the area unprotected.
Here are a few examples of areas that require taping prior to polishing:
Vinyl graphics that are on top of the clear coat
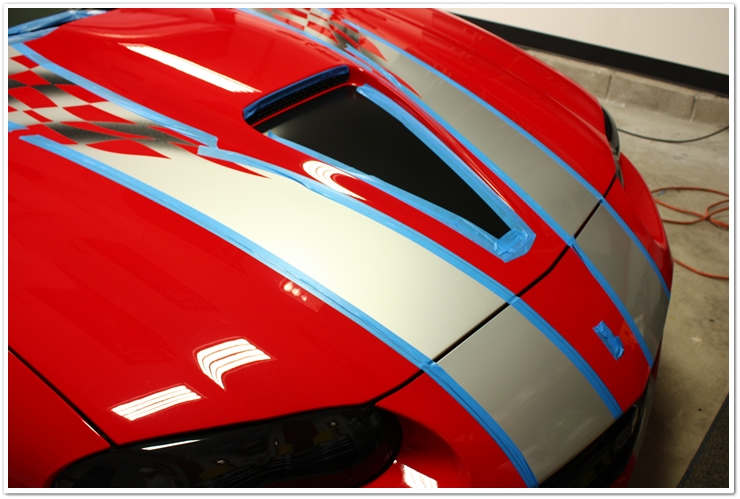
Taping before polishing
Rubber window and door seals
Rubber window and door seals taped
Protruding edges (the entire edge would get taped here. I only have it partially taped for photo purposes)
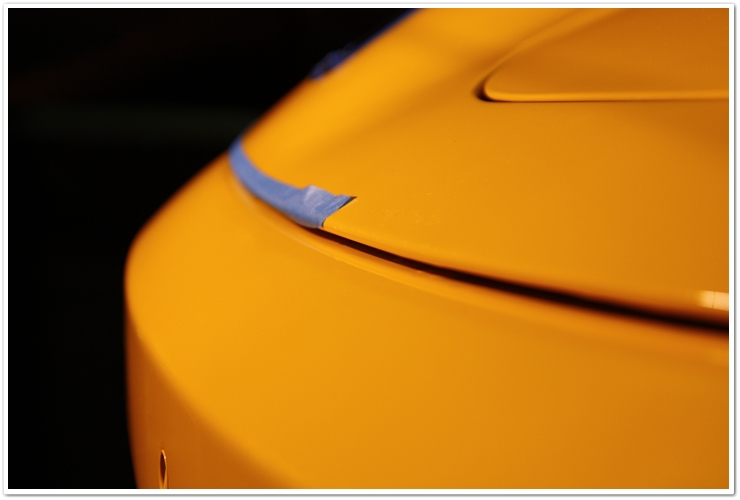
Taping protruding edges
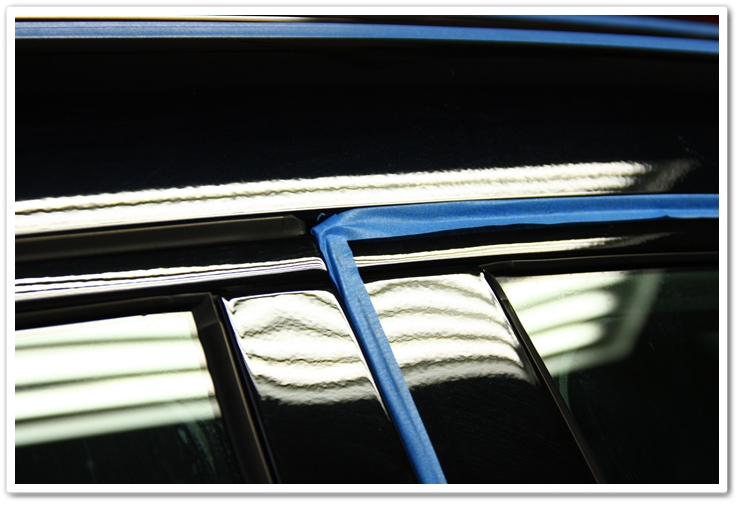
On this photo, I am protecting a rubber window trim, window felt (vertical tape), and you can also see where I have a vertical surface protected for when I’m polishing the horizontal edge just below it.
Taping to protect rubber window trim and window felt
And on this one, there is a small seam that I have taped up with 1/4″ tape just to prevent a buildup of polish. A little bit of tape can prevent a lot of cleanup afterwards! We’ve all seen cars with compound caked in the seams, and I can say that it’s no fun to clean up after it’s hardened.
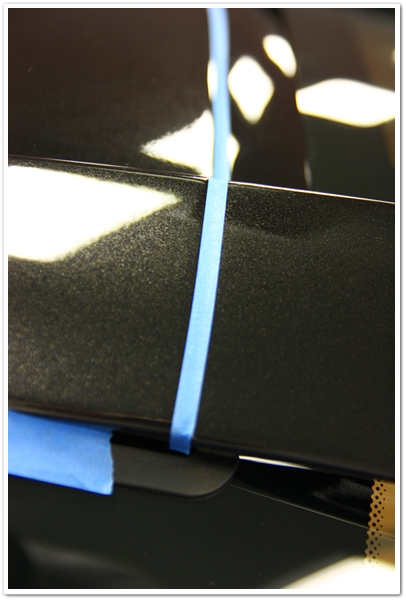
Seam taped to prevent polish buildup
Taping is all about common sense really. If you think that there’s even a slight possibility that a part of the car could easily be damaged or stained, then tape it off.
Well we’ve gone through a lot of information, so let’s do a quick review of what we need to do to prep a car for polishing:
  • Thoroughly wash the car using a strong ratio of wash solution to help strip any previous waxes and/or sealants. A clean, wax/sealant-free finish is required to get the most out of our polishing session.
  • Clay the surface of the car to remove any embedded contaminants that doesn’t come off with normal washing.
  • Tape up all rubber trim, uneven seams, protruding parts (door handles), emblems, and any other part of the car that could potentially get stained by polish or damaged by a buffer.
Now that we’ve accomplished all of these steps, we’re ready to start polishing to bring the finish to a whole new level. Unfortunately however, that needs to wait for another article. Stay tuned…
Polishng products and tools


Credit to detailedimage.com

Monday 24 December 2012

POLISH YOUR CAR LIKE A PRO


Polish Your Car Like a Pro

No need to go broke making your car look like a million bucks.


Keeping your car’s finish looking new doesn’t require a paycheck’s worth of equipment or a professional detail shop. “Wheeling”—i.e., polishing a vehicle with a rotating wheel, just like a pro detailer would—works by temporarily heating the paint’s clear coat until it softens into a viscous liquid that fills in and dissipates blemishes. To prevent permanent damage to the paint, limit this method of polishing to once a year and wax your car every couple of months. Follow these steps, and your ride will have a like-new shine in a matter of  hours.


STEP ONE: Start by  washing your car by hand in a shaded area. Rinse the vehicle thoroughly but do not dry it.

Technique Tip: Wheeling is a messy process, so cover items (such as other cars, pets, and nearby walls) that you don’t want to clean afterward. Use softer pads and polishing compounds on dark-colored cars, as they are especially sensitive to swirl marks. More-aggressive compounds and pads can be used on lighter hues.


STEP TWO: Place a clean, slightly damp pad on the polishing wheel and put a moderate amount of compound on one body panel. Spread the polish with the wheel, using a medium speed. The key is to keep the spinning pad parallel to the car’s surface to avoid swirl marks. Apply constant pressure and work back and forth over the entire surface of the panel.  As the clear coat heats up and the paint becomes warm to the touch, scratches will begin to disappear. When the compound and water are thrown aside and absorbed by  the foam pad, the brightened finish will become visible. Stop. Move to the next panel and repeat.

Technique Tip: Keep the area wet and use just enough polish for each panel.


STEP THREE: As necessary, stop and rinse off the foam pad with a hose or a power washer to prevent it from becoming saturated or gummed up with compound.

Technique Tip: The outer edge of the pad moves faster, generating more friction than the center, and it usually carries less polish—a recipe for a burned finish. So be especially careful around intricate trim areas, such as washer nozzles, mirrors, emblems, and complex bumper contours that can be polished using only  the outer edge of the pad.


STEP FOUR: Wash and rinse the car again by hand when finished, including the door, trunk, and hood jambs. Dry  thoroughly.


STEP FIVE: Applying a coat of wax to the paint will help mask swirl marks and cover up most remaining surface imperfections. Mount a soft foam pad on an orbital sander and apply an approximate 60:40 mix of paste wax and a fine finishing polish onto the pad. Use the sander at a medium speed to spread the wax onto the vehicle in a back-and-forth motion and with light but steady pressure. Leave just enough of a waxy haze to be visible when dry.


STEP SIX: While the wax is drying, clean the other areas of the car (windows, interior, etc.) and then remove the wax with a microfiber towel—bath towels or rags may mar the surface.  Apply touch-up paint to chips and any lingering scratches as needed. Move the car into sunlight for a final inspection. Crack a cold one and enjoy.

Credit to caranddriver.com

Tuesday 6 November 2012

MEAN MACHINES 2012


Thursday 6 September 2012

MEASUREMENT SIZES GUIDE

MEASUREMENT SIZES GUIDE


So we have put this guide together to give you some idea and help you choose the right size t-shirts. 

HOW TO MEASURE T-SHIRT SIZE

If you don't know what size you are, then you'll need a tape measure. 

Find a T-shirt that fits you well, and lay it on a flat surface.

For the chest measurement measure at widest part of shirt from armpit to armpit (see diagram).

For the length measurement, measure from the top of the shoulder to the bottom of the shirt (see diagram).

Then match up your measurements to the chart below to choose the correct size. All measurements are in inches.


SIZE
CHEST 
LENGHT 
S
18"
26"
M
20"
28"
L
22"
30"
XL
24"
32"


NOTE: 
  • SIZING CHART PROVIDED IS FOR GENERAL  APPROXIMATION ONLY. 
  • SIZE MAY VARY BY AN INCH IN LENGTH OR CHEST DUE TO NORMAL MANUFACTURING VARIANCES. 
  • DUE TO DIVERSE BODY SHAPES, WE CANNOT GUARANTEE THE SIZES WILL FIT EVERY BODY TYPE.


We hope this has been of some help, if you want to know more please email or call us :-)


Monday 27 August 2012

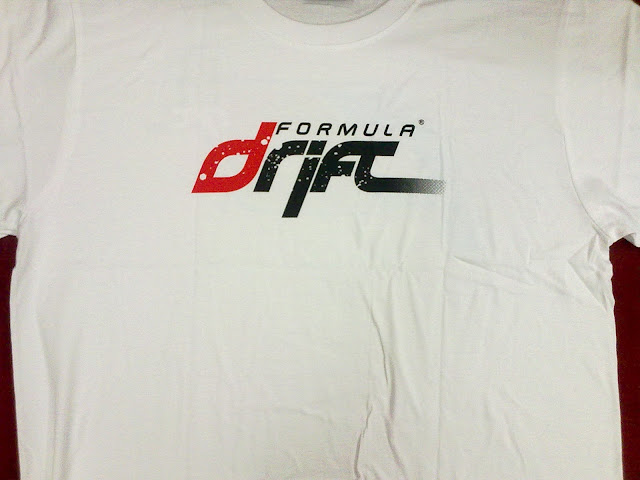
Formula Drift T-Shirt

Color : Black, White

Material : Cotton

Size : M, L

Price : RM30

RM5 POSLAJU WITHIN WM

ADDITIONAL ANOTHER RM5 WITHIN EM


Tuesday 24 July 2012

BASIC CAR MAINTENANCE TIPS

Basic Car Maintenance Tips

Throughout the rest of this website you'll find in-depth articles describing in intricate detail how everything automotive works. On this page, I've simplified all that knowledge into a series of basic car maintenance tips, subdivided by category. These tips apply to pretty much every car owner, from business fleet owners, to the weekend hobbyist. Basic car maintenance really isn't that hard. Hopefully this some tips have simple explanations for your benefits. 

Wheels and tyres

Rotate your tyres!

check your tyre pressure
Every 10,000km, rotate your tyres.

Clean brake dust off regularly

Brake dust contains all sorts of nasty stuff. If you leave it too long, the combination of road grime, moisture and heat from your brakes will bake it on to your wheels. Brake dust normally clings to wheels with static electricity so a damp sponge and clean cold water is the best way to get it off.

Check your tyre pressures

Check your tyre pressures regularly - once a week is ideal. Bad tyre pressures can affect fuel economy, handling and comfort. It's easy to do and there is no excuse not to.

Check your tread depth

Bald, slick tyres might be good for motor racing but they're no good on the road. Most tyres come with tread wear bars built into them now - find one, examine it and if your tread is too low, replace your tyres. Four new tyres might seem expensive but they're cheaper than a fine or an accident.

Engine

Check your belts

At the front of your engine there will be a series of rubber drive belts that loop around various pulleys, driving everything from the alternator to the a/c compressor. Rubber perishes, more so in extreme conditions like those found in an operating engine bay. Get your timing belt and accessory drive belt checked every 40,000 km, preferably replacing it every 80,000 km.  

Fuel Economy

Check your tyre pressures regularly - once a week is ideal. Bad tyre pressures can affect fuel economy very noticeably. It's easy to do and there is no excuse not to. 

Checking your oil level

This is something everyone can do - it's quick and easy and it'll tell you if your engine needs oil. If the oil is too high or too low, it can cause trouble for your engine. To check the oil, park on level ground and wait until the engine has cooled down after driving, then locate the dipstick. Pull it out and wipe it clean, then push it all the way back in until the top of it is seated properly in the dip tube again. Wait a moment then pull it out again. Check the level of the oil. If it's between the high and low marks, you're fine. (If it's too low, add a little.) The high and low marks can be denoted by two dots, an "H" and "L" or a shaded area on the dipstick. The photos below show a Honda dipstick which has the two dots. Why not just read the level first time around? The first time you pull the dipstick out, it will have oil all over it and it will be difficult to tell where the level is. That's why you need to wipe it on a rag to get a clean dipstick, then dip it back into the oil to get a good reading. 
 
check your oil level

Checking your coolant level

Again, something everyone can do. The coolant is the other thing your engine cannot go without. Every engine is different but if you check your handbook you should find where the coolant reservoir is. It will normally be bolted to one side of the engine bay or the other, and be a white semi-transparent bottle. Wait until your engine is cool and take a look at it - the outside should have 'low' and 'high' markings on it and the level of coolant inside should be between the two.


Do not take the radiator cap off to check coolant levels. If the coolant system is still hot then it is still under pressure and the pressure release will burn you.

Fuel / gas

Will higher octane or premium fuel give me better gas mileage and/or more power?

No. Sportier cars have higher compression engines which generate more power and require higher octane fuel to prevent detonation. That's where the myth of "premium = more power" came from. If your handbook says "regular", use regular. 

Bodywork / paint

Keeping your paint finish in good condition

Only choose superior car detailing supplies to keep your car's interior and exterior like new. There are plenty of decent quality waxes and polishes on the market today and if the last time you waxed or polished your car was over a decade ago, things have changed considerably since then. The wax and polish compounds are far more sophisticated both in terms of protection from fading, the look of the finish, and the ease of application. For example Turtle Wax Ice gets rid of that old problem of white wax residue. Is a clean car a vanity thing? Partly, yes, but if you park under a tree where birds help repaint your car with recycled blueberries, that guck will come off a lot easier if it falls on a waxed paint job.


Tip: If you find a bird has pooped on your car, wash it off as quick as you can. There are compounds in bird waste that can damage most car paint jobs. If you leave it in the sun and the poop bakes on, you could end up with a dull spot in the paint.

Electrical

Disconnecting and reconnecting your battery

negative battery terminal
If you're going to do any work on your car involving the electrical system, disconnect the battery first. To do this, loosen the connector for the negative/ground terminal first, and wiggle the terminal cap off. Use a wire-tie or similar to tie the cable back out of the way. If you need to take the battery out, you can now take off the positive connector.


Why negative then positive? If you disconnect the positive side of the battery first, the negative side is still connected to the entire car. If you drop a tool and it lands on the positive battery terminal and touches anything else on the car, you'll have an electrical short. By disconnecting the negative first, you're cutting off the return path for the current. Now, if a tool drops on to either of the battery terminals, it doesn't matter if it touches part of the chassis or not - there's no continuous path for the electrical current.


Reconnecting your battery. Connect the positive terminal first, and the negative second - the reverse of removal, and for the same reasons. When you slip the negative connector on, there will be a spark as it gets close and makes contact with the negative battery terminal. Don't be afraid of this - it's nothing to worry about. Make sure the terminal caps are done up nice and tight.

Check your battery terminals

Most modern cars run on a 12 volt negative ground electrical system. If your battery terminals or contacts aren't clean, you're making it more difficult for the current to pass around the electrical system. Remove the terminal caps as described above and clean each contact post with a wire brush to get a nice clean metal contact surface. Do the same to the terminal caps, then reattach them as described above.

Lights

One indicator or blinker is flashing faster than the other

negative battery terminal
When you indicate one way and the blinker flashes quicker than when you indicate the other way, it means one of the bulbs has blown. An auto parts store will be able to tell you what sort of bulb you need to replace it with and your manual should show you how to get at the indicator bulbs - they're different on every car.

Don't touch the glass when changing headlight bulbs

Most headlight bulbs now are filled with halogen and have special coatings on the outside of the glass. If you pick the bulb up by the glass with your fingers, you will leave trace amounts of oil and grease on the glass. When the bulb is used, that area of the glass will get hotter than the rest and it will eventually cause the bulb to crack. When changing headlight bulbs, only hold the metal bulb holder at the base, or make sure you're wearing rubber surgical / mechanic's gloves (clean ones) if you're touching the glass.

Dash / instrument warning lights

check engine light

The check engine light.

Every new car now comes with OBD-II - On Board Diagnostics 2. This is a fault-registering system connected to sensors all over the car, engine, fuel and emissions system. When the check engine light comes on, it can mean many things. There are something like 4,000 unique OBD2 codes that can be stored. Handheld OBD2 diagnostic tools can be plugged in to the OBD2 port which is normally under the dash on the driver's side. These tools can read out the fault code and/or reset the system to contain no codes. Codes are split into two categories - historical/inactive, and active. The historical codes are lists of things that have been detected in the past but are no longer an issue, whilst the active codes are things that are a problem right now. Codes are subdivided into B-codes (body), C-codes (chassis) and the biggest list of all - P-codes (powertrain).

P0440 OBD-II code. This is the most common code you'll find and it's the first thing you should check. P0440 is the code for Evaporative Emission Control System Malfunction which covers a multitude of sins. The one thing it covers that you can check is your gas cap (petrol cap). Most new cars have a pressurised fuel system and vapour recovery loop. If you've filled up with petrol and not twisted the gas cap until it clicks, you've not sealed the fuel system. It won't pressurise and the OBD2 system will log a P0440 code. In fact, on a lot of cars, that code is so common they'll actually have some way of telling you to check the gas cap. In the Honda Element, for example, if a P0440 code is logged, the dash scrolls "CHECK GAS CAP" across the odometer display. So if you get a check engine light, check the gas cap first and see if the light goes off. Note : even if the light does go off, the code will likely still be stored in the OBD system and will show up next time it is checked.

It wasn't the gas cap. If tightening the gas cap didn't do it, you'll need to find someone with an OBD2 diagnostics tool or reader. Some garages will charge you just for plugging the device in and reading the code. If they do, walk away. They're ripping you off. Better to find a garage or mechanic that will read the code and actually give you a diagnosis rather than just making you pay to find out a number. Smaller garages and local mechanics will normally do this for you for a small fee, and being independent, the diagnosis won't be predicated on you buying some expensive parts from a corporate chain.
If you're a do-it-yourself type used to working from shop manuals, then a lot of places that will give you the diagnostic code for free. 
service engine light


The service engine light / Maint Reqd light.

This might indicate "Service", "Service Engine" or "Maint Reqd". It's an indicator that you're getting close to a scheduled maintenance interval. On some cars it's as simple as counting miles before it comes on, whilst on others it maps engine temperatures, oil temperatures, air temperatures and other indicators of probable stress to tell you when it might be time for new oil or a service. In most cars this can be overridden or reset by you, the owner. Your handbook will tell you if this is the case. If you take your car for a service, the garage should reset it for you.
Typically this light will come on when you start your car, and then turn off again as part of the self-check. If it stays on for 10 seconds then turns off, it normally means you're within 800 km of needing a service. If it flashes for 10 seconds, it normally means you've exceeded a recommended service interval.
battery warning light


The electrical fault light.

This warning light is different in every car but normally it looks like a picture of a battery, similar to the picture on the left here. You'll see it come on and go off when you start your engine as part of the car's self-test, but if this light comes on and stays on, it means the electrical charging system is no longer working properly. Think of it like a cellphone battery. If the cellphone is plugged into the charger, you can use it indefinitely, but when you disconnect it from the charger, there's a limited amount of time before your battery runs out. It's exactly the same in your car, only bigger. Every car has an alternator - the charger - and a 12v battery used to supply power to the electrical system. If the alternator becomes faulty or the drive belt to it snaps, then it will not be able to do its job. The longer you drive, the more your car will use up the remaining juice in the battery and eventually the engine will die. This almost always requires a new or refurbished alternator.
brake warning light


Brake warning light 1

Most cars nowadays have a brake warning light on the dash. Its purpose is to alert you that something is wrong in the braking system somewhere. If it comes on, check your owner's manual to find out its meaning. The brake warning light doesn't have a standard meaning; it could be used for multiple purposes. For example, the same light may be used to show that the hand brake (parking brake for the Americans amongst you) is on. If that's the case and you're driving, you ought to have noticed the smell of burning brake dust by now. The light can also indicate that the fluid in the master cylinder is low. Each manufacturer has a different use and standard for this light. Which is nice. Because it would be such a drag if the same indicator meant the same thing in every vehicle.
brake warning light


Brake warning light 2

If you've got an ABS-equipped car, you also have a second light - the ABS light. If it comes on, get it seen to as soon as possible. It means the ABS computer has diagnosed that something is amiss in the system. It could be something as simple as dirt in one of the sensors, or something as costly as an entire ABS unit replacement. Either way, if that light is on, then you, my friend, have got 1970's brakes. It's important to note that this light normally comes on when you start the car and then switches off a few seconds later. If it blinks, throbs, flashes or in any other way draws your attention to itself, then take note. It's not doing that just to please itself. Compared to a steady light, a blinking ABS light normally indicates something more serious. In some cases it could be as bad as "you have no brakes at all."
coolant warning light


Coolant warning light

This is normally the coolant level warning light. If this comes on it means that the level of coolant in your radiator is low and needs topping up. DO NOT OPEN THE RADIATOR CAP WHEN THE ENGINE IS HOT! The coolant system is pressurised and it could easily release pressure and spray you with boiling coolant. Do it when the engine is cold. Top up the system with either a pre-mixed coolant bought from a shop, or with distilled water. Don't use tap water - the mineral deposits in it boil out in the cooling system and calcium gets depositted around the inside of the radiator making it less efficient (which will eventually cause it to fail). It's always best to use pre-mixed coolant, or to mix your own rather than using neat water. The coolant mixture behaves as an antifreeze in winter as well as a corrosion-inhibitor to stop your engine rusting from the inside out.
oil pressure warning light


Oil warning light

Typically this light will come on if your oil pressure is too low. Low oil pressure is serious and if you continue to drive with this light on, eventually your engine will die. Low oil pressure can be caused by a failed oil pump, a blocked oil filter or strainer in the sump, or by low oil levels - for example if your engine is burning oil. Either way, you need to get it fixed, and fast. Low oil pressure is A Bad Thing and your engine won't thank you for leaving this problem untreated.

Credit to carbibles.com

Thursday 5 July 2012

MUSC DRAG CHALLENGE KULIM 2012

MUSC DRAG CHALLENGE KULIM 2012


1) INFO PROGRAM:
-----------------------

a) Tarikh : 14 & 15 Julai 2012
b) Tempat : Jalan Kulim Hi-Tech 1, Kulim Hi-Tech, Kulim, Kedah DA (berhampiran kilang Fuji & Intel)


2) IKLAN RASMI:
--------------------

klik di bawah : -
http://i978.photobucket.com/albums/ae264/muscmotorsports/MUSC%20DRAG%20CHALLENGE%20KULIM%202012/flyer-kulim.jpg


3) YURAN PENYERTAAN:
------------------------------

a) Kereta - RM200 (Baju - untuk 80 penyertaan pertama)
b) Motosikal - RM150 (Baju - untuk 80 penyertaan pertama)


4) KELAS-KELAS PERLUMBAAN & JADUAL:
--------------------------------------------------

a) Kereta (14 Julai 2012) - Trek 300m

Pendaftaran dibuka – 09 am
1. Na<1.6cc (injin proton, mitsu & toyota) - 11 am
2. Na<2.0cc (kecuali injin vtec) - 01 pm
3. KCar<1.0cc - 04 pm
4. VTec Open cc - 07 pm
5. Fwd Turbo Open cc – 10 pm

b) Motosikal (15 Julai 2012) – Trek 300m

Pendaftaran dibuka – 09 am
1. 4t<125 Std Body – 11 am
2. Yamaha LC Std Body (lain2 open) – 02 pm
3. 125z Std Body – 04 pm
4. 4t<125 Open – 07 pm
5. King Drag Bike Open – 10 pm

5) HADIAH-HADIAH
------------------------

a) Kereta
1st - RM1,200 + Trofi
2nd - RM700 + Trofi
3rd - RM500 + Trofi
4th - RM300 + Trofi

b) Motosikal
1st - RM1,000 + Trofi + barangan penaja
2nd - RM600 + Trofi + barangan penaja
3rd - RM400 + Trofi + barangan penaja
4th - RM200 + Trofi + barangan penaja


Monday 2 July 2012

The Bugatti Veyron's Maintenance Costs

The Bugatti Veyron's Maintenance Costs

The Bugatti Veyron, the world's fastest street-legal car at 267 mph, is also one of the most expensive cars at $1.8 million, next to the Maybach (cool $7 million). But does anybody care about the truly exorbitant maintenance costs of Bugatti Veyron? If some generous-hearted billionaire wants to give you one, you better think twice before accepting it.

Here is the real deal on what it will cost you to maintain it. Rumor has it that it's much cheaper to use a private jet than maintain a Bugatti Veyron itself. There was a story of a rich Bugatti owner who trailers his precious Veyron while he follows in a private jet.

Bugatti Veyrons are admired for the supercars that they are, but owning and maintaining is a totally different story.

A Bugatti Veyron Centenaire

Source: Ed Callow (Photo requires attribution)

Super maintenance at $300,000 per year

That's the approximate figure it will cost you to own a Bugatti and operate it each year. Routine maintenance will cost you another $20,000 as compared to only $3000 for other luxury cars.

The ultimate gas slugger

A Bugatti Veyron with an 8Liter W16 cylinder engine will guzzle gas like a thirsty elephant. When running at full speed at 253 mph, it will empty its full tank in 12 minutes but if you are a city-dweller, would it discomfort you much if you know that it uses up 48 liters for every 100 miles of travel?

Must have your own trailer truck

Owning this supercar means that one should also have an amply spaced trailer truck to lug it around. Doing so would be more practical in a way if you opt travel across the country. Driving it at any speed would be too much waste of gas. Otherwise, an owner would have to deal with the headache of filling up gas many times along the way plus the risk of being hijacked anytime.

Extra cash for a $10,000 autodetailing job

Even if you have the $1.8 million to spend anytime, owning a Bugatti Veyron is already a feat in itself since you have to be on a waiting list before you even get hold of one. After you get your own Veyron, would you just let a cheap auto detailing shop do the job? Of course not. Some Bugatti owners in the middle east regularly flew in auto-detailing masters at the cool kaching sound of $10,000.

Tires sets you at $30,000-$50,000

Bugatti recommends that you change your, specially-designed Michelin Pilot Sport compound tires after you've logged in at least 4000 miles. When you've reached the 10,000 miles mark, both wheels and tires will need replacement, at a $50,000 cost.

Bugatti Beading


Special Garage for your Veyron

Of course you won't allow that special supercar to sit and sleep just in any ordinary garage, much less an open one, will you? Some owners get a custom-built, temperature and air-controlled chamber for their beloved Bugatti Veyron.

Bugatti Detailing YouTube (Video Credit: Paradise1man)


The $1.8 M-car Bugatti Veyron, Fastest Street Legal Car (Video credit:Top Gear)


Credit to Hubpages