Color : Black
Material : Cotton
Size : M, L
Price : RM50
FREE POSLAJU WITHIN WM
ADDITIONAL RM5 WITHIN EM
ADDITIONAL RM5 WITHIN EM


Welcome to all Motorsports fans.

Welcome to all Motorsports fans.

Welcome to all Motorsports fans.

Welcome to all Motorsports fans.

Welcome to all Motorsports fans.


 gotta love this picture.


First and foremost, if you are not capable of dealing with wires, do not try this. You will fuck something up. Each wire tuck is different and troubleshooting wiring over the net is about as difficult as trying to win INC ROTM with an ef hatch.
Anyways, you shitheads, here it is. Pay attention, put on a bib, and take notes.
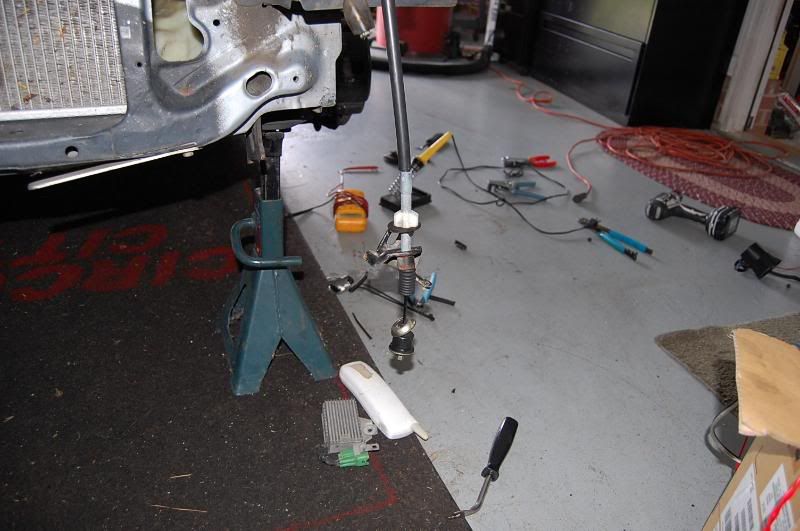
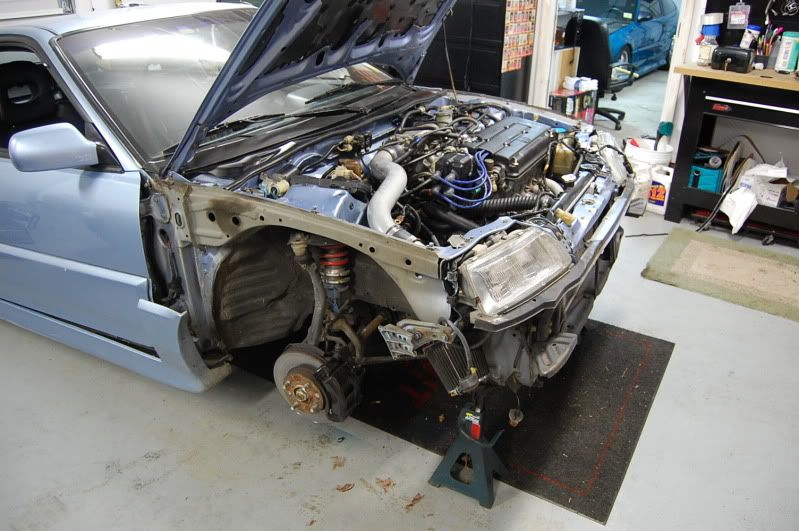
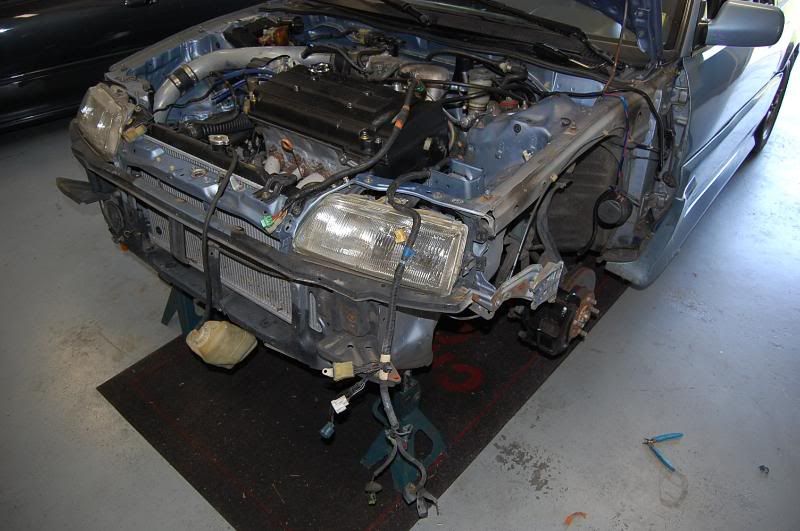
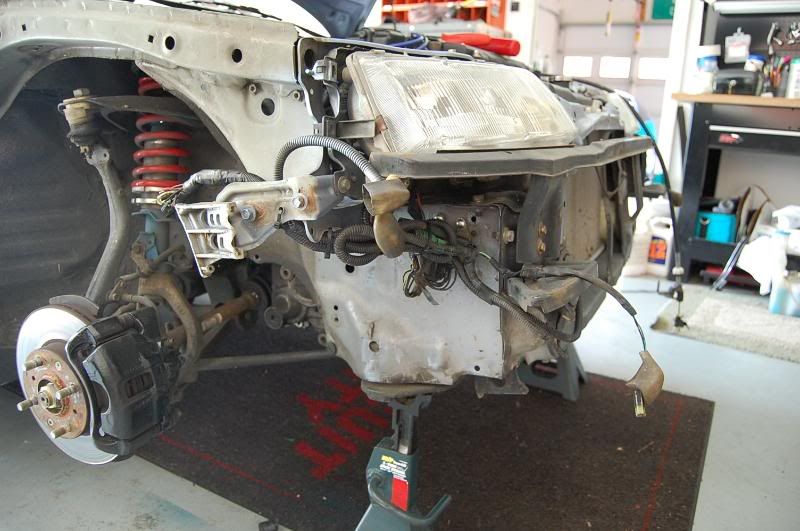
Anyways, I didn't take pics of the car "before" I started, but here's what it looked like a while back:
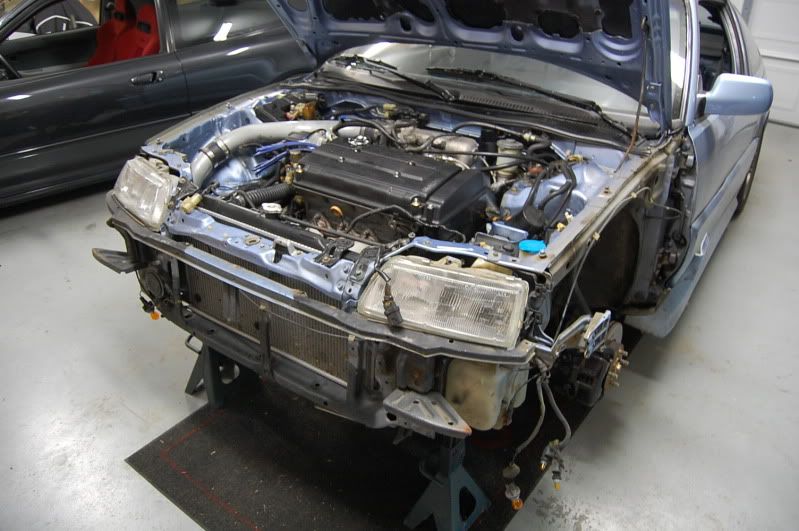
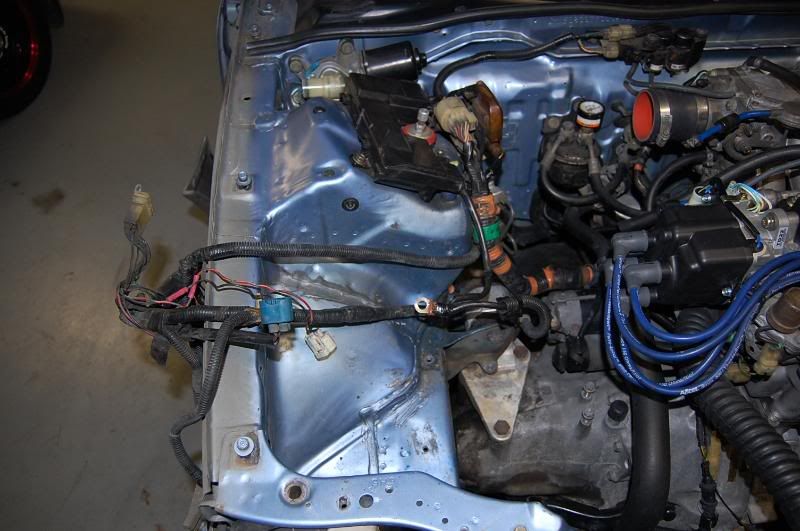
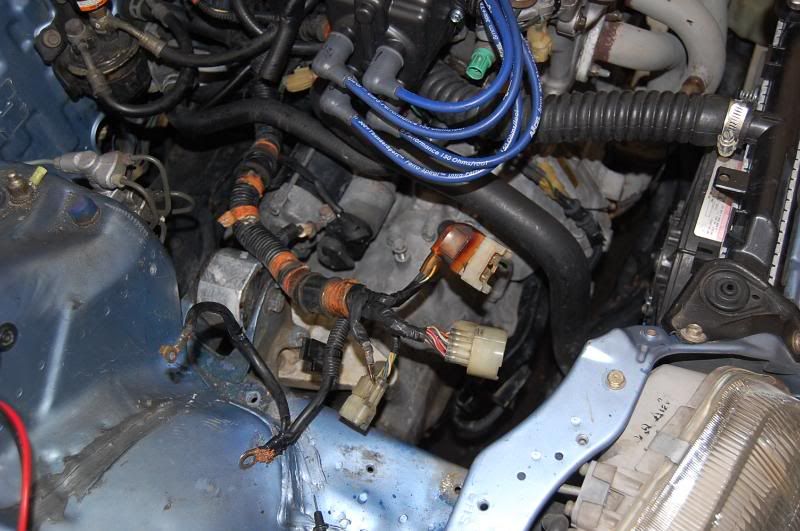
I got the car today and took a "before" under hood pic:
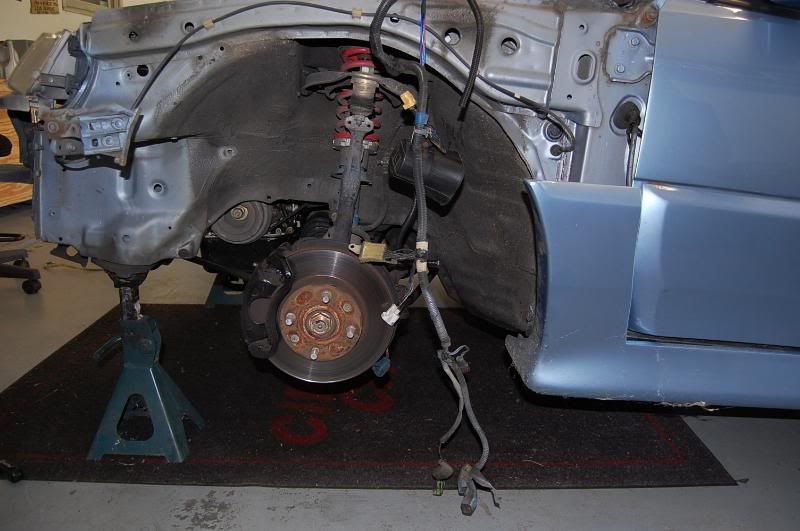
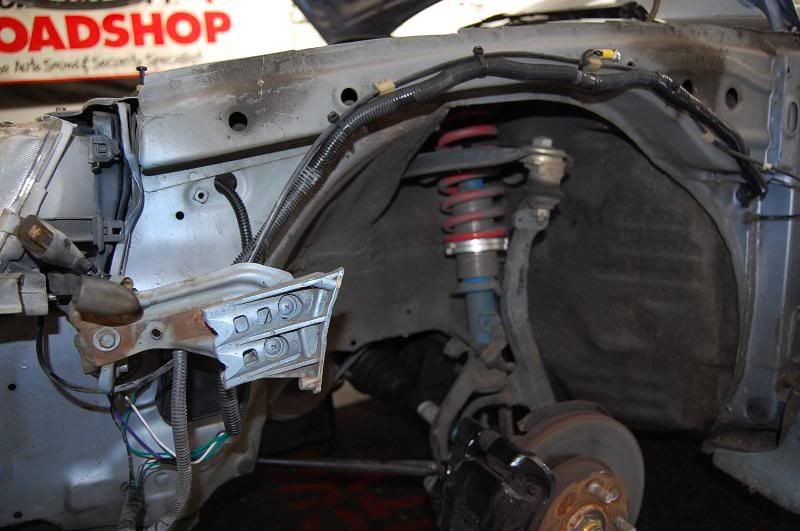
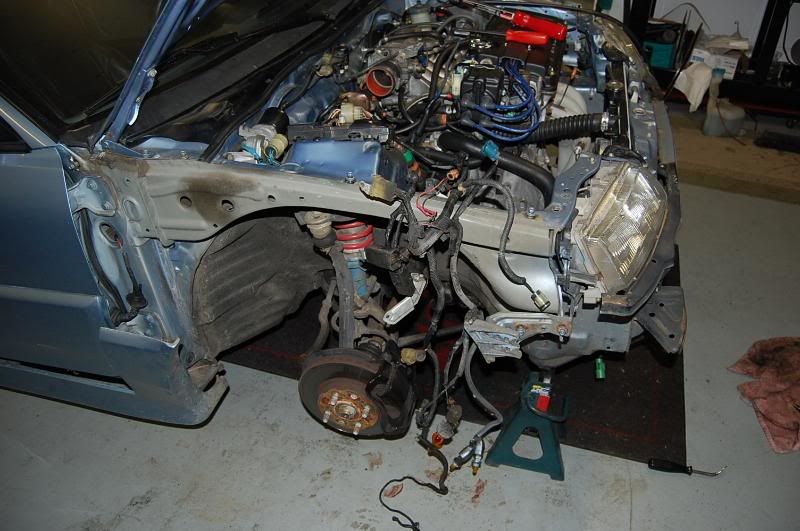
I jacked it up and yanked the fenders, front end and battery out.
Notice the jackstands. Anytime you do work long term, use jackstands. Not jacks....jackstands. I'm not trying to read about any of you guys getting hurt because of this.
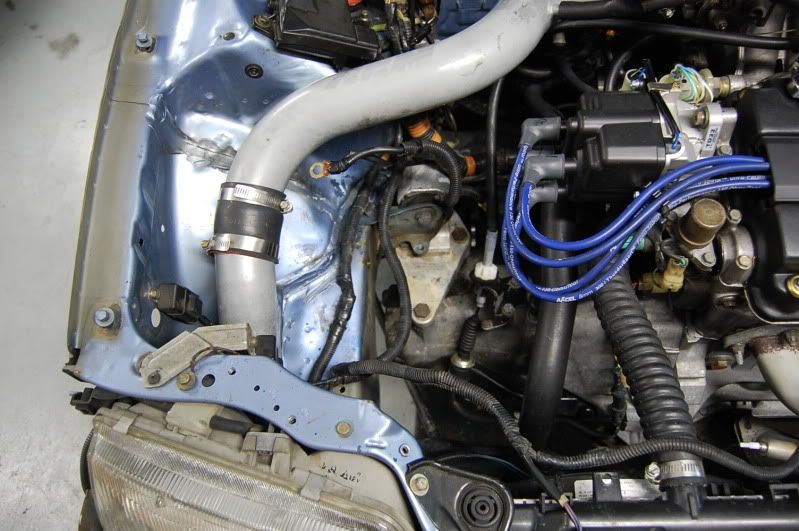
Enough of that shit...pics:
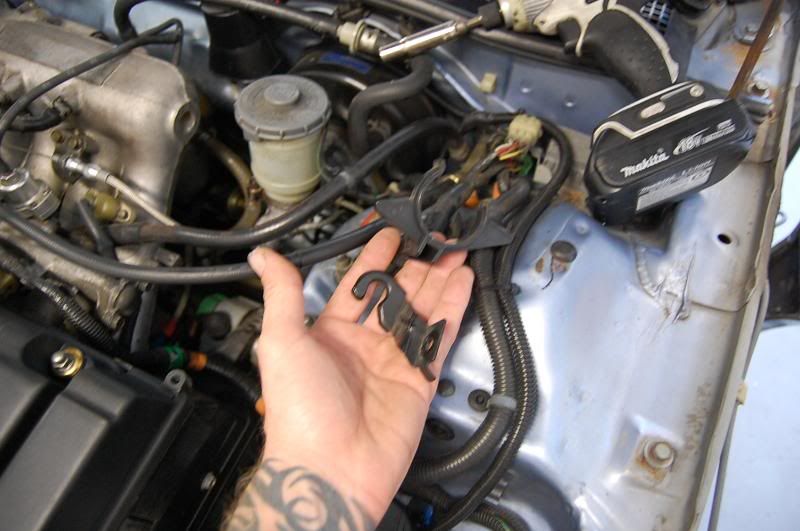
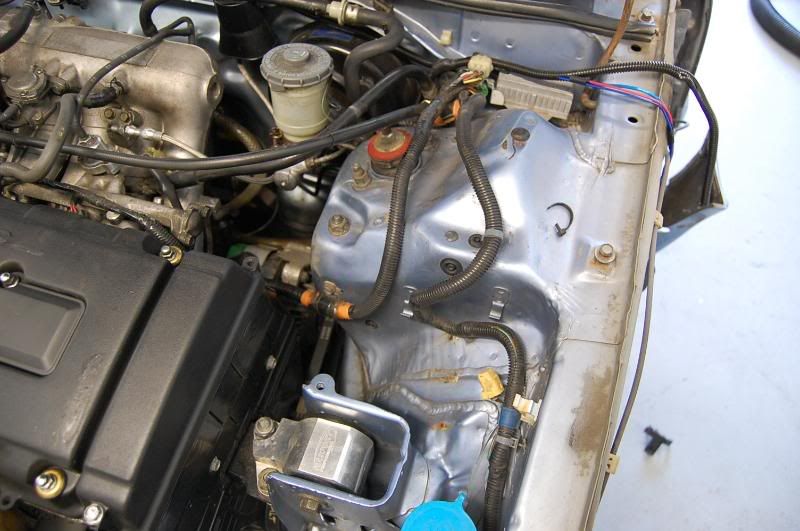
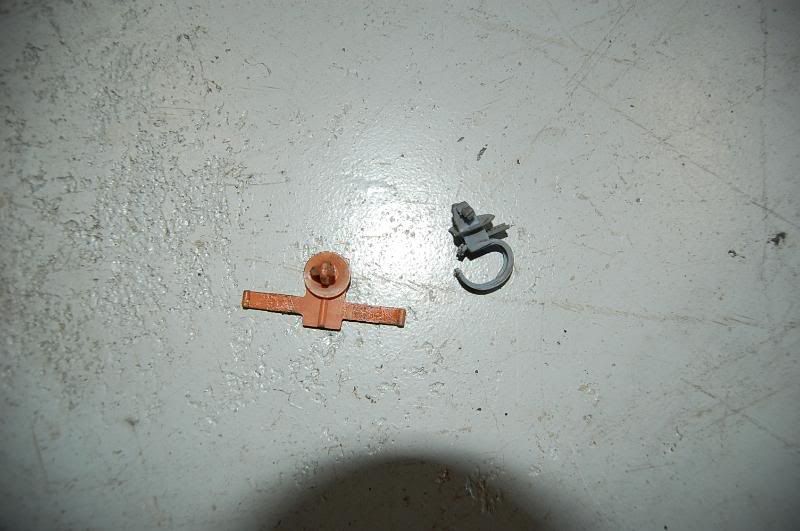
Remove all of these little brackets. Some have bolts, so just yank them out.
Some of them have a clip that goes into the body. Using a panel tool, just pop them out.
Kind of a loose shot.
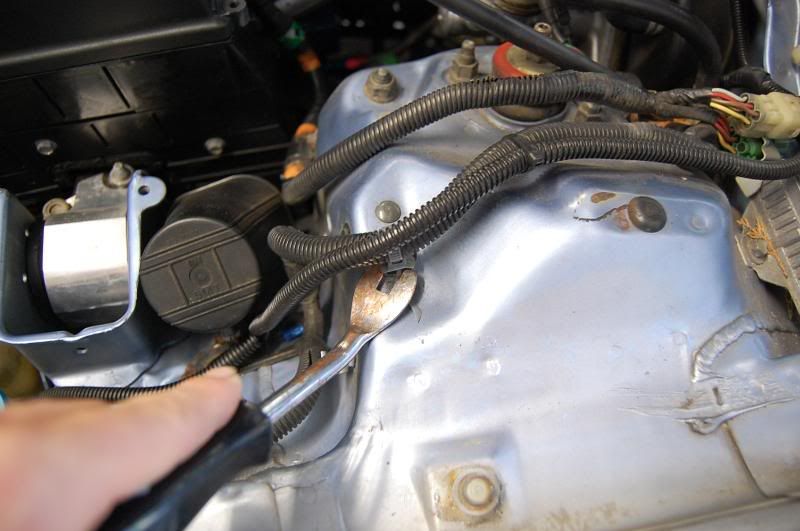
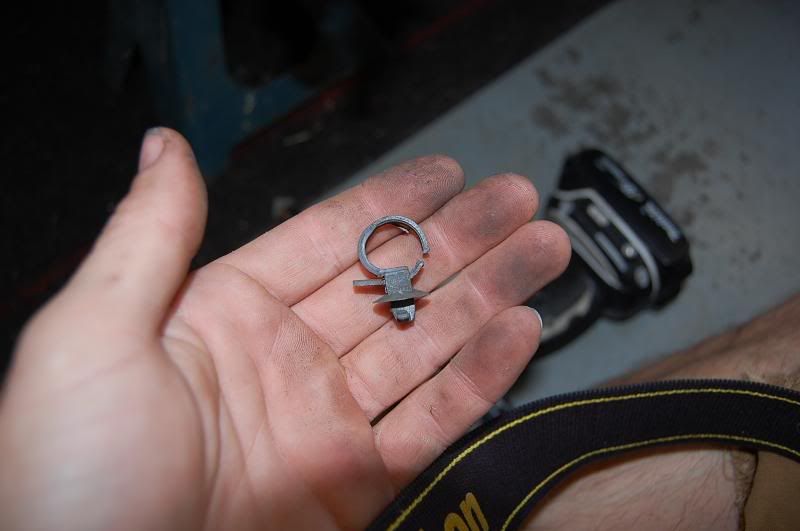
These little clips hold the loom to the body. As you pull, cut these loose. I'll explain why later.
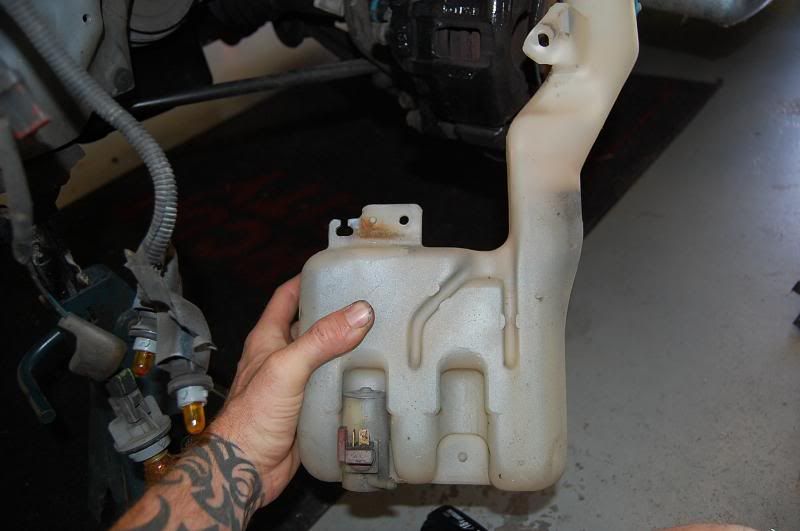
Yank out the windsheild cleaner solution bottle.
Unplug the headlights and the ground plug.
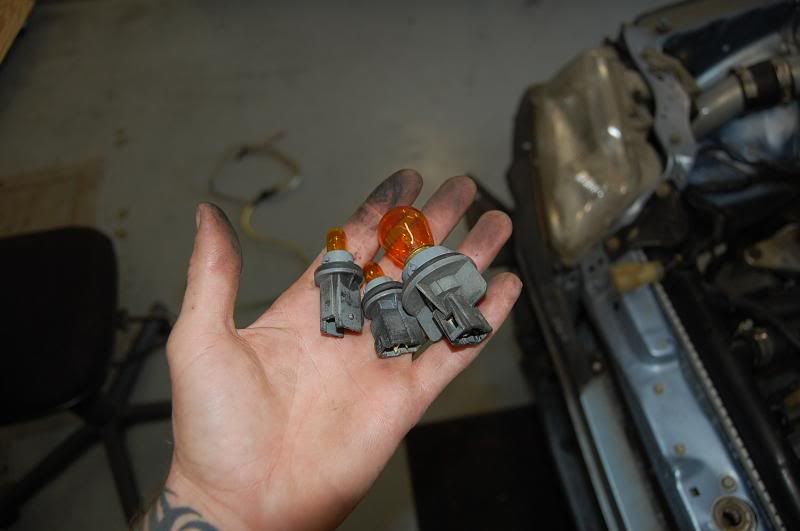
Remove the sockets from the harness.
Dangling harness so far.
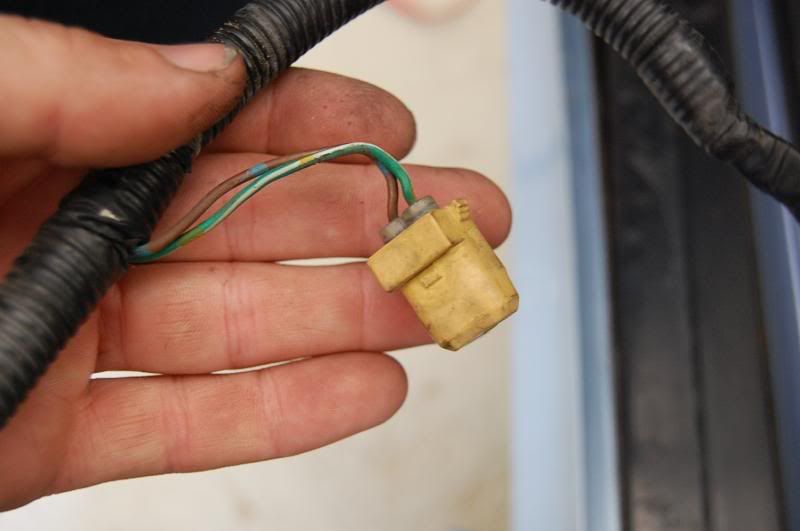
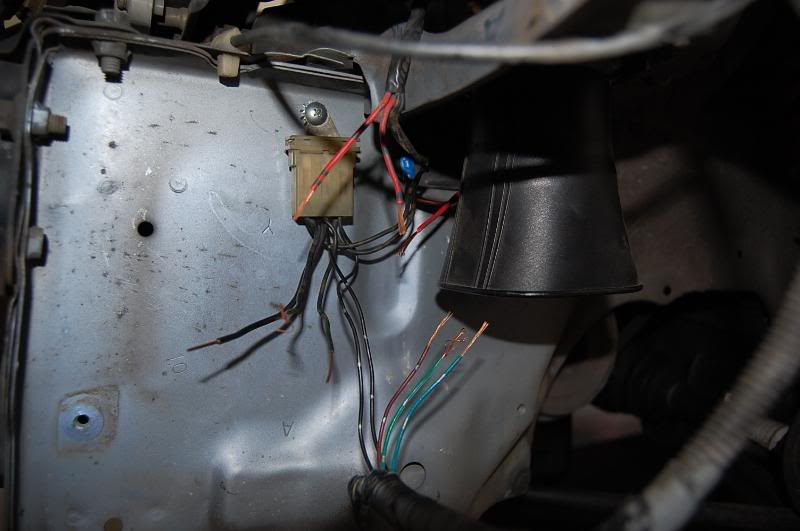
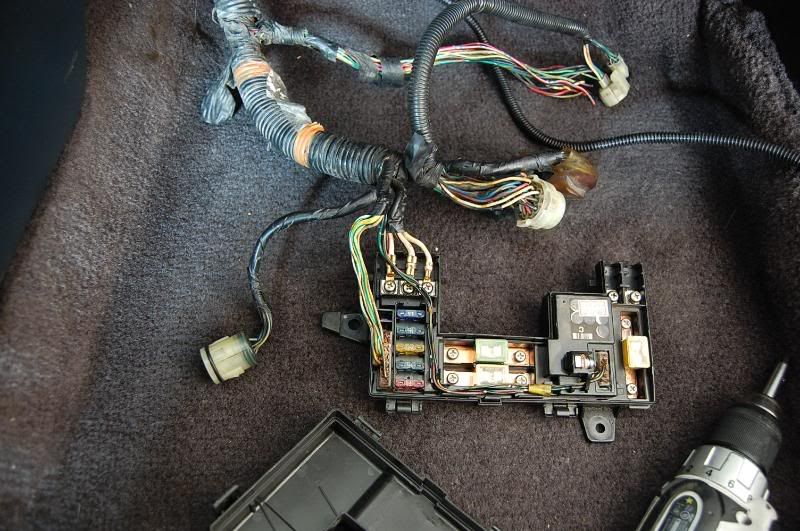
Remove the resistor box and put it aside. This is it's plug.
This is the "warning" wires for the brake fluid. Simply tape these off on BOTH ends. These will not be hooked back up. Some folks will bitch about this, but I check my fluids weekly, so it's not needed for me.
These are some more examples of those clips thast need to be removed. It helps to cut them off so when pulling wires through grommets/holes, they don't get snagged.
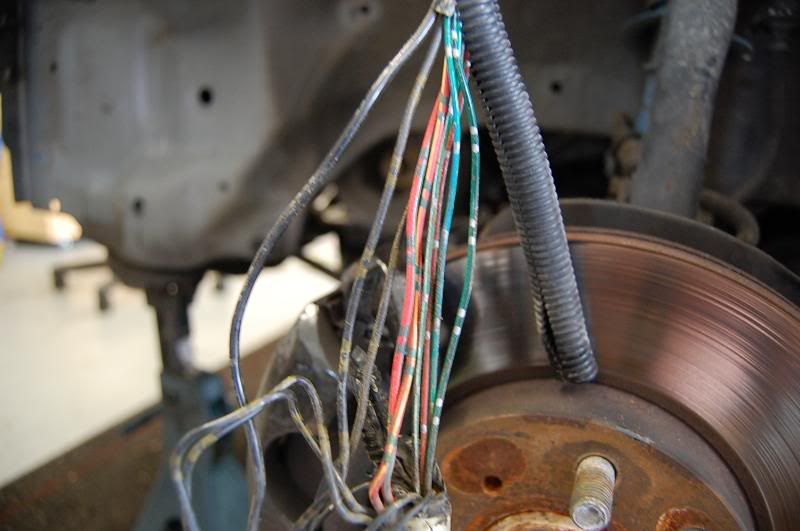
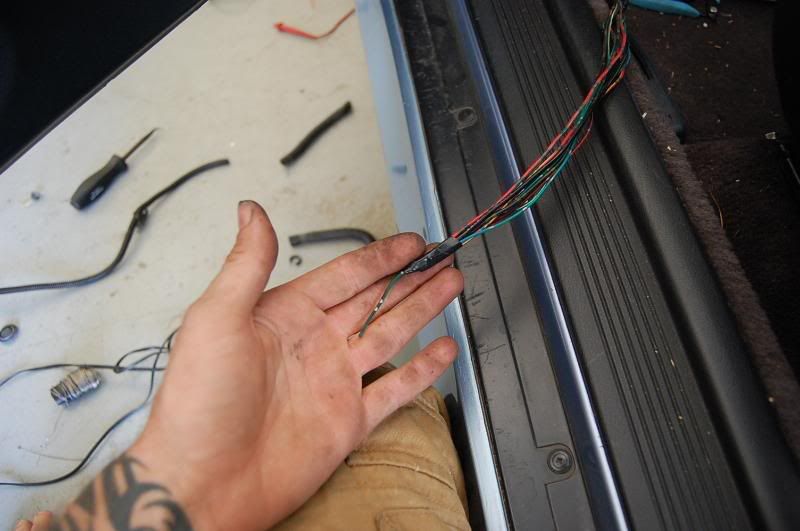
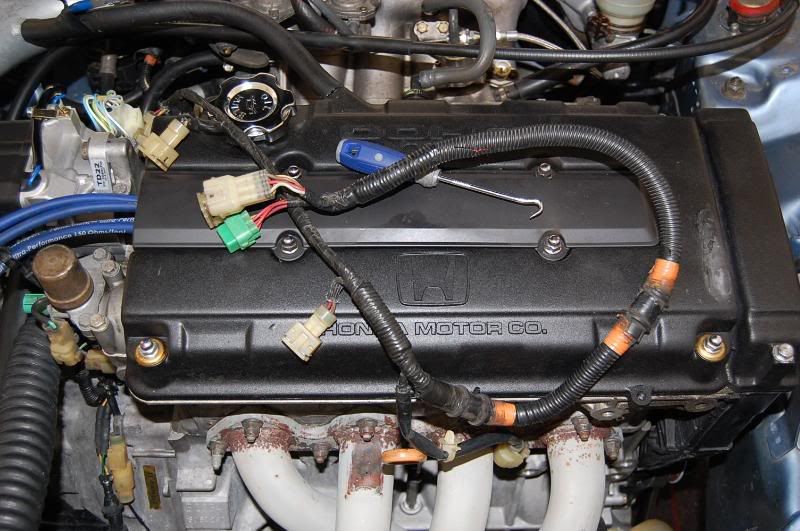
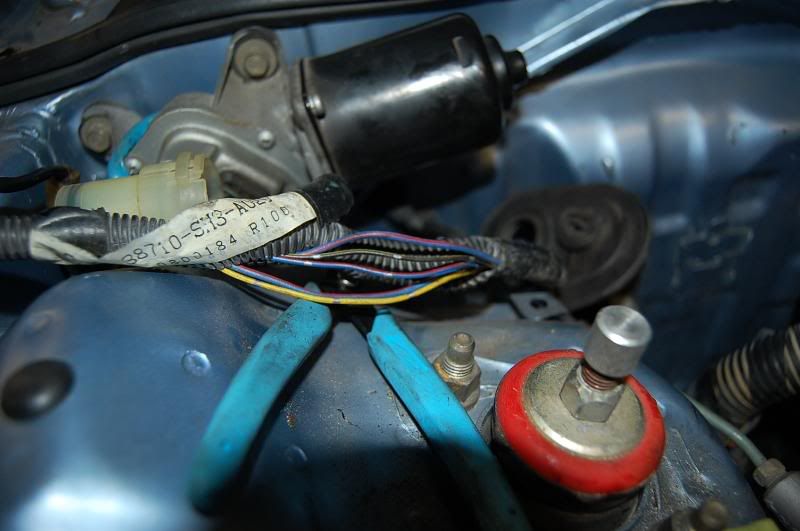
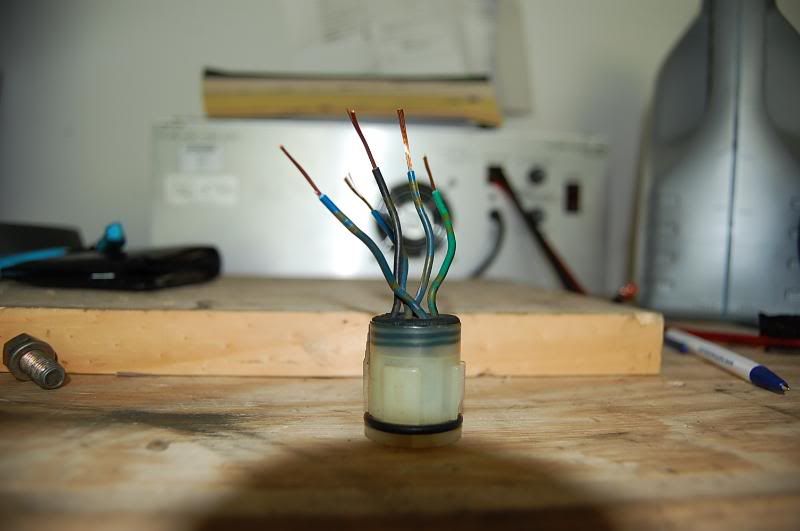
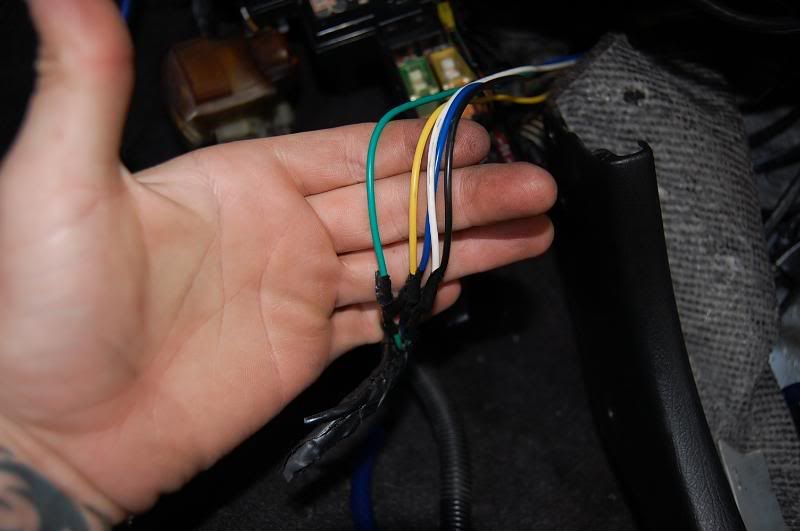
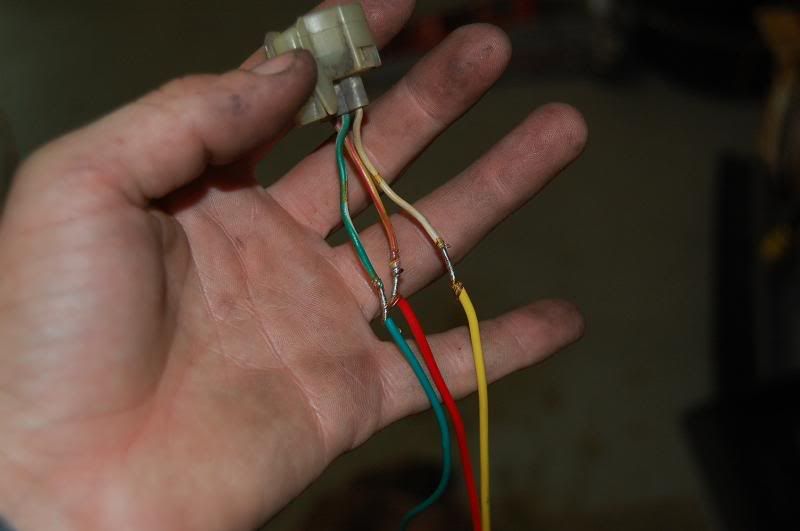
Open the harness up and take note of the wires. All of them are uniquely colored, so this will be pretty simple.
Aaaaaaand cut.
This plug went to the windshield wiper thingy. Since it's not being used, I can just slide that unused wire out and remove the ground as well. 1 less wire to deal with.
Plug the headlights back up and run the wires back through.
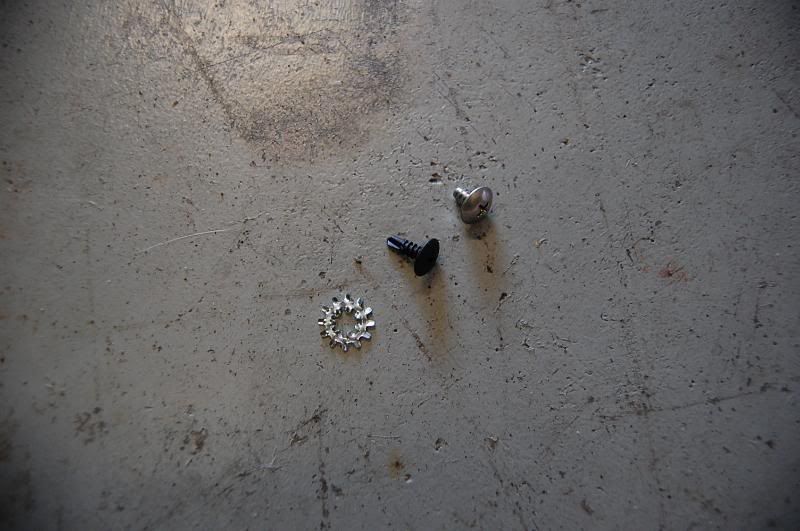
These are the screws needed to make a ground. 1 is a starwasher, one is a self tapping screw and the other is a screw that comes with Pioneer radios.
Scrape off some paint and use the self tapper to make the hole.
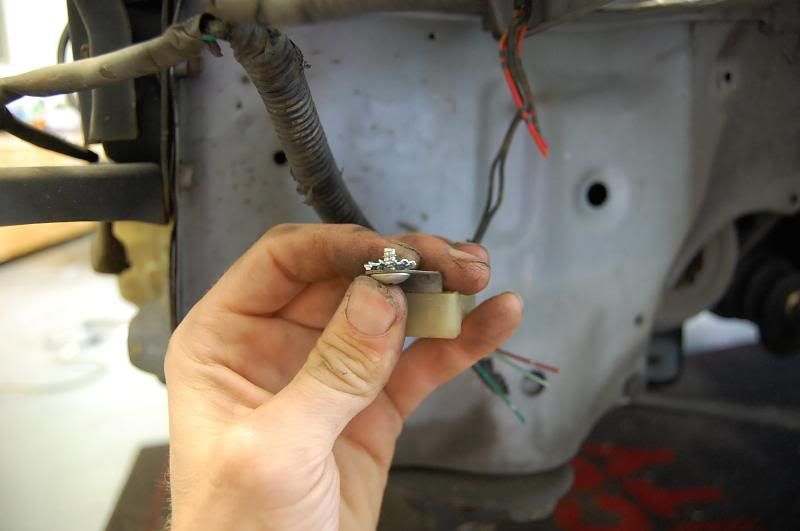
Now put the Pioneer screw through the ground plug and then put the starwasher on.
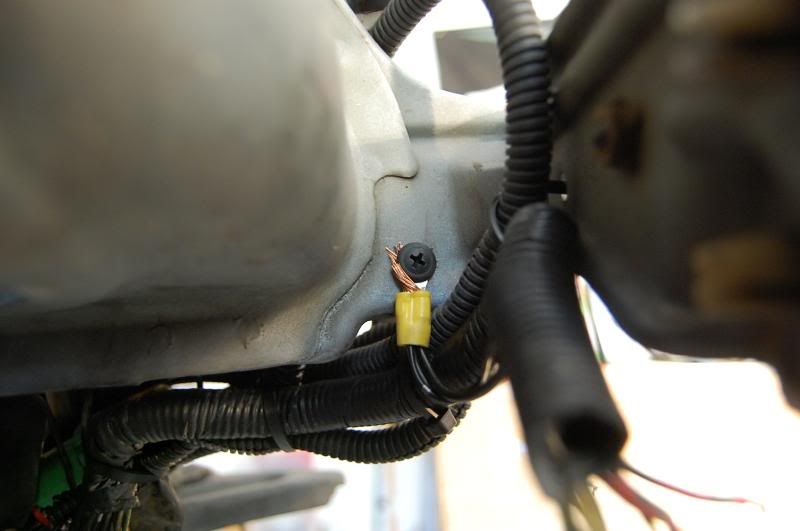
And screw it in. The Pioneer screw is a larger thread than the self tapper, so it gets a solid grip. The starwasher helps dig into the paint. Grounds are crucial, so make sure this is solid!
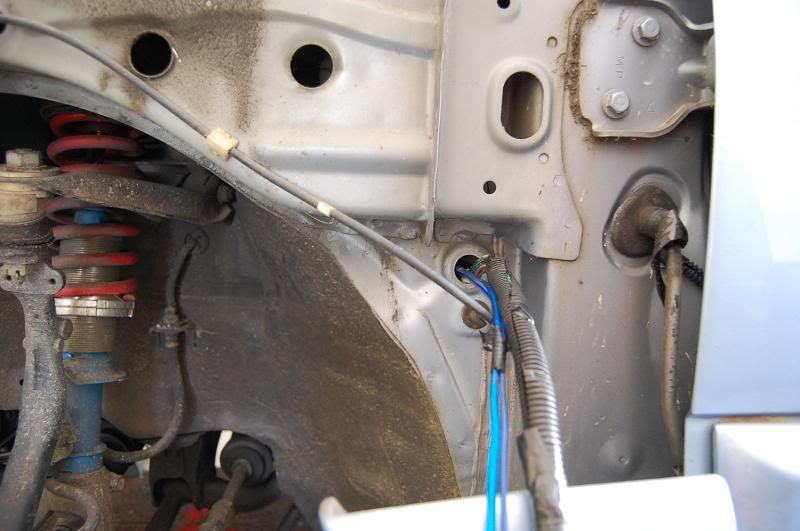
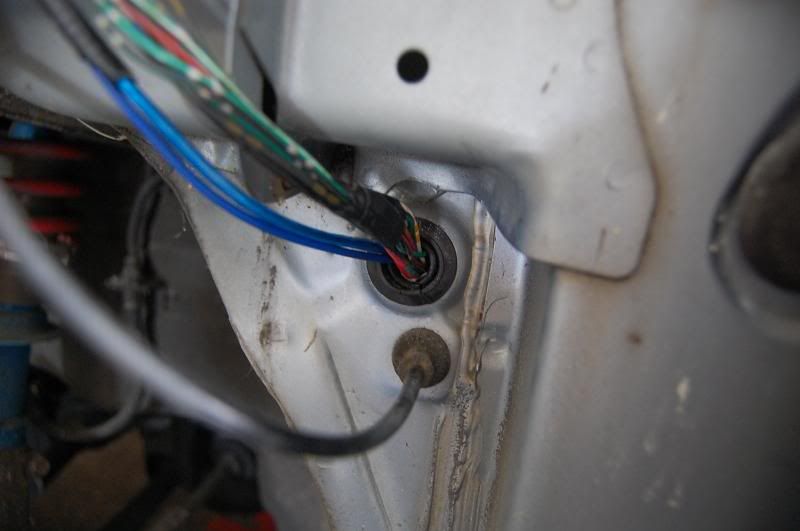
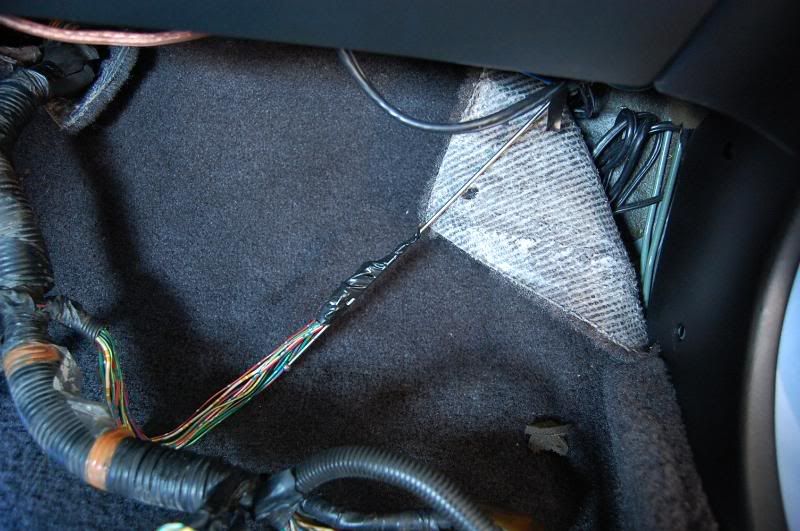
Pull the harness through the firewall.
And this is what ya have so far:
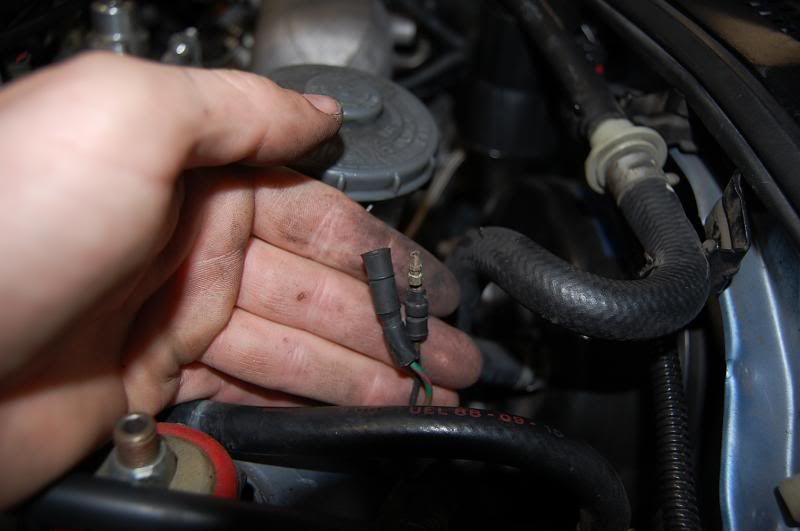
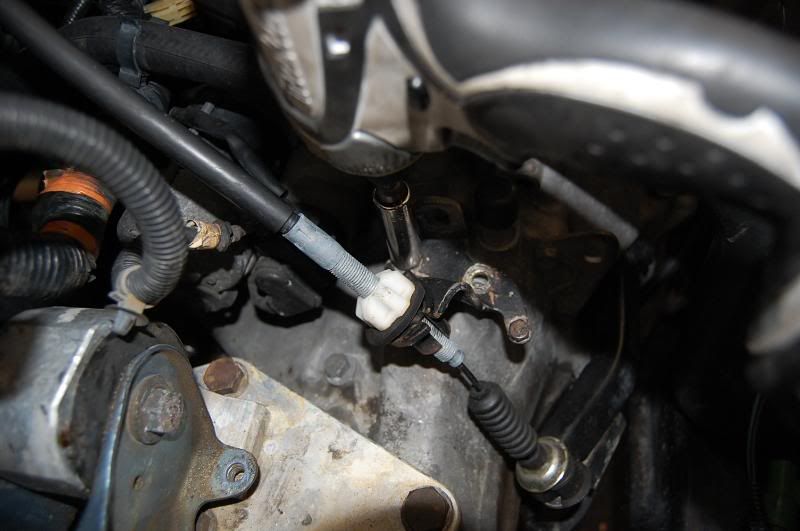
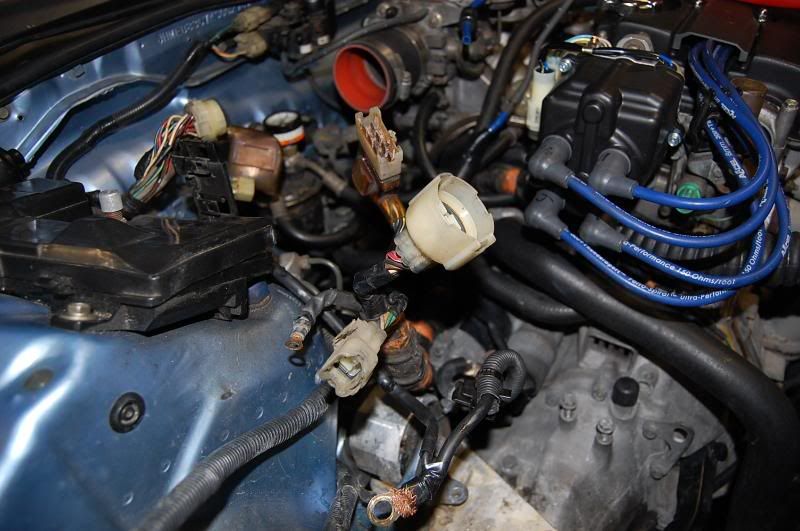
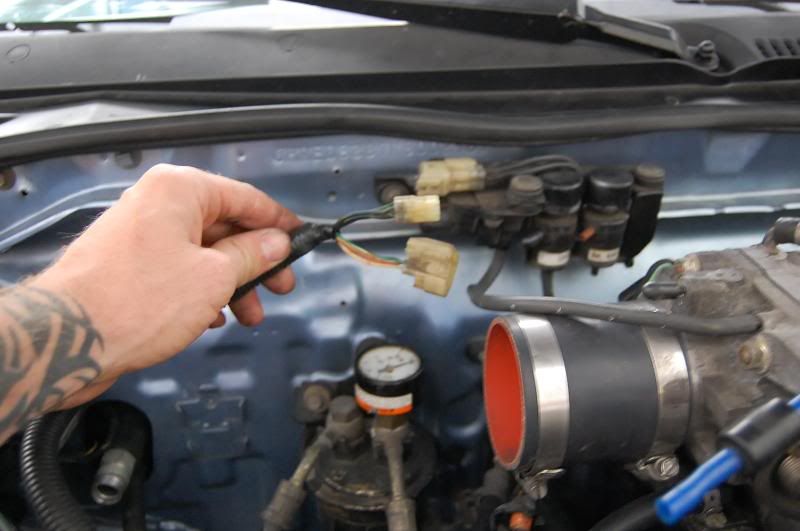
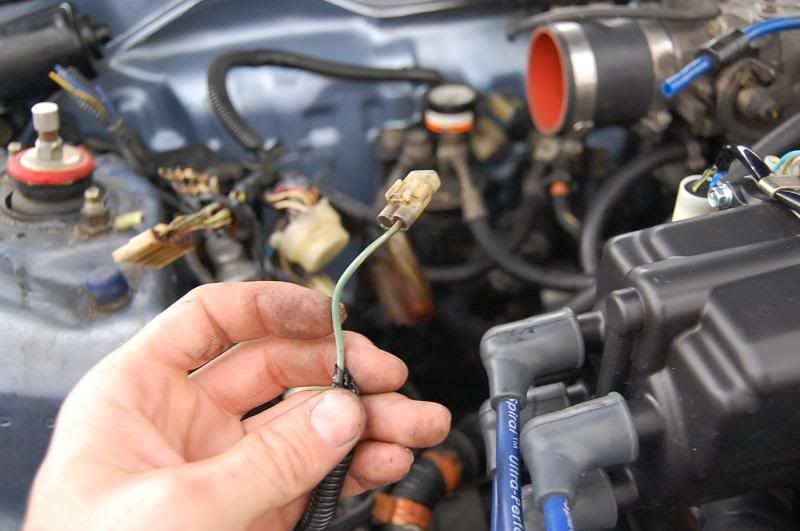
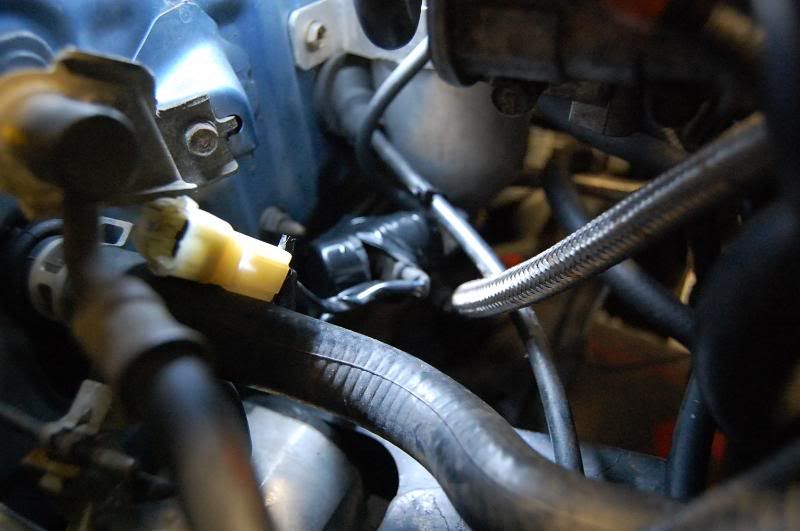
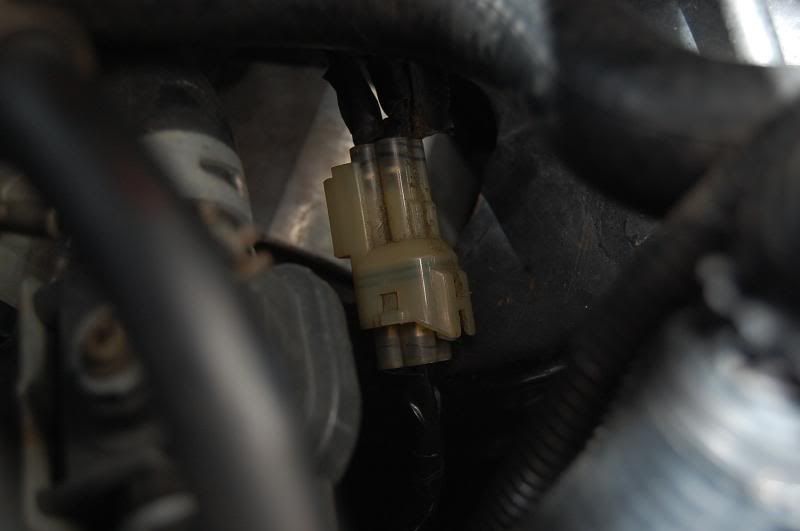
This plug is needed to set timing, so it has to be accessble (I know I spelled it wrong, get over it.).
I pulled it out the loom, cut it shorter to be closer to the reisitor box area, soldered and taped it up.
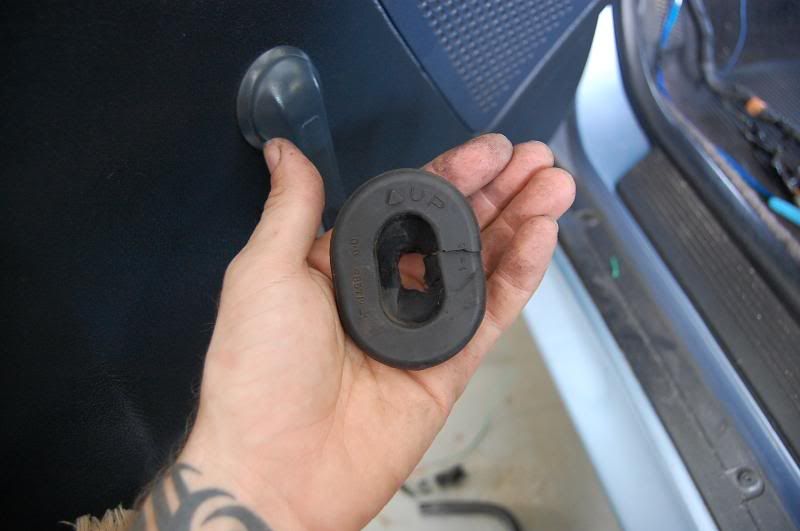
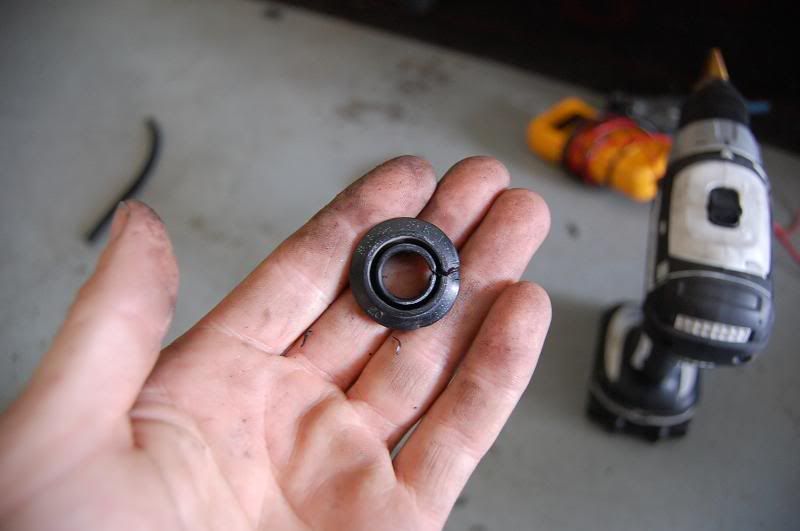
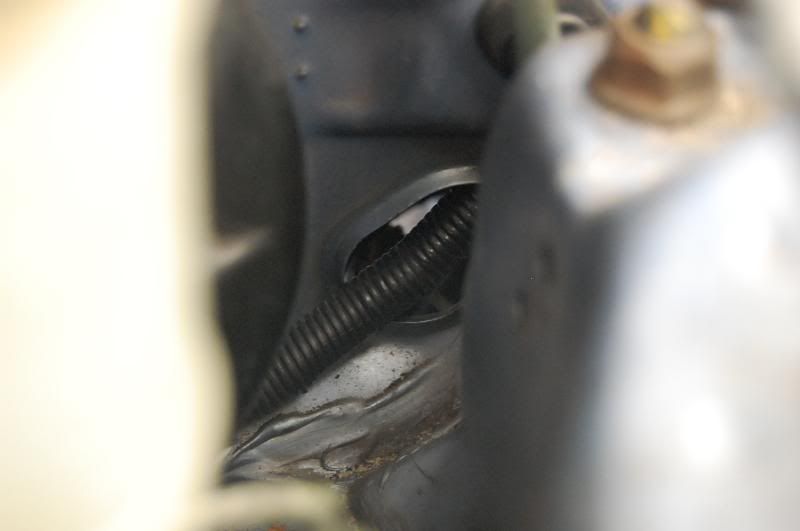
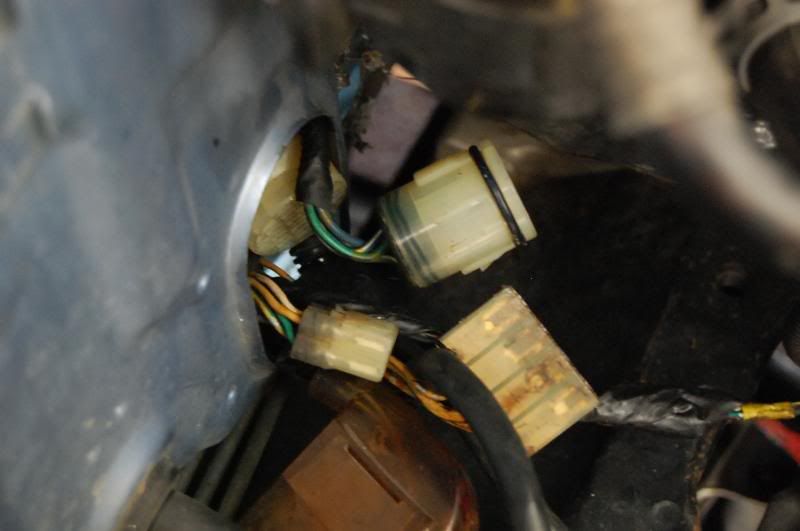
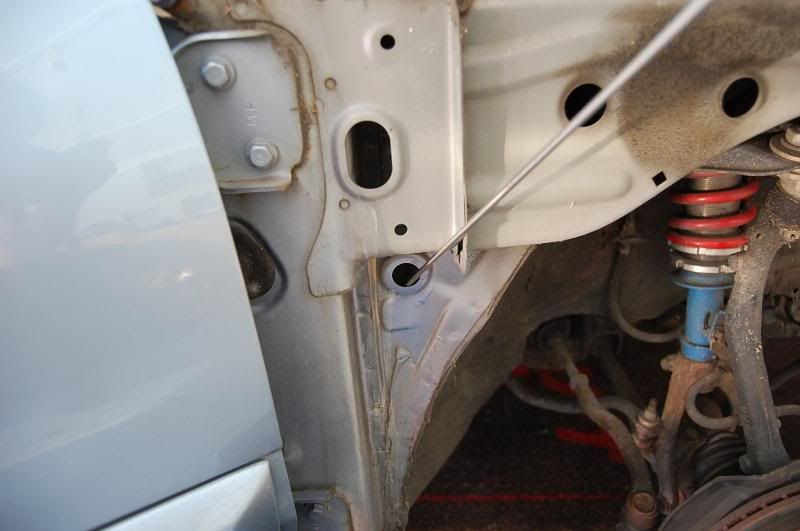
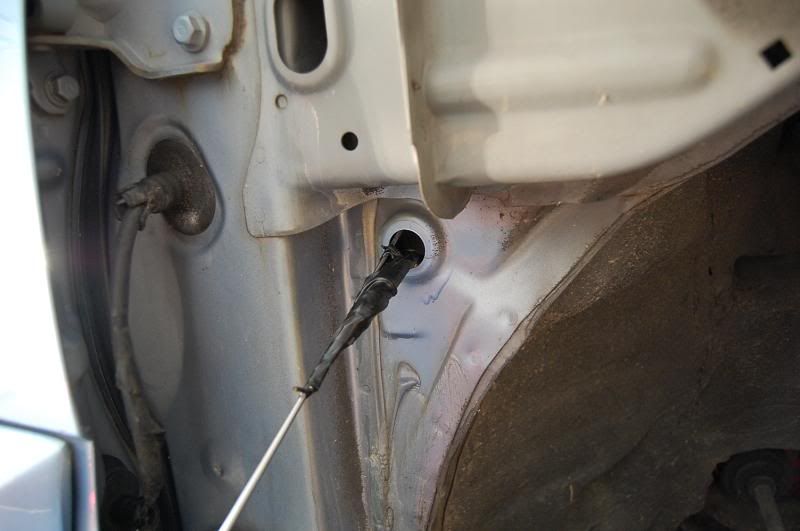
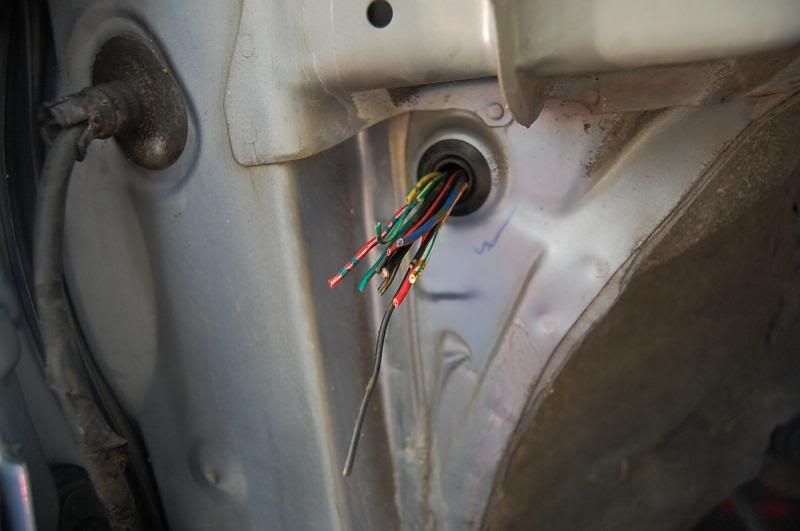
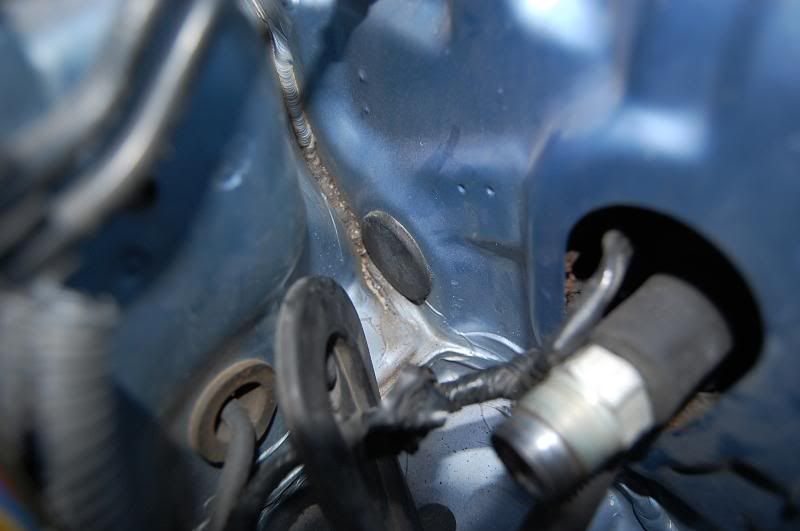
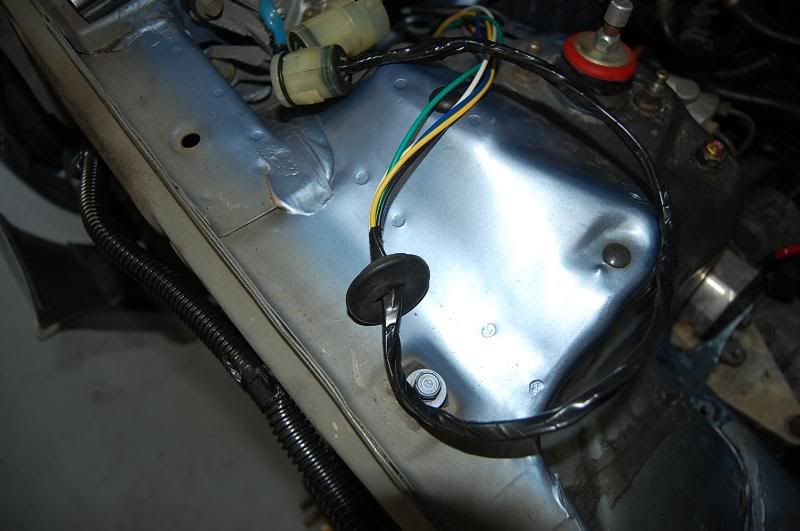
This grommet is where I will be bringing the wires through.
Before I bring it in, I need to remove the huge boot and tape up the wires to bring them through.
and..
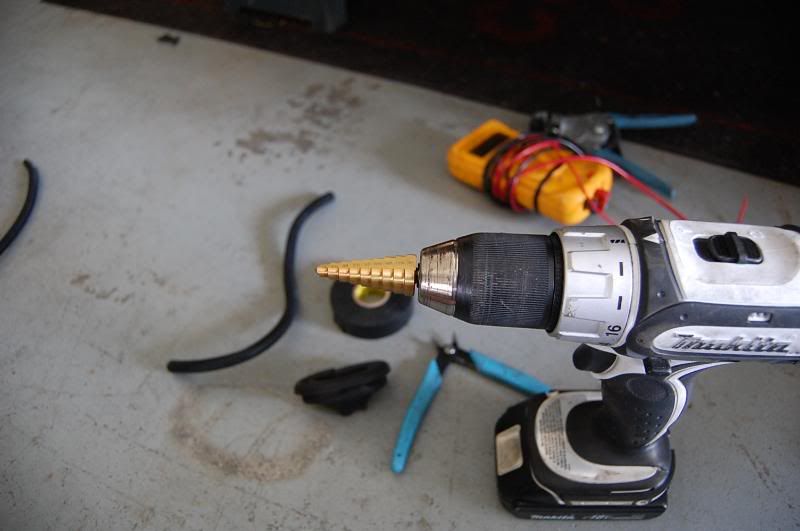
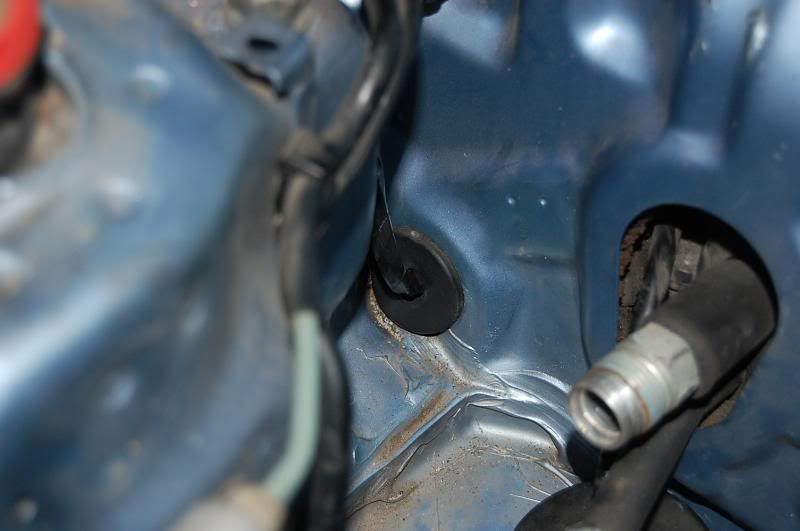
Using a "unibit", I drilled the hole larger in the OEM grommet.
I also slit it so I can pop it back in.
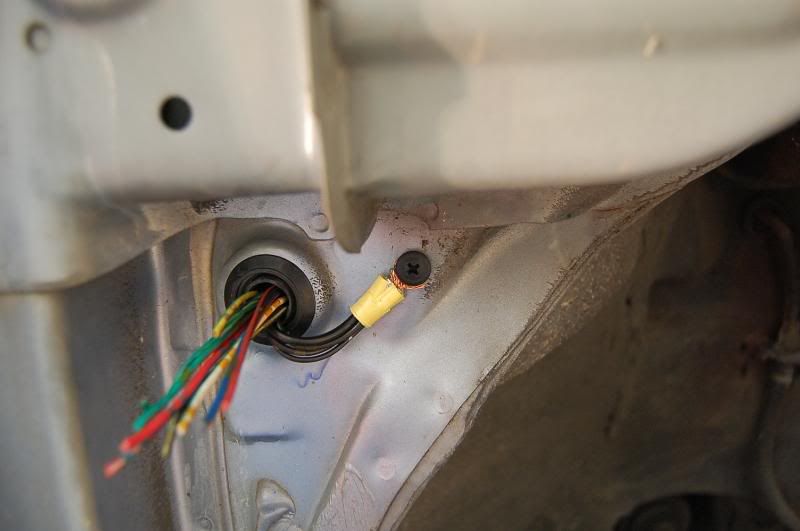
and it's back on.
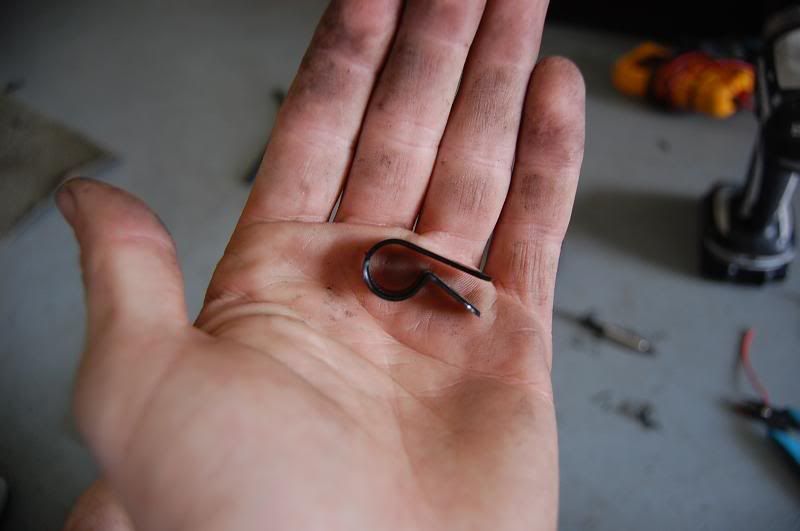
This next piece is called a "c-clamp". It hold down bundles of wires. This is good to use so that the wire bundle doesn't move around overtime wearing a hole in the loom or coating.
In use.
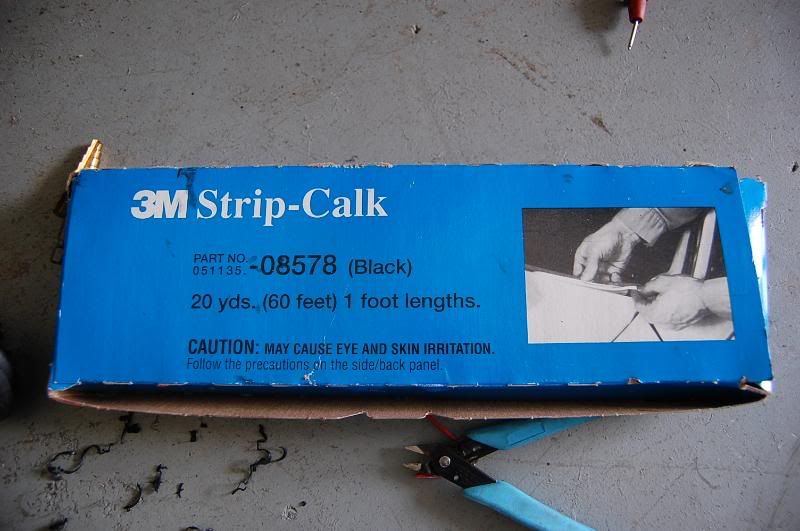
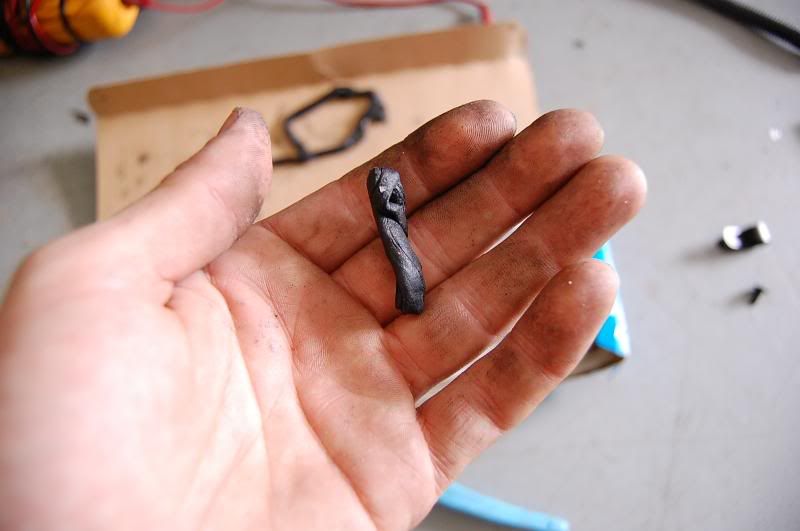
Next up is 3m strip caulk. This is used to seal up holes. It never dries, and the hotter it gets, it is more pliable. In fact, overtime it will "seep in" to the grooves of the loom sealing it further.
Roll it out like a tootsie roll.
And wrap it around the loom.
This seals up around the hole preventing anything from getting in. This may be overkill, but overkill is my business and wiring is something you don't want to half-ass.
I'm only being super detailed on this side. I will still show what's going on on the other side, just in not as much detail, as it would be redundant.
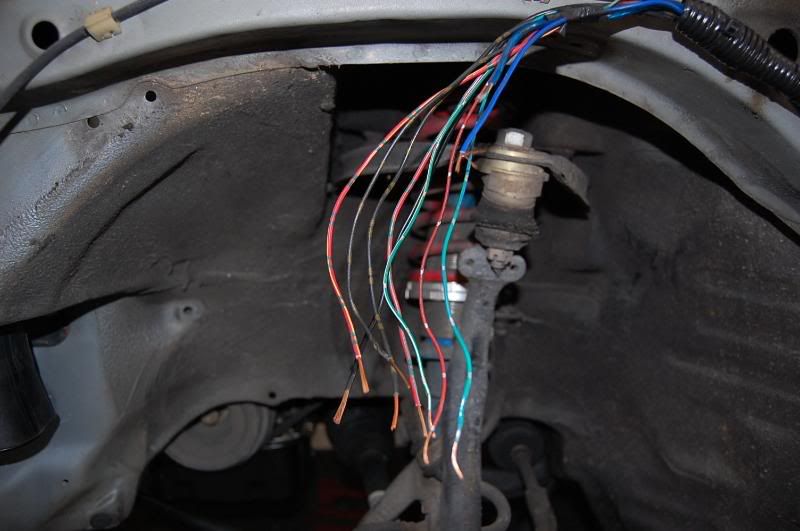
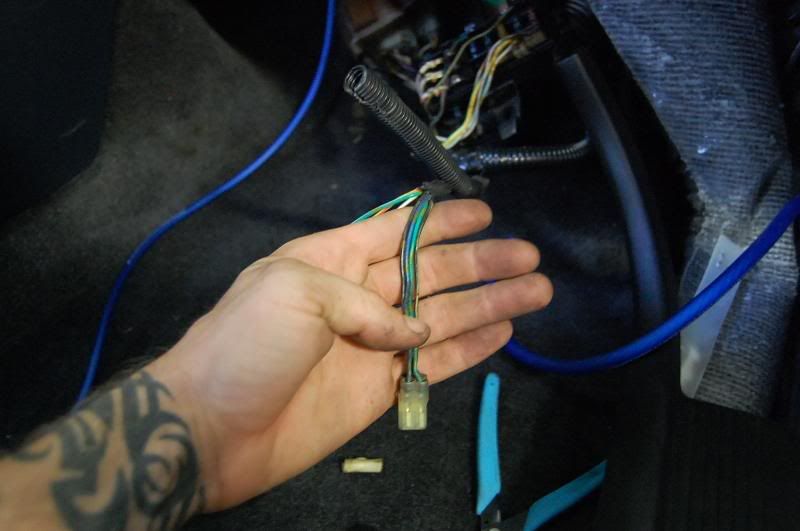
Wires stripped back on the car side and interior side.
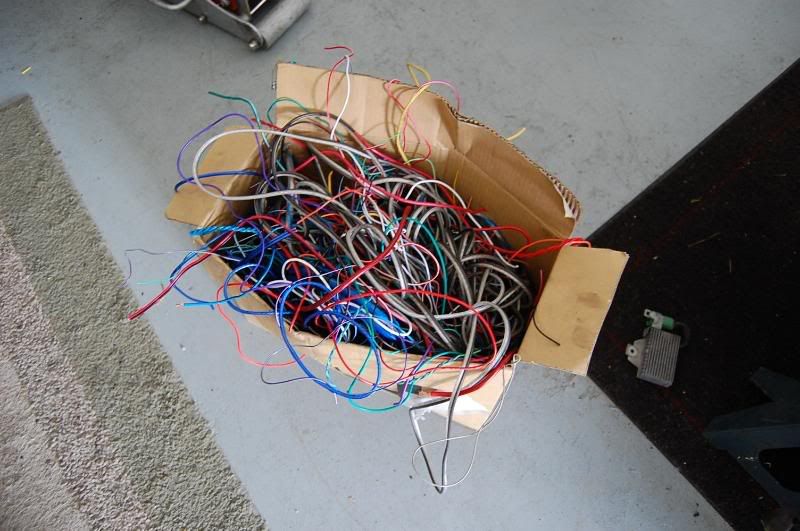
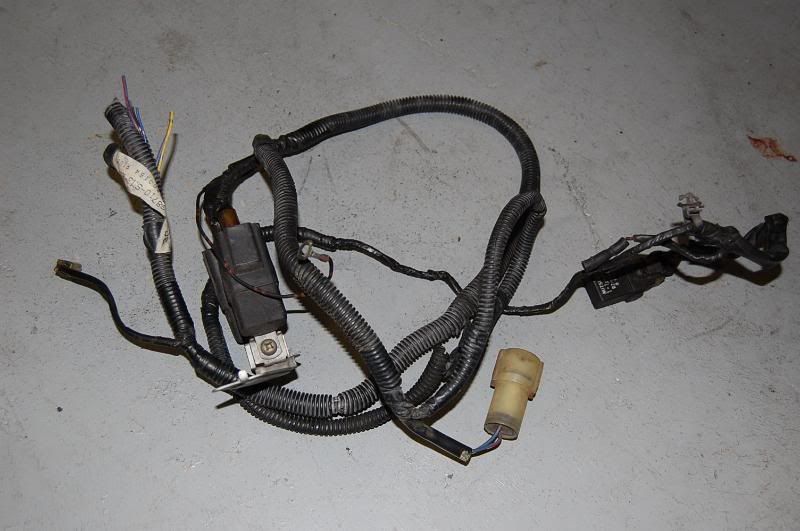
Box O' wire. I save all wires leftover from alarms and other stuff for projects like this.
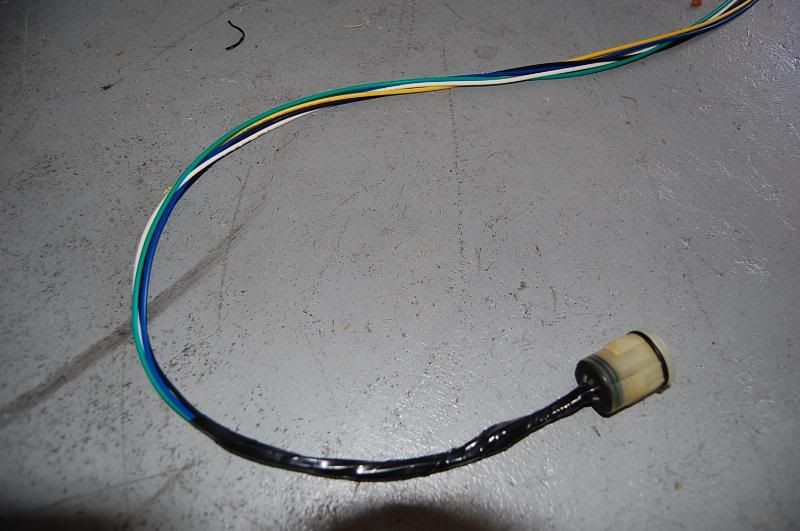
Measure out the wire and connect both ends.
I took the grounds from the car side and gave them their own solid ground.
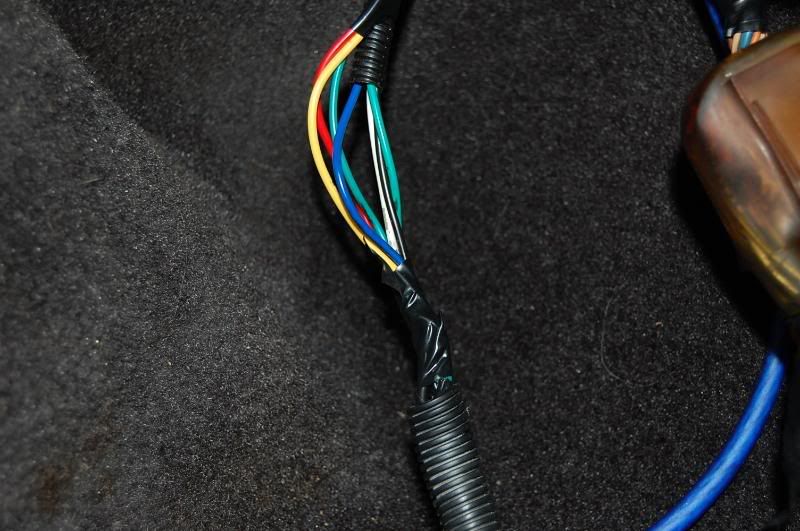
All the wires connected.
Soldered, taped, loomed, and fastened up.
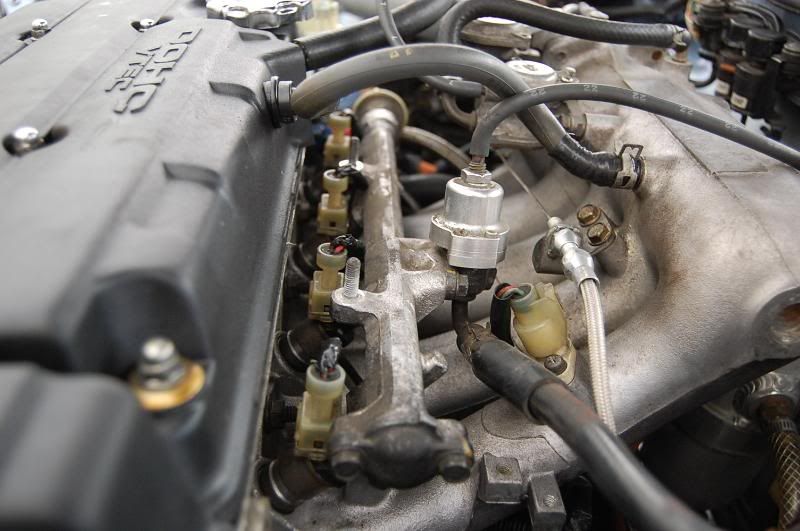
Pulled the injector harness off.
Loosen the clutch off the tranny and pull it off, letting it hang on the driver side.
Injector harness on top of the block.
Aaaaaaaaaaand cut.
Extensions soldered on.
Notice the length difference?
I ran the harness under the intake manifold. I brought the clips up inbetween the runners and plugged them in.
I ran the rest of the harness into the hole.
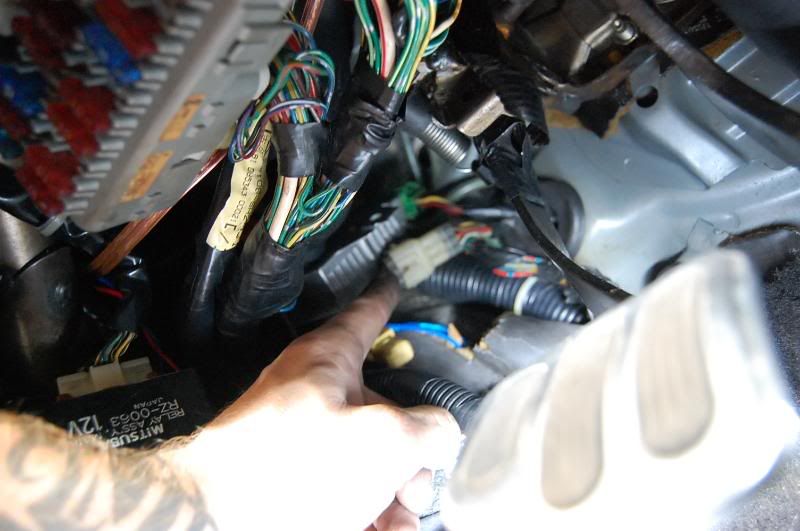
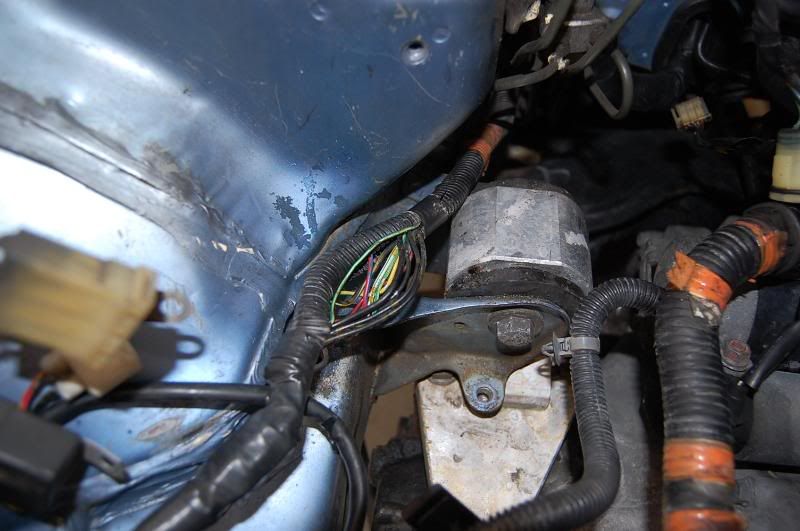
Plugged in the resistor box and tucked it high in the dash.
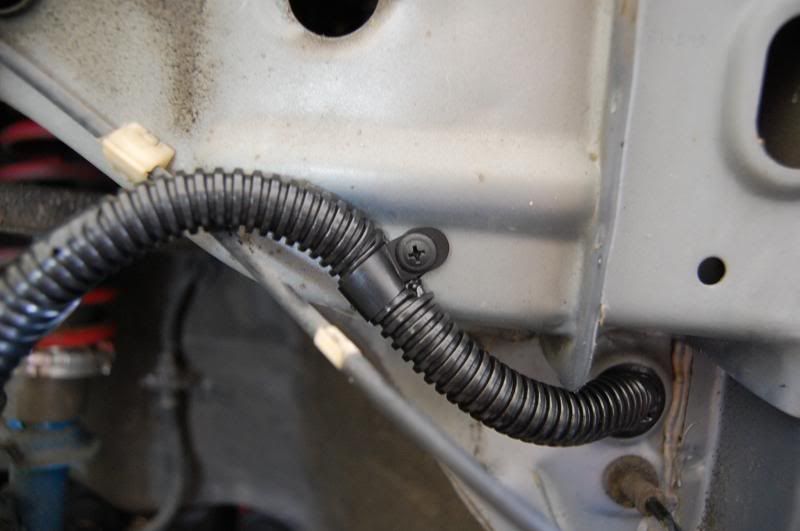
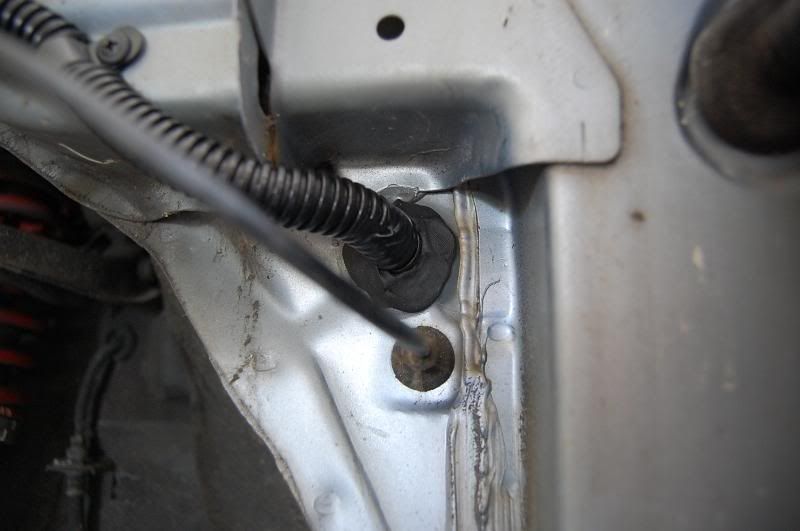
And here is the OEM grommet back in place.
Some folks cut a large hole low in the bay and run all the wires back in that way, and that's cool. I, however, prefer to use factory holes and grommets. The other way may be cleaner, but it's alot more work, and if not sealed properly, it may allow water to leak back into the cabin.
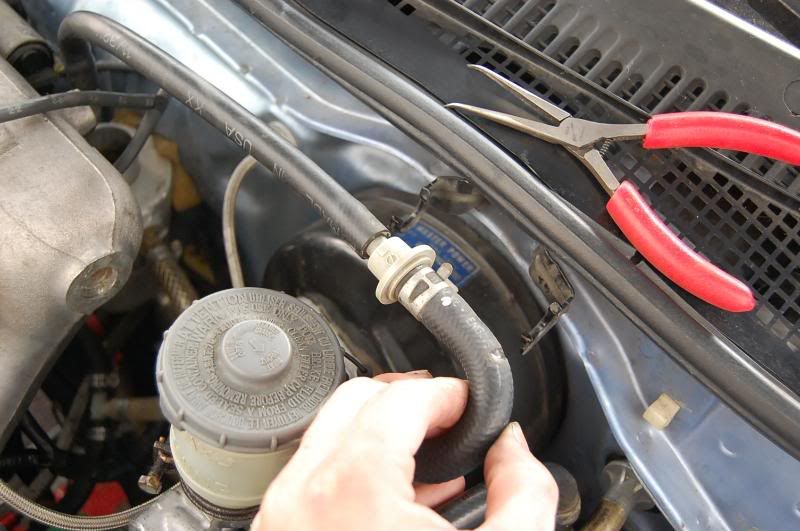
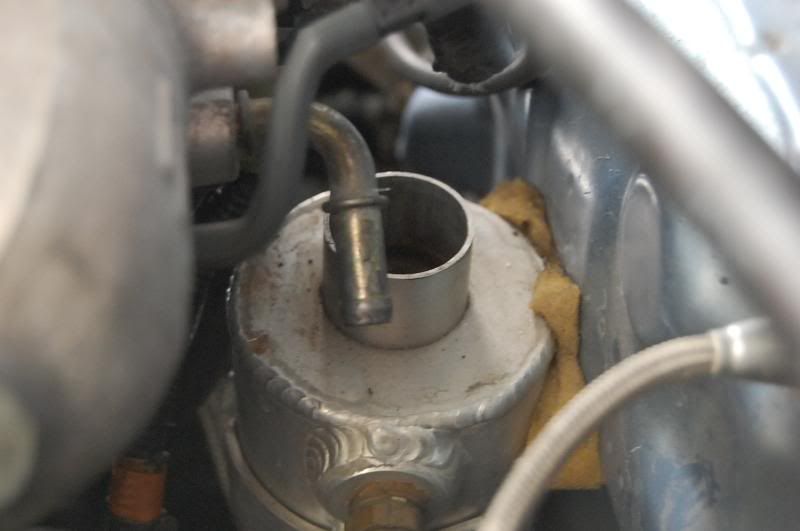
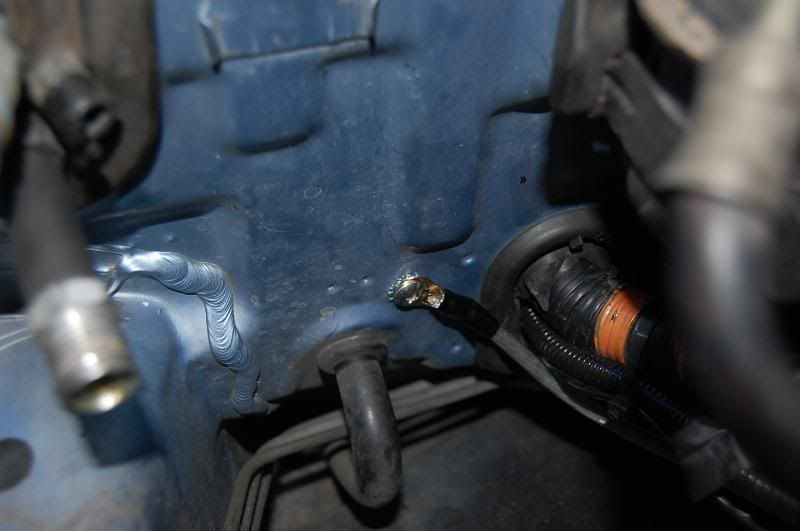
Tucking the brake booster crap.
Unhook from the intake mani.
GENTLY using a rubber mallet, tap the elbow upside down. Using a metal hammer will bend or snap this off, delaying any progress.
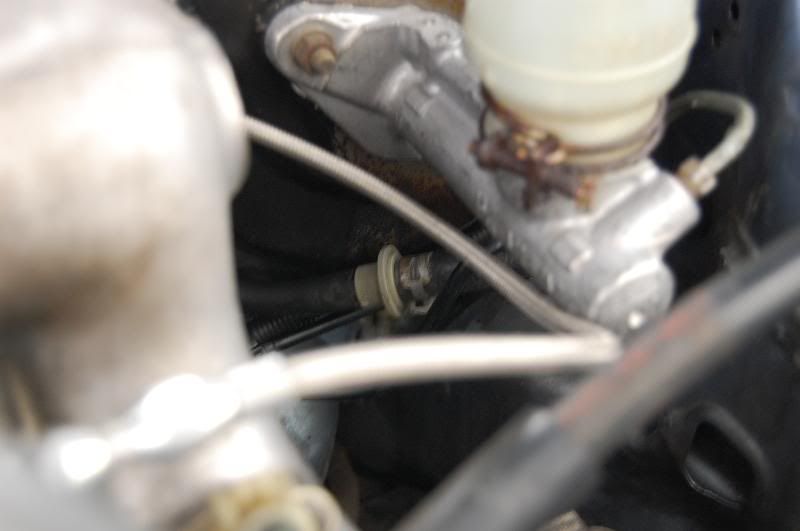
Run the hose under the brake lines.
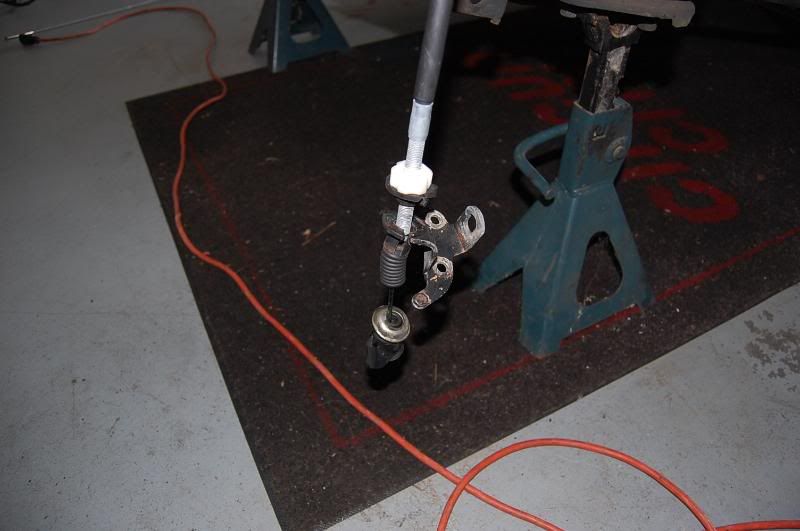
And remove the bracket.
Onto the passenger side wiring. Unhook all lights and remove all relays, screws, ground blocks, etc.
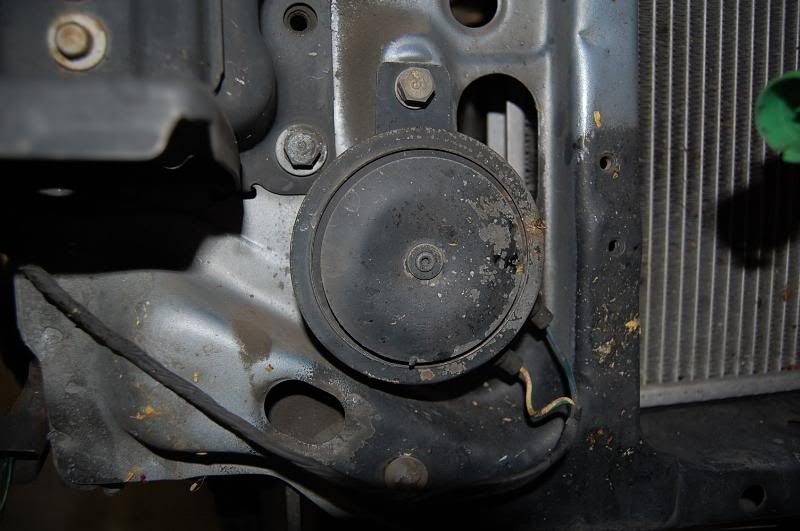
Reference pic of horn wiring.
Random pics of stuff laid out.
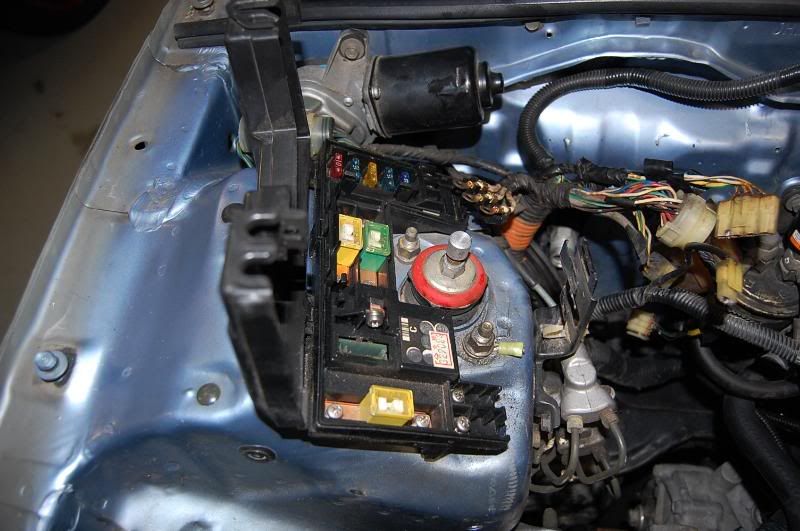
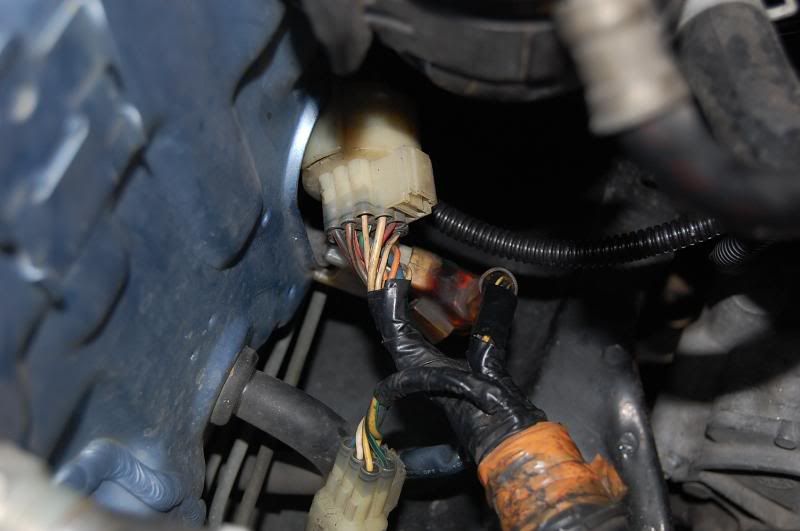
Unhook all plugs and fusebox stuff.
Now this harness is all the AC wiring components. I am going to remove this for now, but I'm leaving the wires intact and labeled so I can go back in and hook it back up later. I might even go ahead and run it tommorw. I dunno yet.
Either way, it has to be cut...
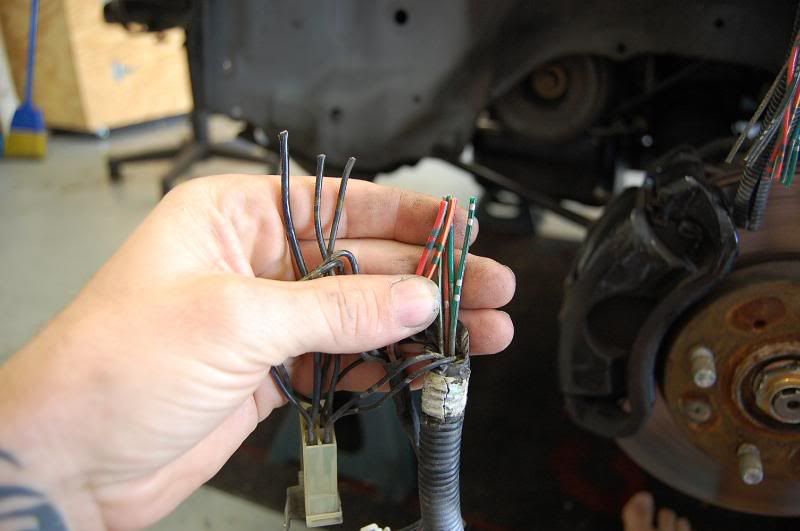
Open the bundle and check for no duplicate wires. I found 2 wires that are yellow with a green stripe. However, one has silver dots, while the other has two silver dots. Make sure to cut them so this is easy to identify.
Aaaaaaaaaaaaaaaaaannnd cut.
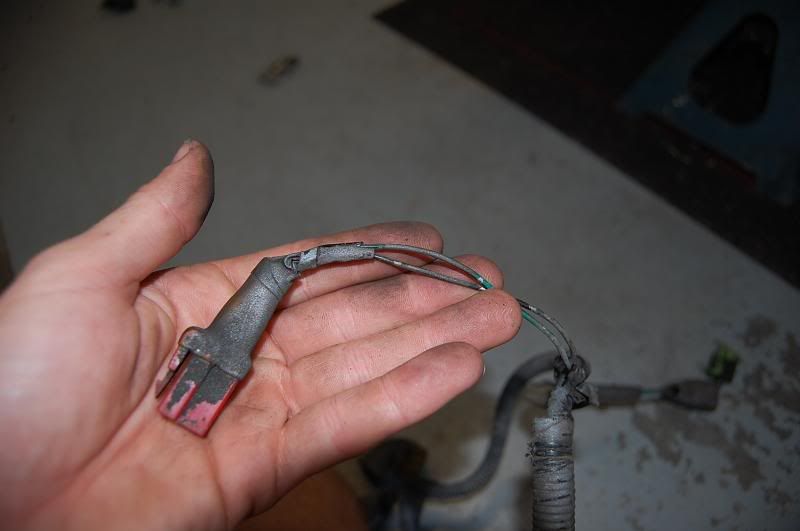
Unplug.
No more vtak.
GENTLY push the wires through the grommet. Pulling too hard may depin a plug causing hell and havoc.
Harness in the car.
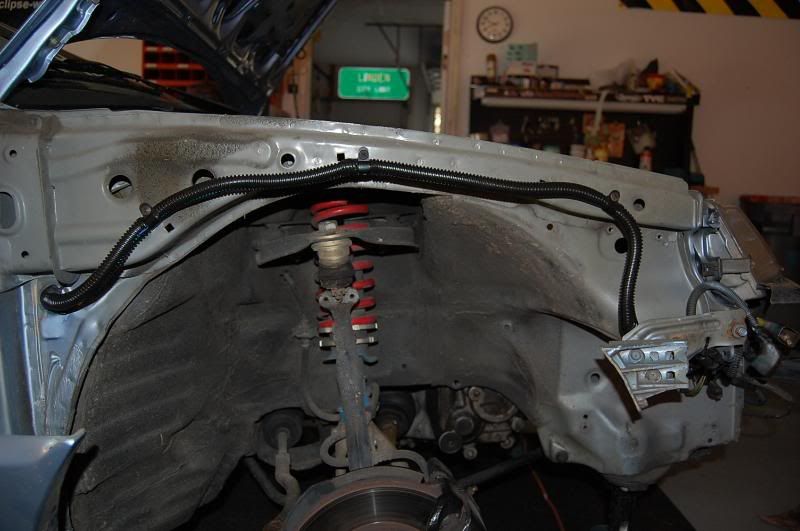
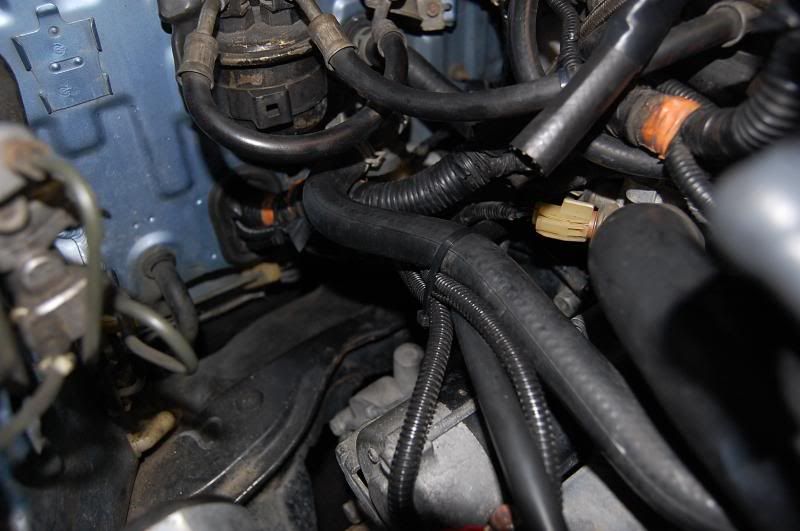
Bay shot.
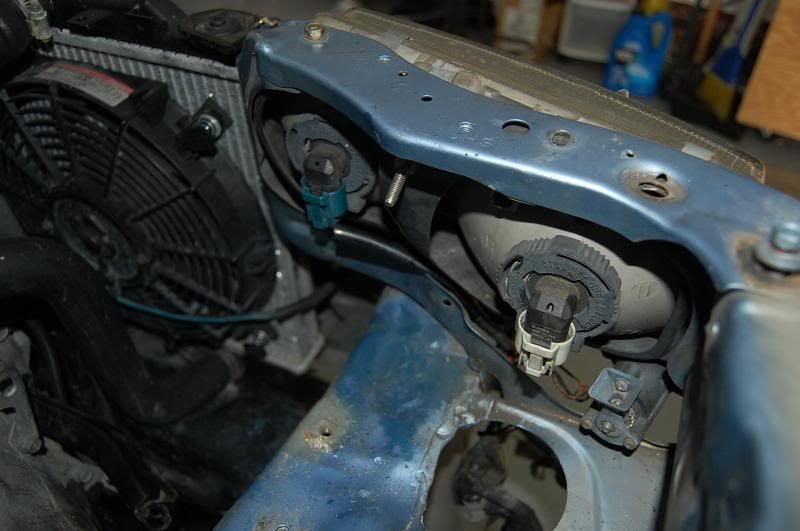
Plug the headlights/horn/fan back in.
Oh Hai!
Wiretie and secure the bundles.
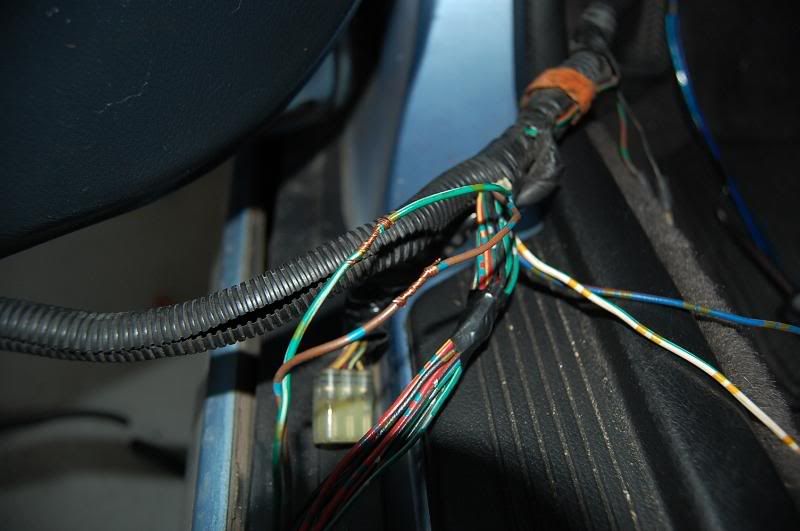
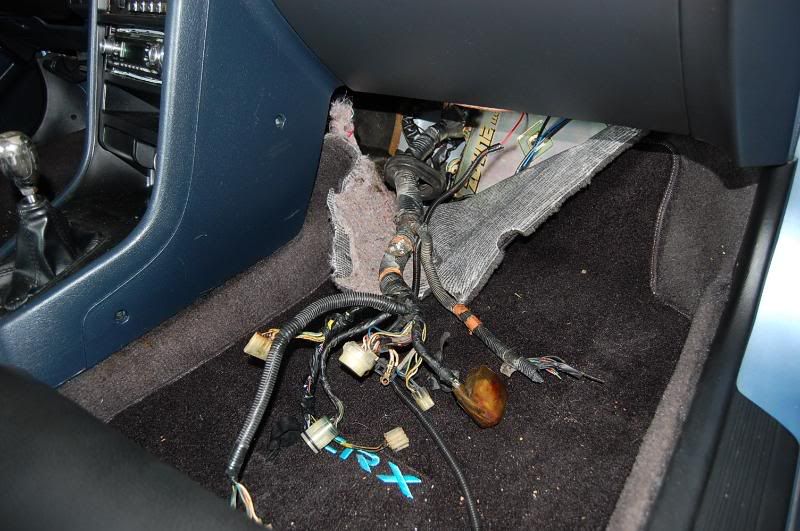
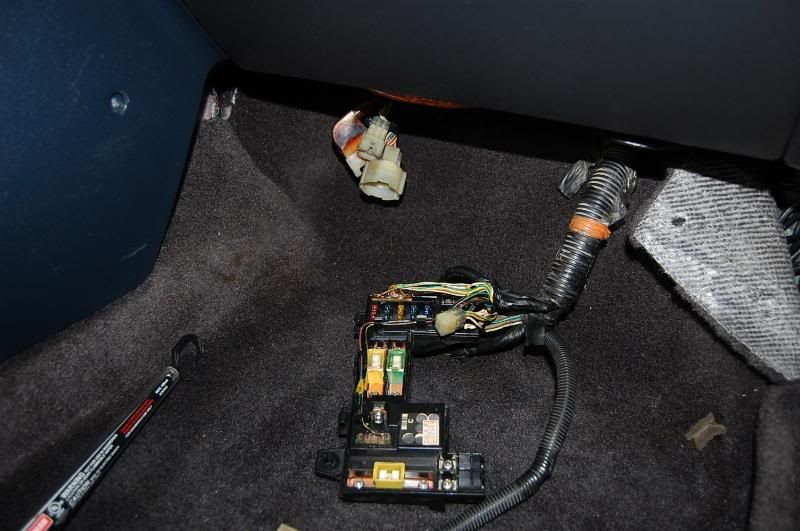
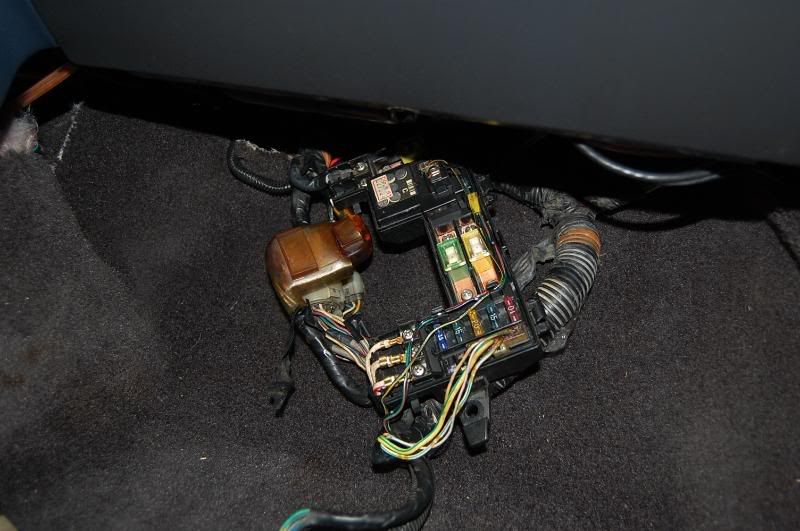
Fuse panel and car side harness chilling in the floorboard.
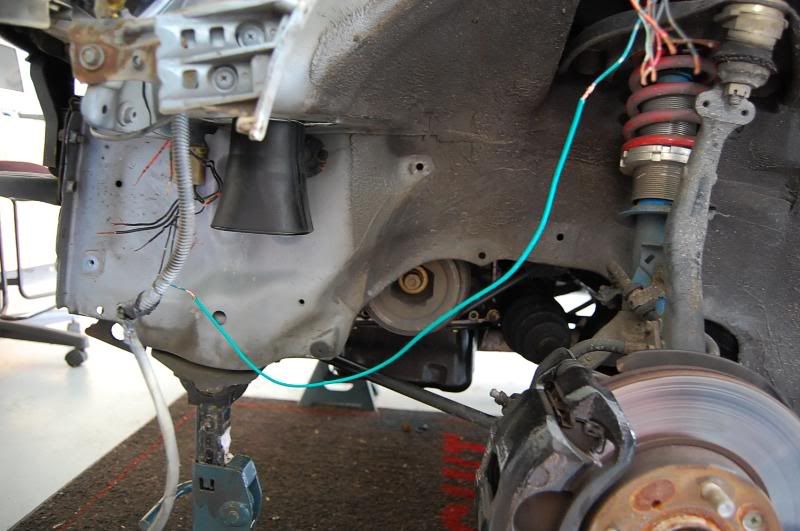
Since the Zydne is a 1 wire vtec ecu, I ran the vtec wire back out to the solenoid.
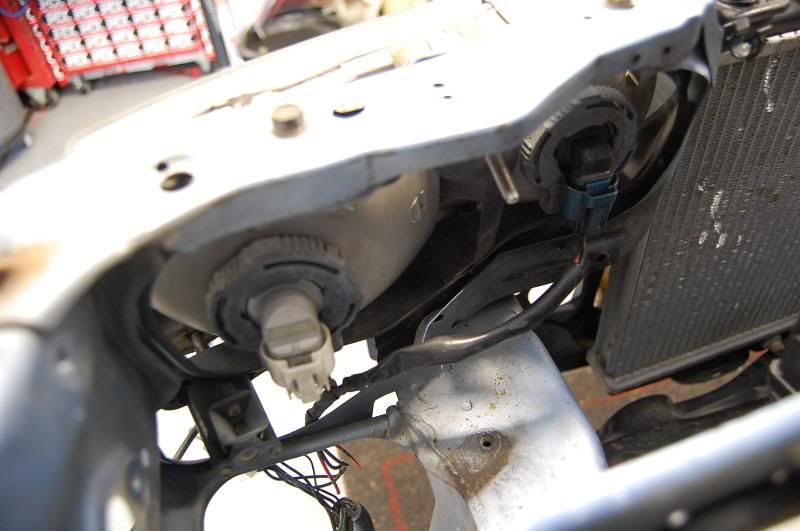
On to the passenger side light harness. I popped the grommet out and ran a car antenna down the hole.
Taped the wires to it and pulled it back through.
Here's where I f'ed up. I cut the harness too far back. I should have cut closer to the headlights, but I didn't. What this did is made the wires at this end uncomfortably short. Fortunatly, I have the patience of a saint with wiring and made it work. Note for next time: Cut closer to the headlights...lol
I put the grommet on and grounded the ground wires on each end.
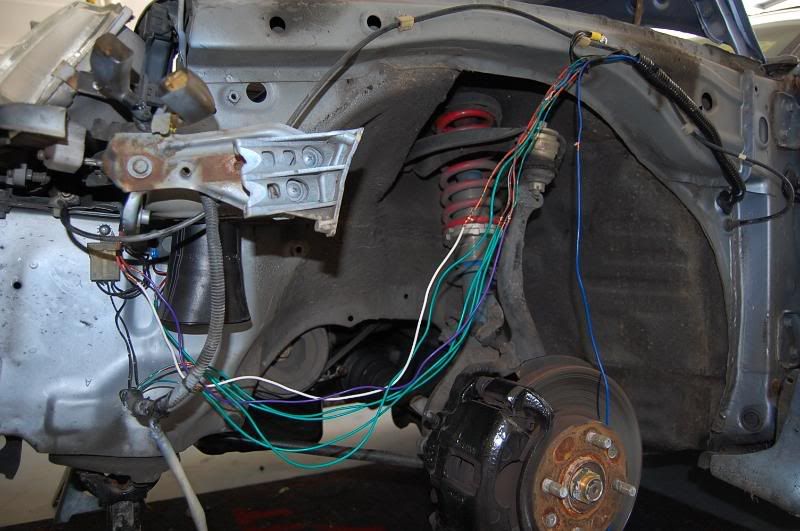
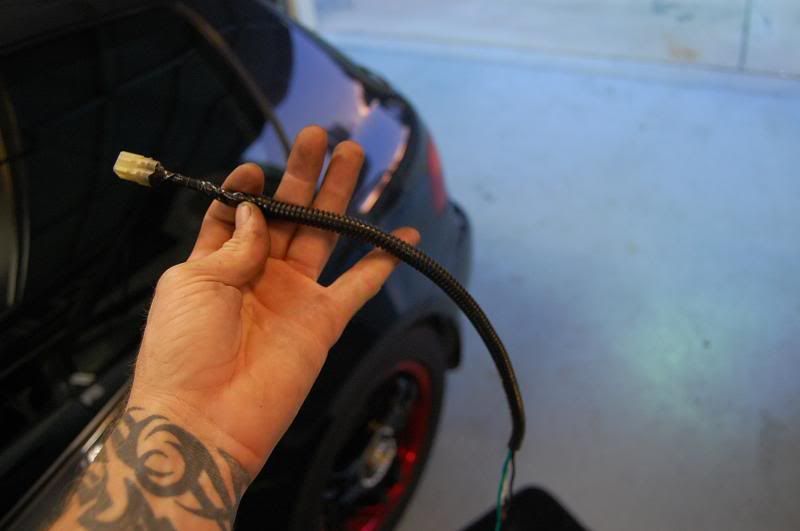
Once again, extend all the wires.
And loomed up and secured.
Push the engine harness through...
and plug up the plugs and fuse box.
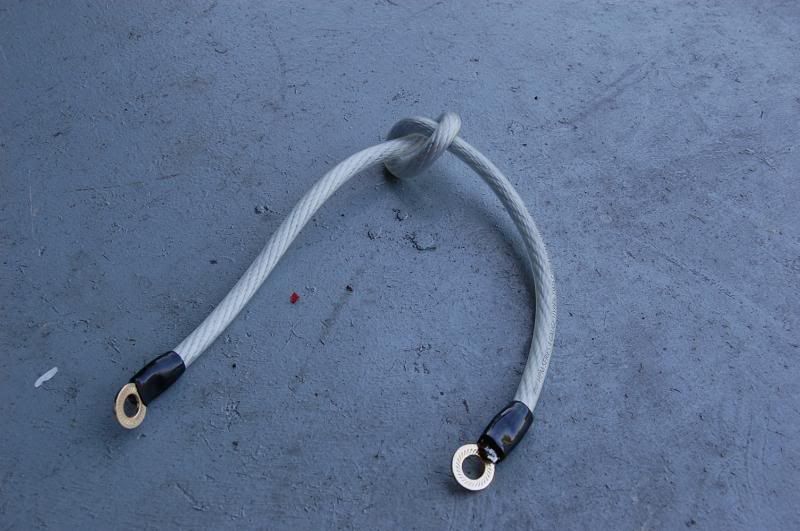
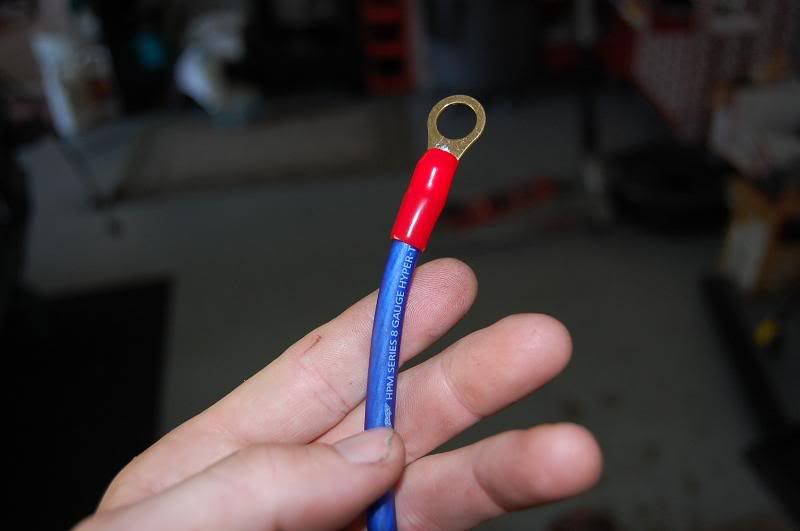
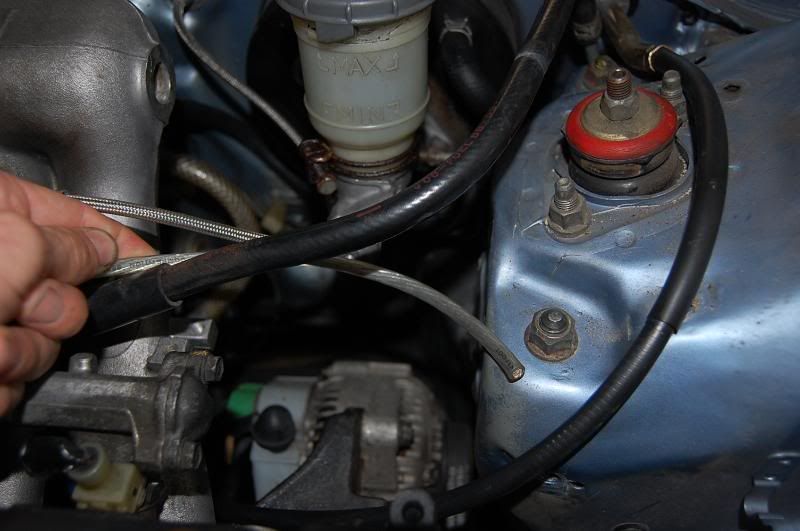
New ground wire. I used Stinger HPM 4 gauge wire. It's super flexible, has a nice jacket and is super easy to work with.
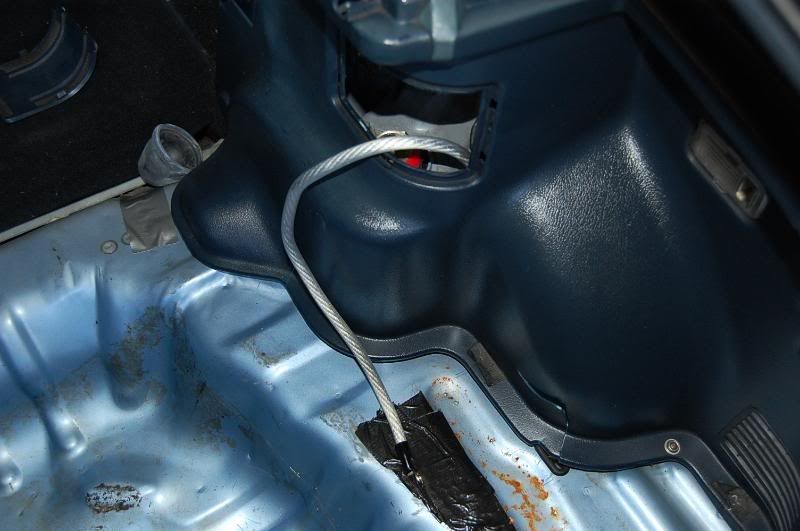
I used the 14mm rear shock bolt as ground. Nice and solid.
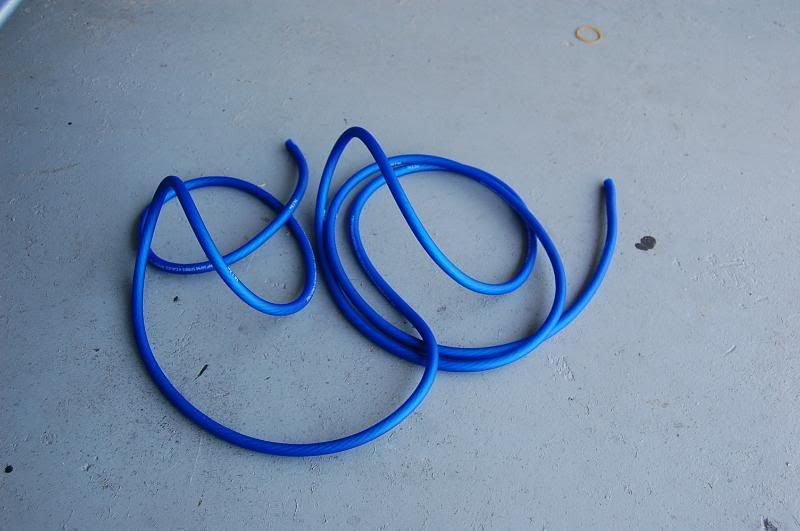
12 feet of the same power cable.
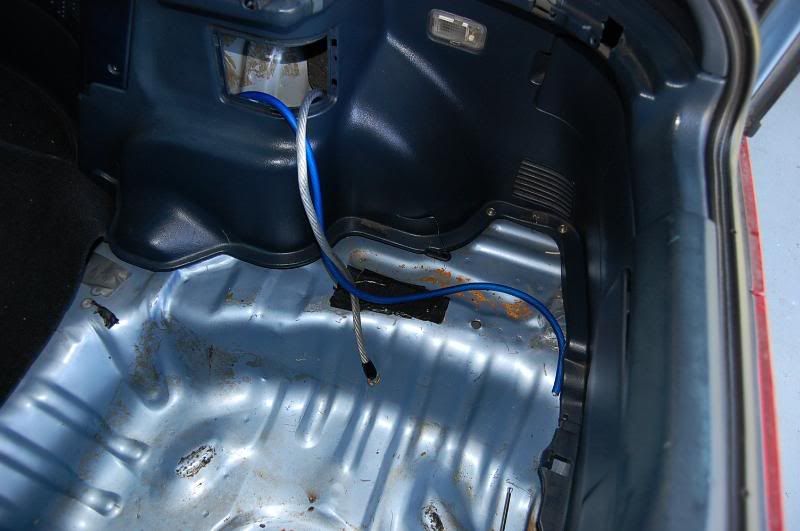
Run it from front to back
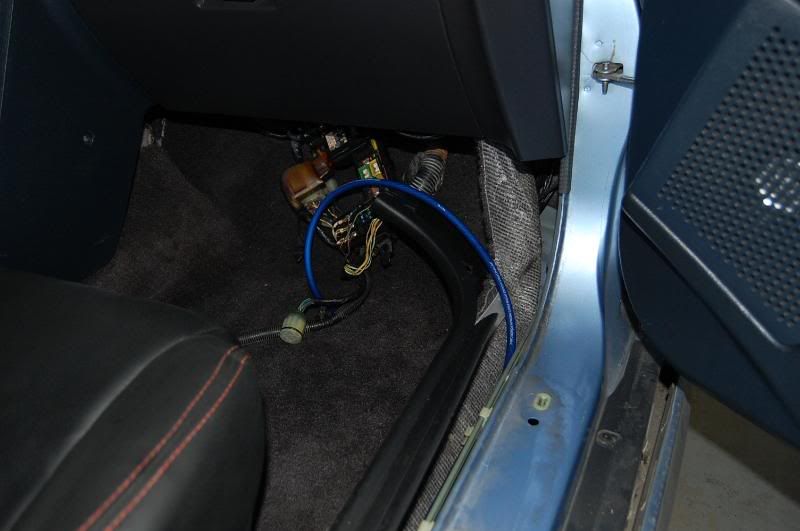
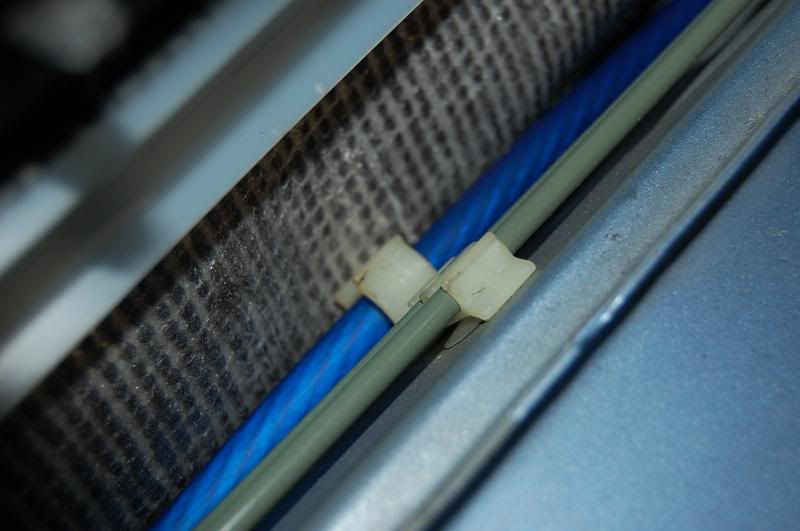
Using the oem clips, it holds the wire nicely. Thanks Honda!
And out the back.
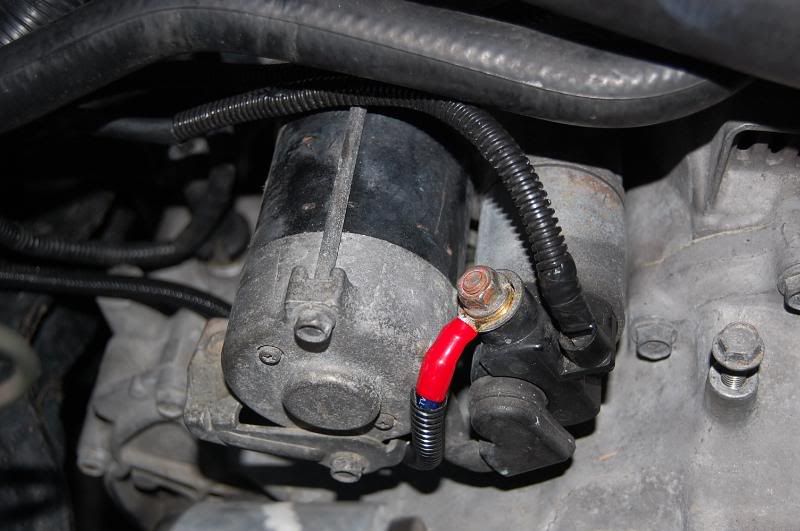
Old and worn starter/battery cable.
New and sexy starter cable.
The old starter signal cable was too short.
Cut and soldered new wire on it. Make sure to use the same size cable. I used some heavily sheilded 12 gauge.
Loomed and tucked.
This plug controls the winsheild wipers. I've seen alot of HTer's delete the wipers, but in NC, we have to have them.
Off with the plug!
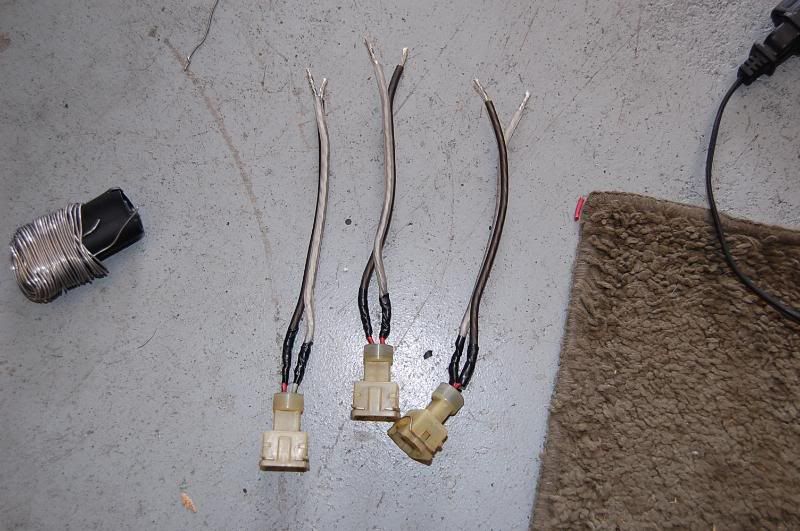
Solder and tape up new extensions.
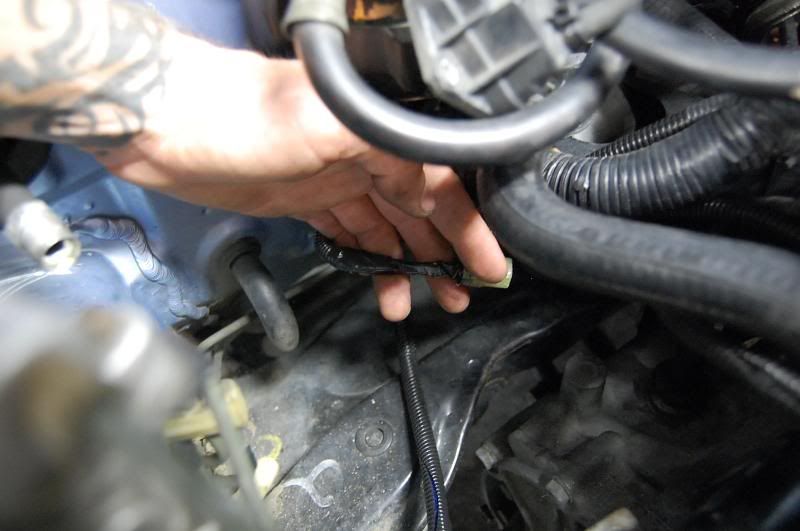
This grommet is where the wires will be going through.
Slide the grommet on and slide it all in.
Solder it back on at the fuse holder end.
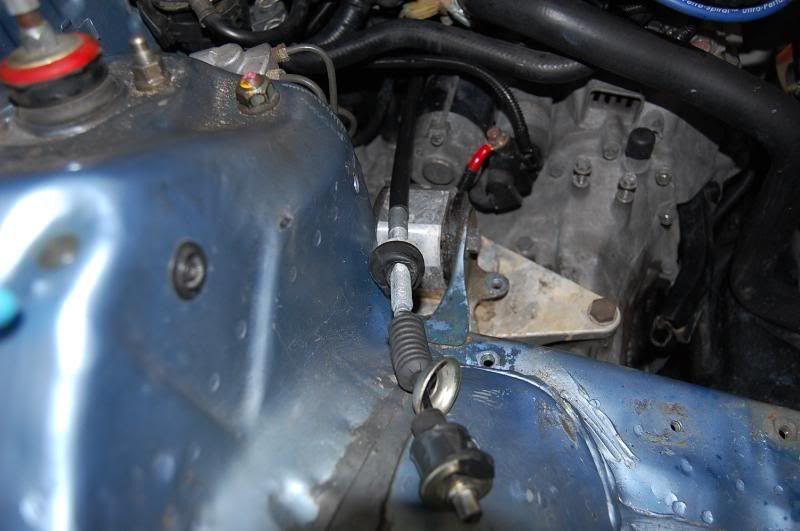
Rememebr the clutch cable?
Pull the bracket off and slide the cable under the intake manifold.
And bolt it back down.

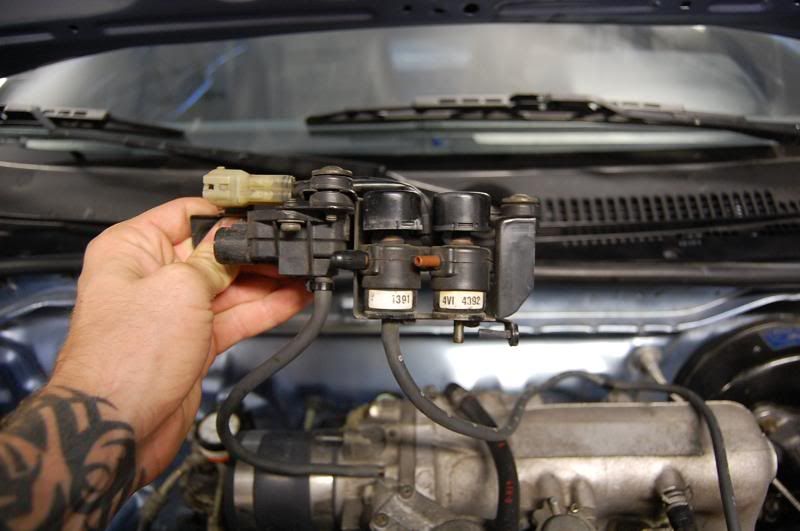
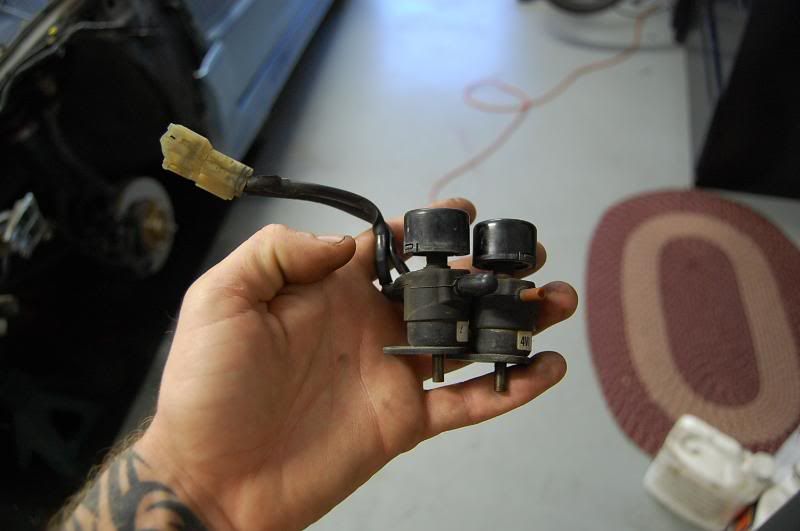
Unbolt the vacuum stuff.
Take them off the bracket.
I taped them together (most cars only have one, for some reason this crx has two and they are wired together, so I didn't seperate them)
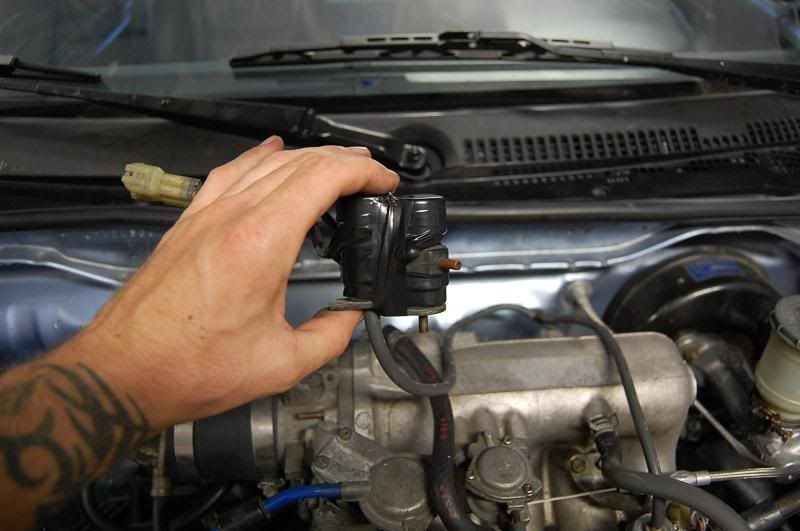
Wire tie it down.
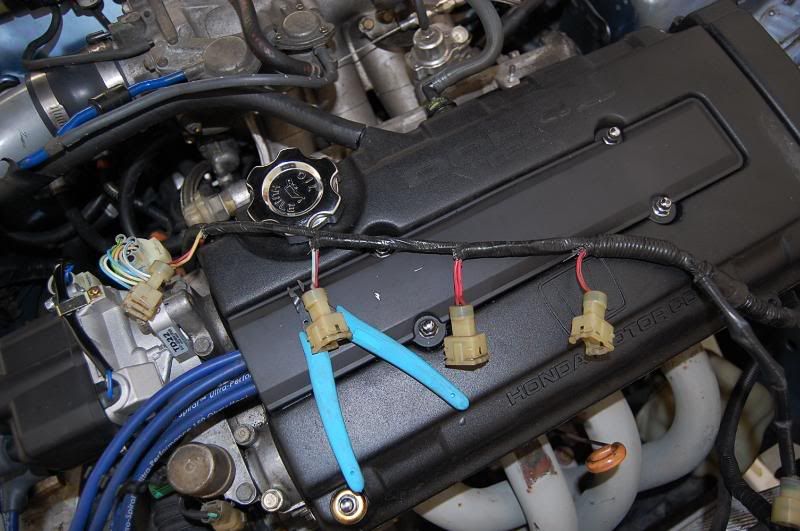
Cut the wires, extend and plug in as usual.
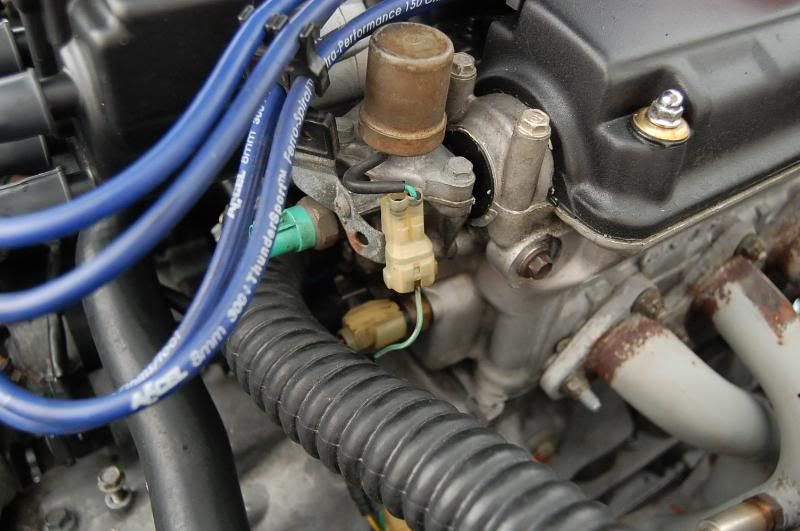
On to the next sensor, pretty much the same procedure.
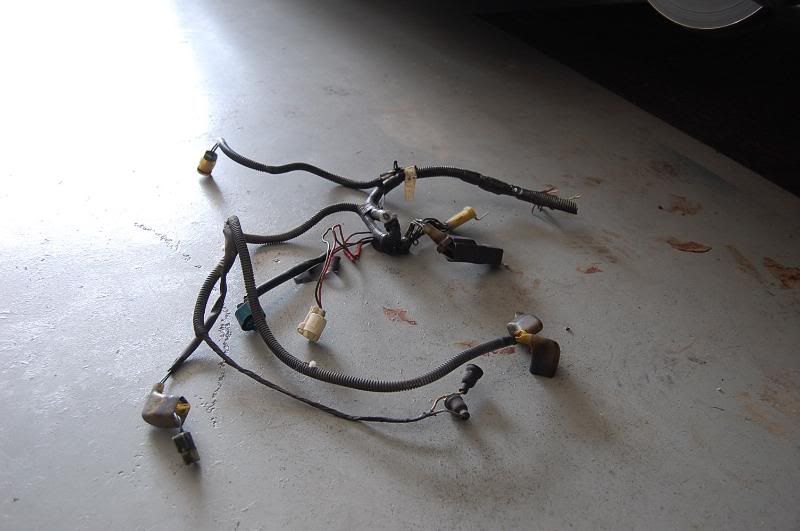
Here's the wiring for the sensors..done.
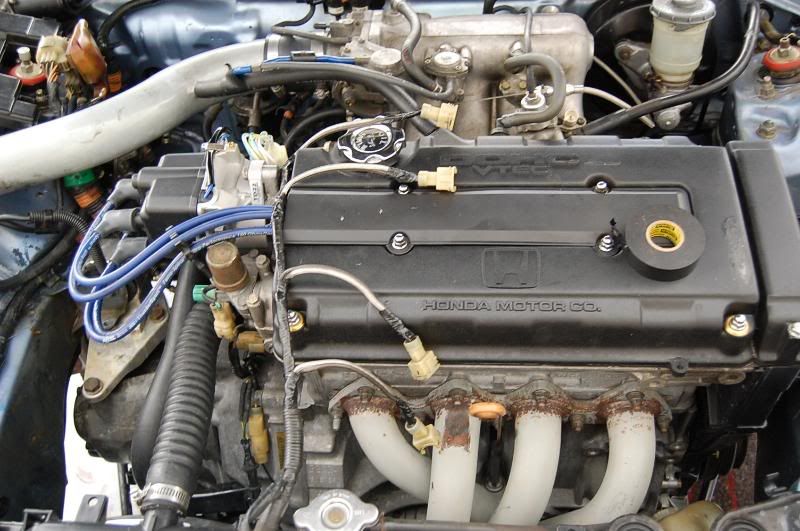
All the wiring (minus grounds) are done under the hood. I wire-tied the wires together neatly and put the oem grommet back in place. This is important to keep the cabin waterproof.
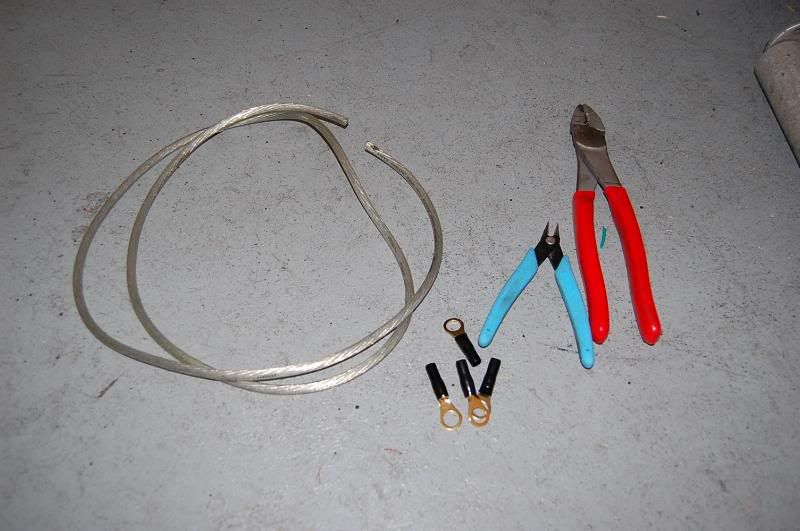
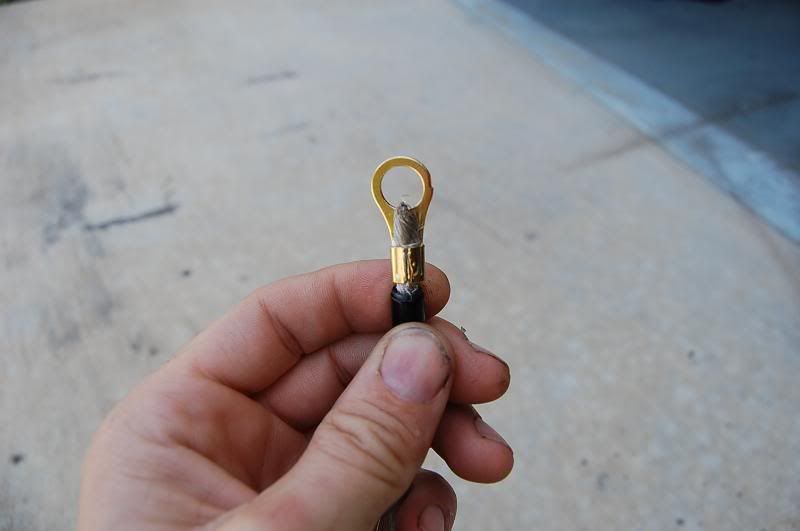
Supplies needed for grounds. 8 gauge wire, some crimp rings, wire cutters and Snap-On cripmers.
Measure the length.
Cut the wire.
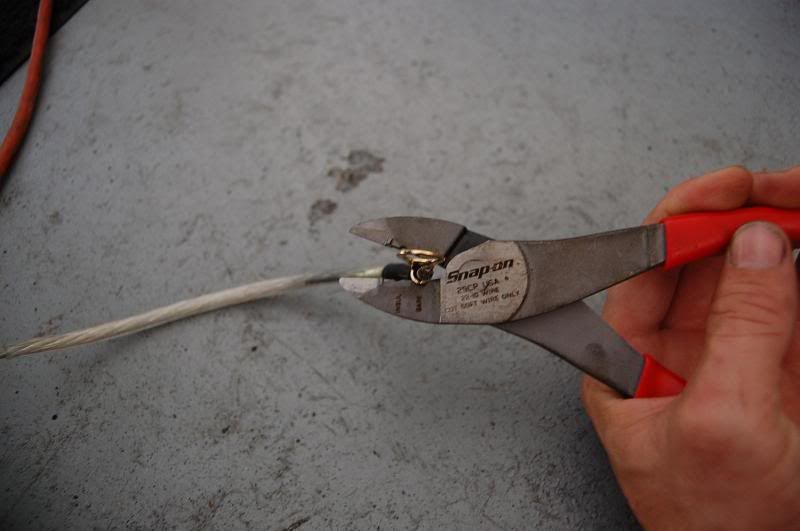
Slide the jacket on first.
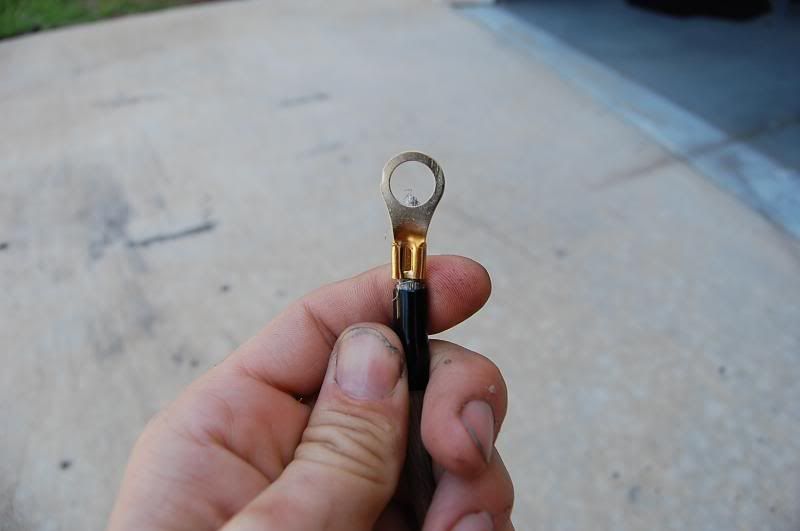
Put it in the crimpers. It is important to put the "notch" on the backside of the crimp, not the "seam" side.
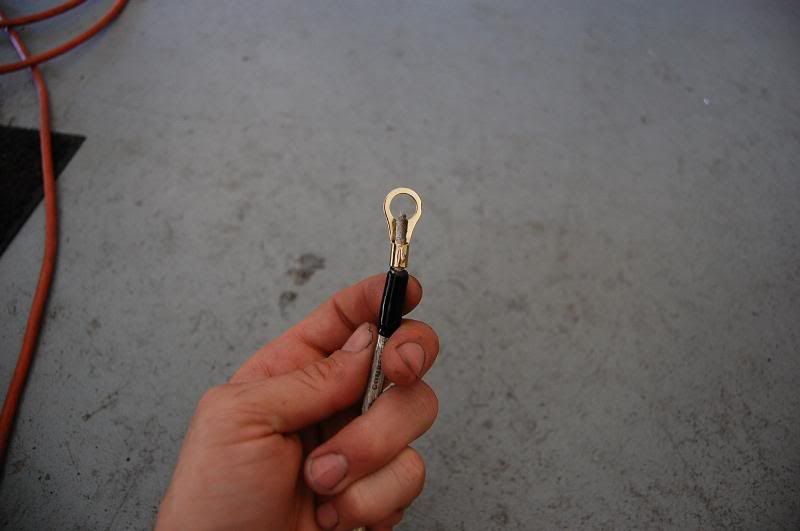
Front and back.
Make sure that the ends are equal and the wire is not twisted. The wire should lay flat just like this.
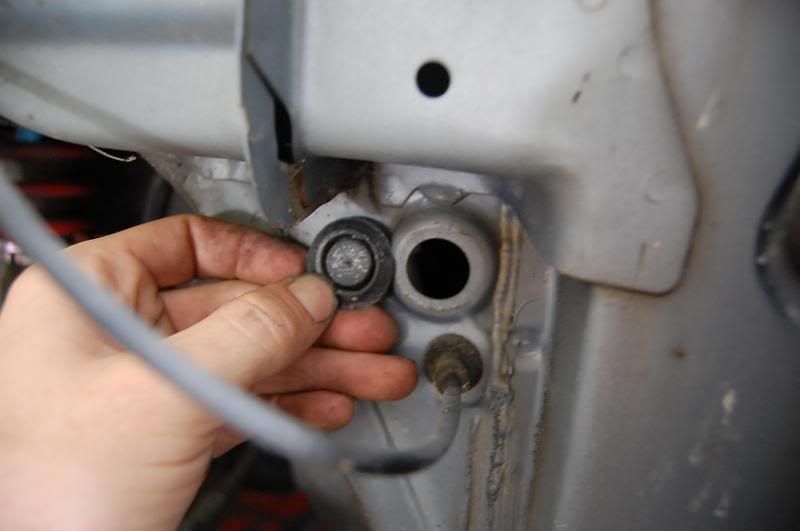
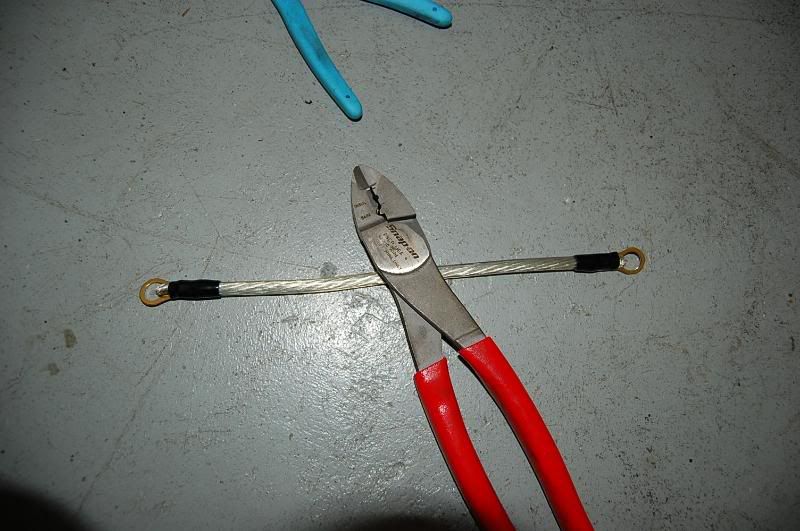
Driver side ground. You should have a million short 10mm bolts let over. Use them for this purpose. They are the same thread pitch and everything. You could ground it elsewhere, this is just where I did this one.
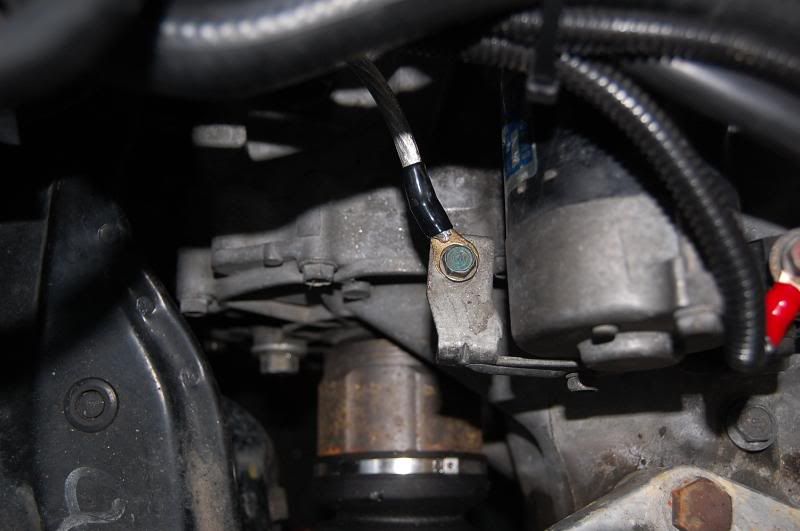
I used the starter for the passenger side. Main reason being, is that the starter draws/uses the most current, so I put the ground there.
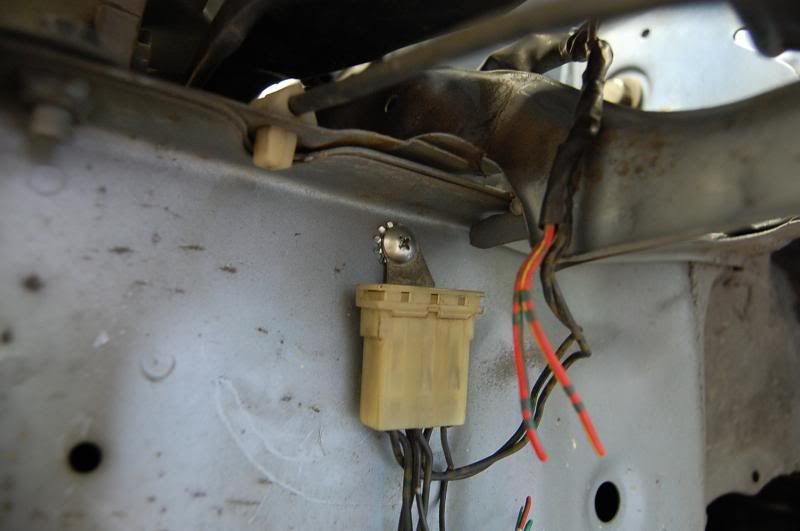
I simply made a ground on the firewall using the Pioneer screw/crimp/starwasher mentioned earlier in the thread. I may move it inside the cab later for a cleaner look. Either way, it works.
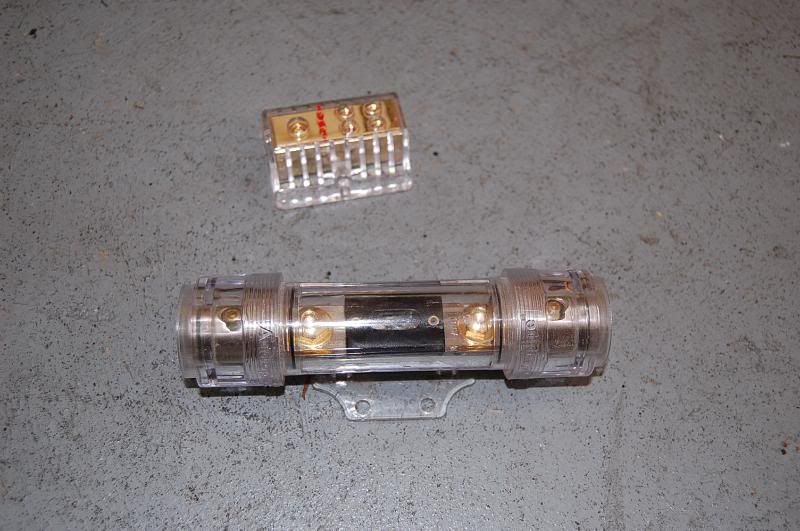
These are some necessary pieces. The larger piece is a ANL use holder. It has a 100 amp use in it. This is placed next to the battery. If there was an accident, the 4 gauge gets damaged or something bad happens, this fuse will pop. This MUST be installed i you are to relocate you battery. It is a cheap way to protect your car.
The smaller piece is a distribution block. This splits the larger wire into smaller wires nicely.
Both these pieces can be purchased at a stereo shop.
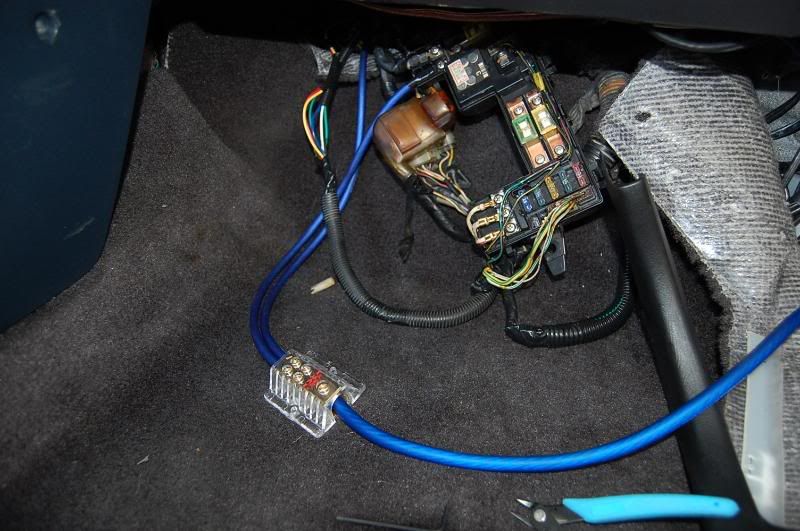
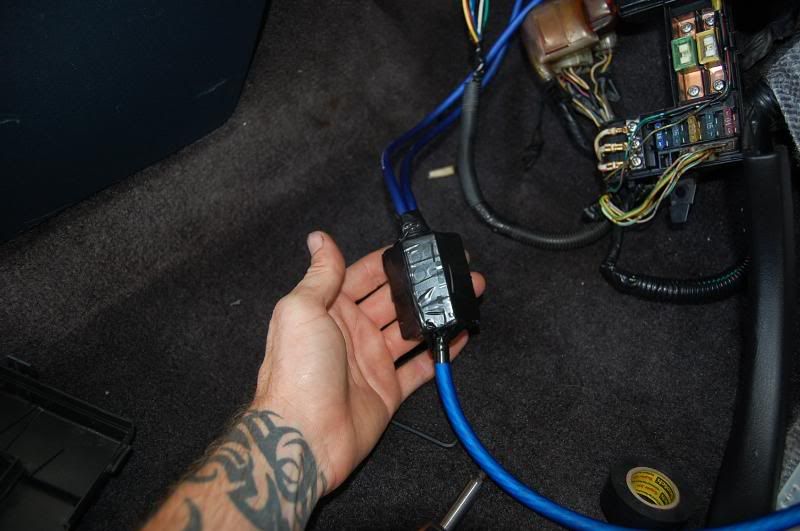
Distro. block in use.
Even though the block is covered with plastic, I still wrapped it in tape just in case.
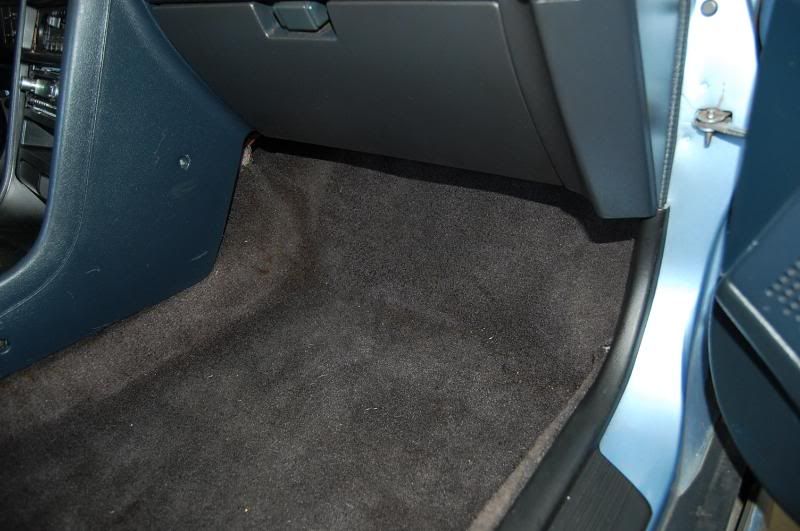
Tuck everything away and put the carpet back.
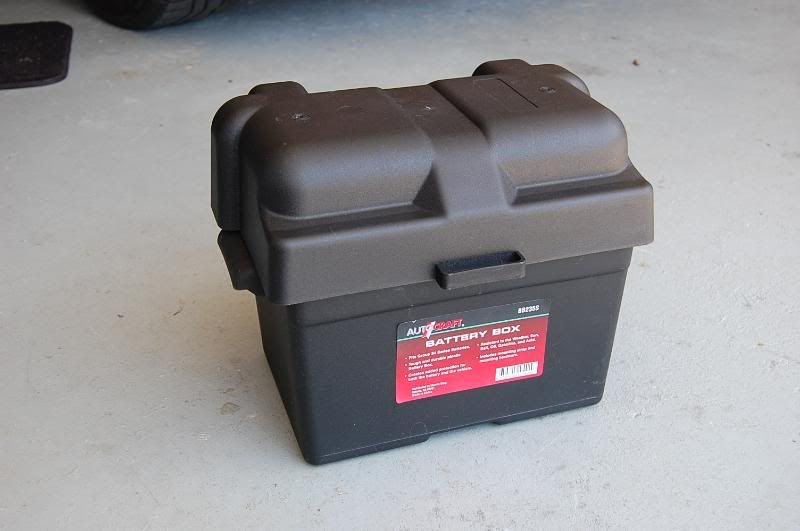
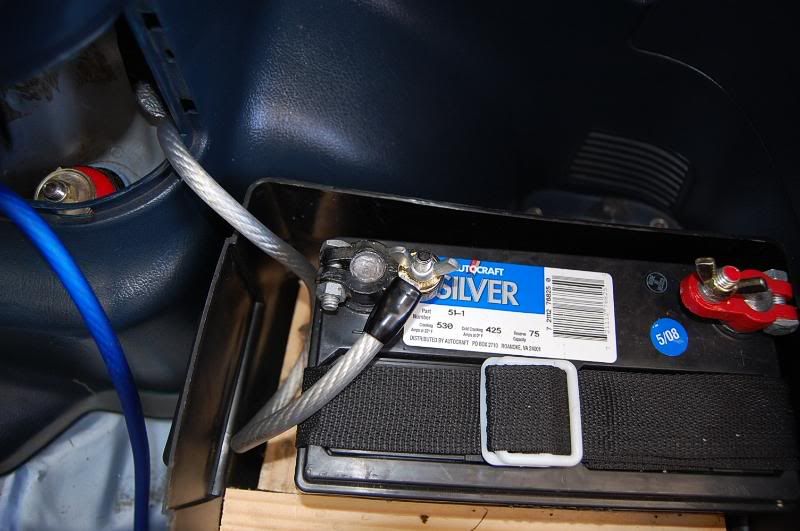
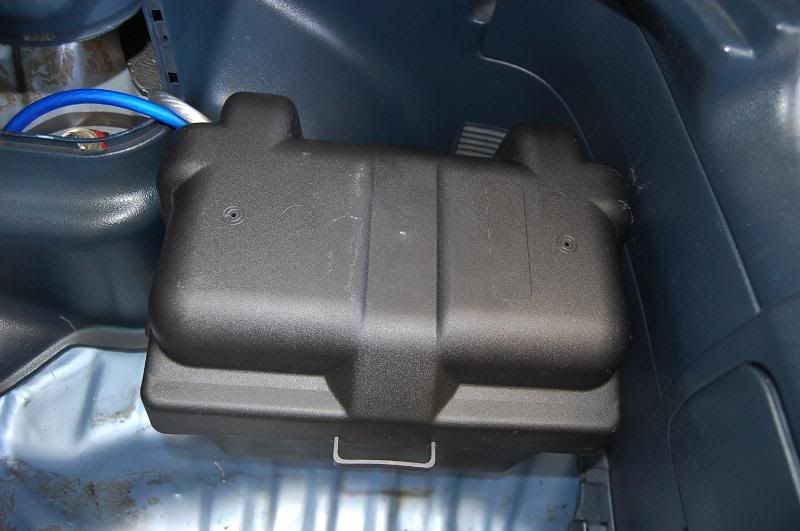
This small battery box can be purchased for about $13 at Advanced auto.
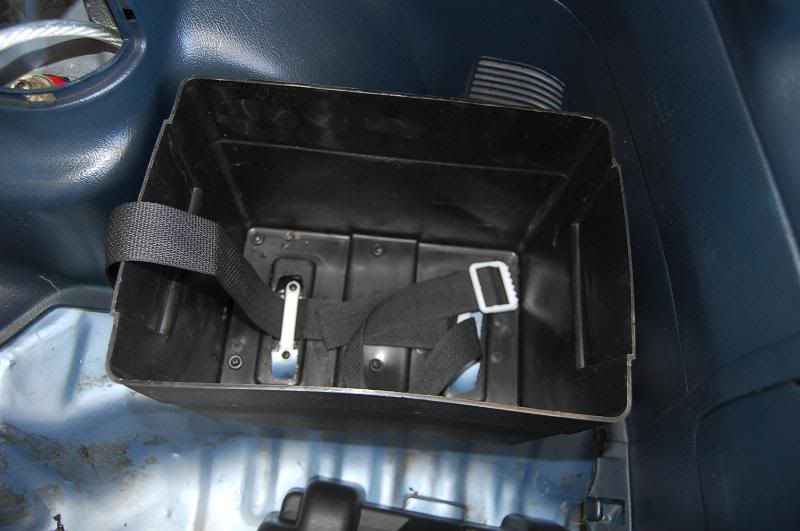
I cut some holes out and screwed it down in place.
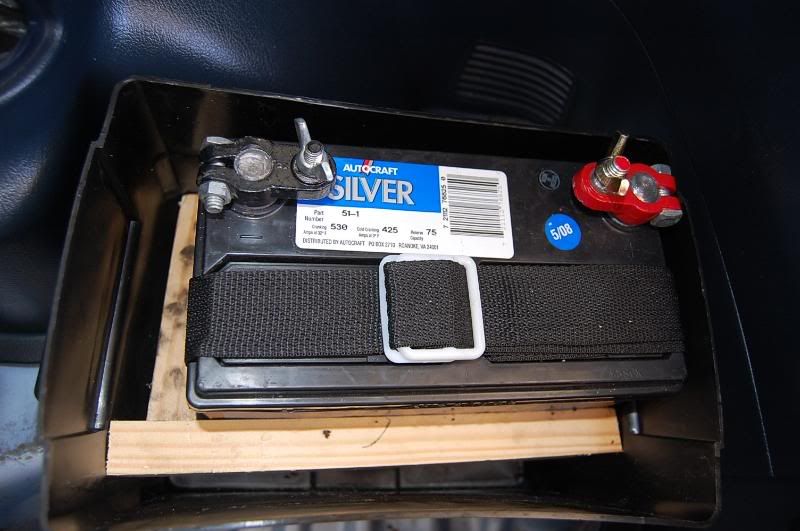
Dropped the battery in place, strapped it down and put some wood in the box to keep it from sliding around.
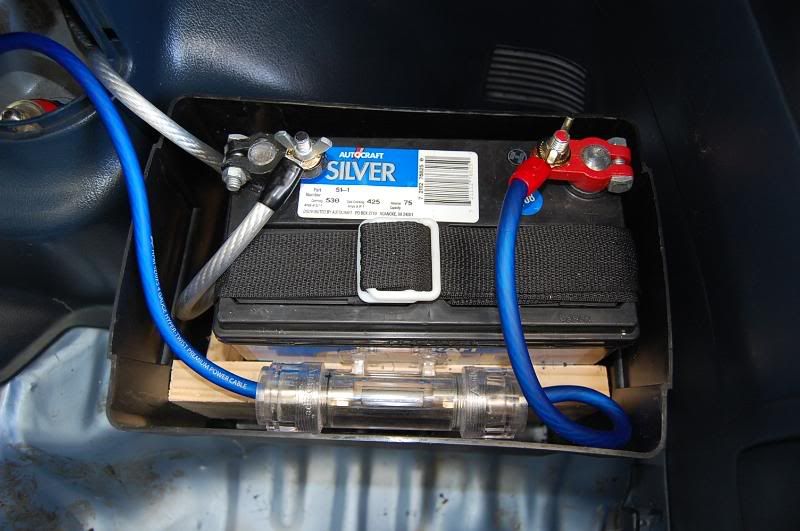
Hooked the ground wire up.
I measured out the 4 gauge for power and cut it. This is where the fuse holder goes.
Fuse holder in place.
Aaaaannnd hook the battery up.
Put the cover back on the box.
A couple of quick notes here. I plan on swapping the battery out for an Optima soon. It's not safe to ride around with a lead acid battery in a passenger compartment. These batteries give of fumes which are of course, harmful.
An Optima and/or gel style battery would be a much safer choice for a daily driver.
I will also be securing this better in the following days. A neighbor of mine is a welder and he says he'll whip up a nice little bracket for a 6-pack. This will be safer in case of an accident, the battery will not become a projectile in the car.
Now, I admit, I make mistakes. As I made one on this car. When I went to hook the battery positive terminal up, there was a HUGE spark. It's ok if there is a small one, but this was huge. I knew immediatly something was wrong. I pulled the ring terminal back and checked everything out.
It turns out when I put the 8 gauge ring on the starter, I turned it too tight. The backside of the ring terminal was touching the starter, and creating a deadshort. I replaced it and the jacket and all was good.
It is important to make sure you have solid connections and nothing is touching.
I just thought I'd share my own mistake...lol.
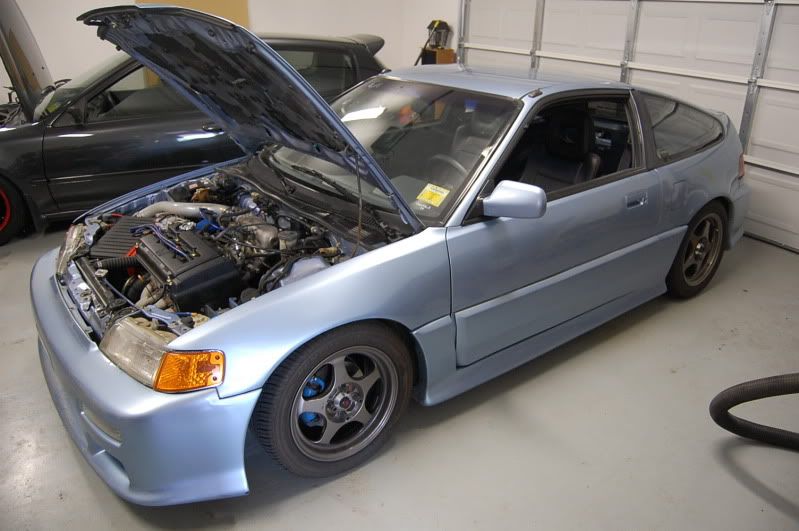
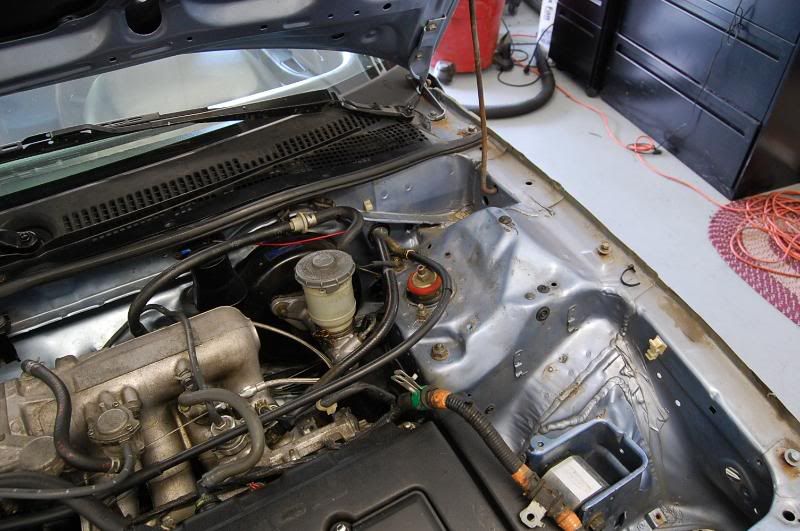
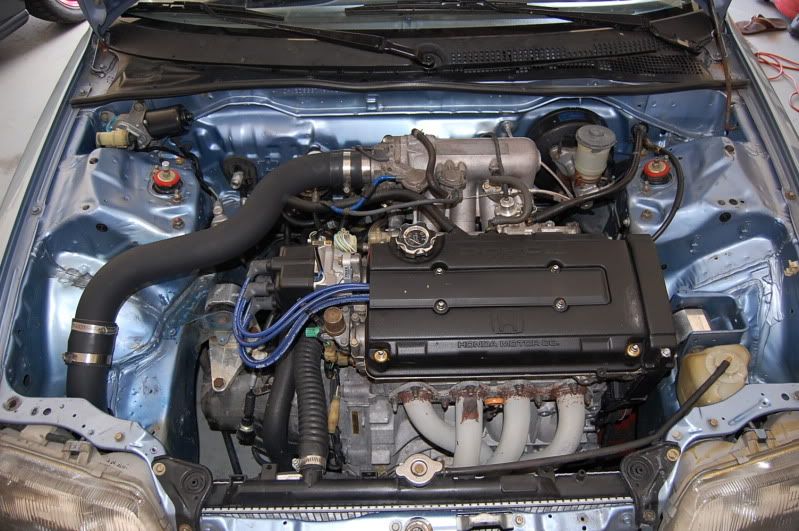
Before:
After:
The best way to look at it is corner by corner and see how much stuff is gone/moved.
The car started on the first try, all lights work, idles fine and no cels.
If I had gone straight through, without stopping, I could have done this in less than 8 hours. Stopping to take pics, post them, narrate and answer questions takes alot of time and slows me down. I need to clean up the vacuum hoses on the intake manifold and some other minor stuff by the AC. But for the most part, it's done.
Enjoy.


