


Wednesday, 27 February 2013

Sunday, 17 February 2013
HEADLIGHT RESTORATION PROCESS
HEADLIGHT RESTORATION PROCESS
We’ve all seen car headlights that have turned into a foggy haze. Not only does it look bad, but it’s also unsafe because it can’t produce as much light. Sure you could buy a new headlight, but for modern cars you can plan on paying a couple hundred dollars for a replacement.
I’m going to take you through a few simple steps to restore a headlight. Depending on the condition, you can probably get it back to 90+% of new.
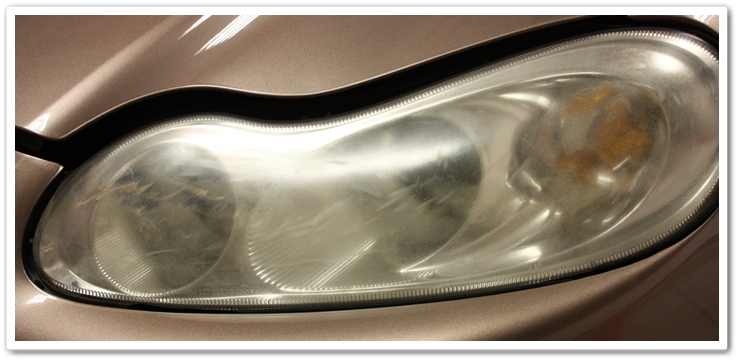
This example had some pretty serious damage to it. I could tell that it had been hit by something as it had pretty deep gouges all across the light. Given the condition, I knew I was going for “better” as opposed to like-new.
For this condition, you’re going to need at least several steps of wetsanding followed by several steps of machine polishing. You also want to tape all around the headlight to protect any seals/trim as well as painted finishes. If the lens has only a mild haze to it, then you should be able to clean it up with just the polishing steps without having to wetsand.
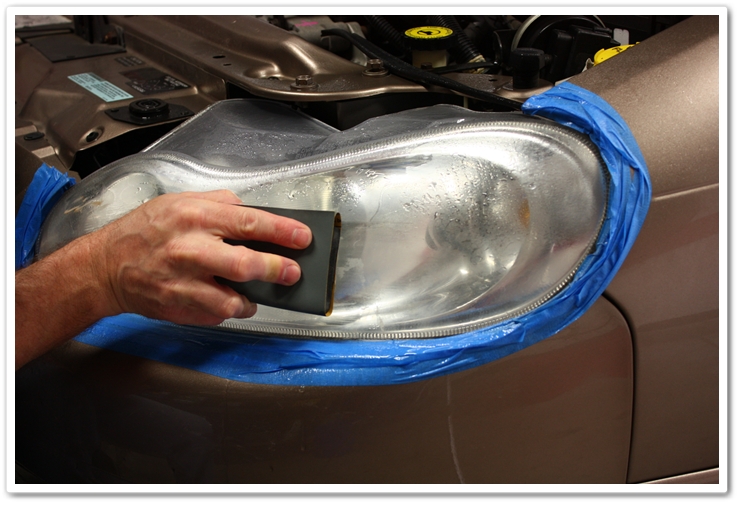
Here I am starting with 1500 grit sandpaper. I started off just like I would with any wetsanding project…go in one direction first, and then alternate directions as you move up through the different levels of paper (cross hatching). Here I started with horizontal passes. I know, I know…my tape job was less than stellar on this one!
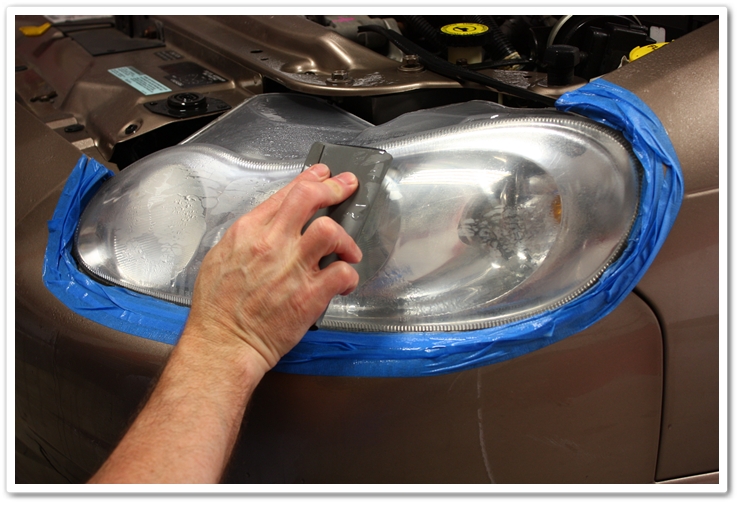
Next I stepped up to 2000 grit sandpaper, and I switched to vertical passes:
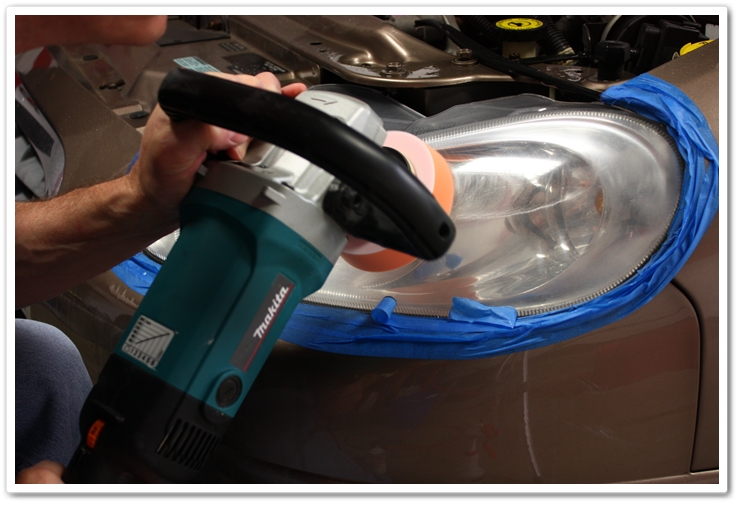
After about 4 different grits of paper, I switched to the polishing machine with your normal commercial polish to take out the sanding haze and to polish out the finish.
Once again…before:
After:
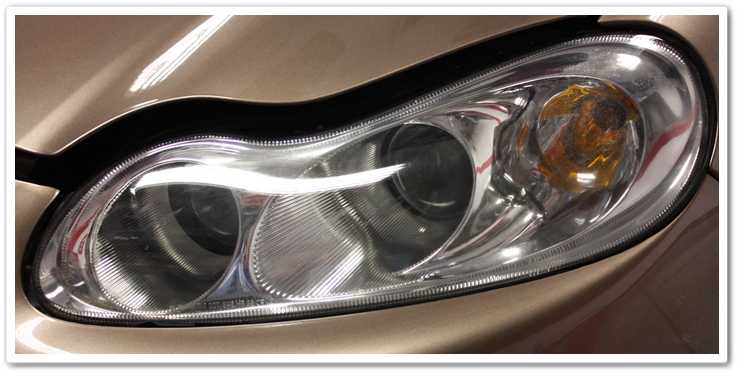
Since this light was hit with some force, it had micro-fractures all through the lens that was well below the surface and obviously couldn’t be corrected. When it was done, it looked probably 75%-80% of a new one.
One thing to remember is that headlights typically get to this point after they’ve lost their UV protection (some are/were made better than others). Once you polish it out, you’ll need to give it a light polish every now and then to prevent the haziness from returning. This simple maintenance step can even be done by hand.
Don’t be afraid to give it a try. It’s quick, it’s simple, and it can make a big difference in the overall look of the vehicle!
Credit to detailedimage.com
Tuesday, 5 February 2013
INTERCOOLER FIN REPAIR
Intercooler Fin Repair

Intercoolers improve efficiency and power in turbo applications by rapidly radiating heat from the compressed intake charge before it enters combustion. Intercooler fins play a crucial role in the intercooler’s ability to keep your vehicle’s intake temperatures cool. Over time, the intercooler’s fins can bend or clog from road debris and rocks, causing a disruption in airflow that causes a loss in performance, not to mention becoming a real eyesore.

 We noticed top-mount intercooler had a fair few extra-squashed fins. Not wanting to pony up and purchasing a new core, we decided to make repairs using simple household items. We should mention there are other options to fixing those fins, which include purchasing a fin straightener, or fin rake that’s sold online. Although using a rake fin would seem the most practical in quickly straightening those damaged fins, this tool isn’t always the best item to use as we found out with our intercooler. Many aftermarket intercooler’s cores, including ones such as Greddy, don’t have long rows of straight fins. Rather, they consist of condensed short, zigzag rows that require more attention when straightening. To address this issue, we gathered up a number of items to create our own DIY kit, which included a set of tweezers (the type your girlfriend or perhaps yourself would use to pluck eyebrows), toothpicks, and a pair of screwdrivers.
Using a pair of flat-head screwdrivers and plenty of patience, methodically wedge the bent fin between both flat ends of the two screwdrivers and press together to straighten them back to their original shape.

If the screwdriver method isn’t working out, a pair of wide-tip tweezers with a flat face is another alternative.


Notice after using a set of tweezers that the intercooler fins were shaped in a square pattern. Don’t worry, we have a quick fix for that as well.

We used toothpicks to contour the fins by simply pressing alongside each edge to achieve a nice rounded corner, similar to the factory design.

Although the repair job proved to be tedious due to the fact that we went fin by fin, the end result was well worth our time spent as shown in the image below.

Credit to Import Tuner


