


DIY Grounding Kit Installation
Ok first before we start, it is very important to know & understand that the grounding kit & voltage stabilizer is NOT a performance enhancing mod! It merely improves: Cars electronics.
From that point on it leads to other attributes such as improved throttle response, improved audio quality, enhanced interior & exterior lighting of car, etc. this than leads to a 100-110% running car.

Ok let’s start.
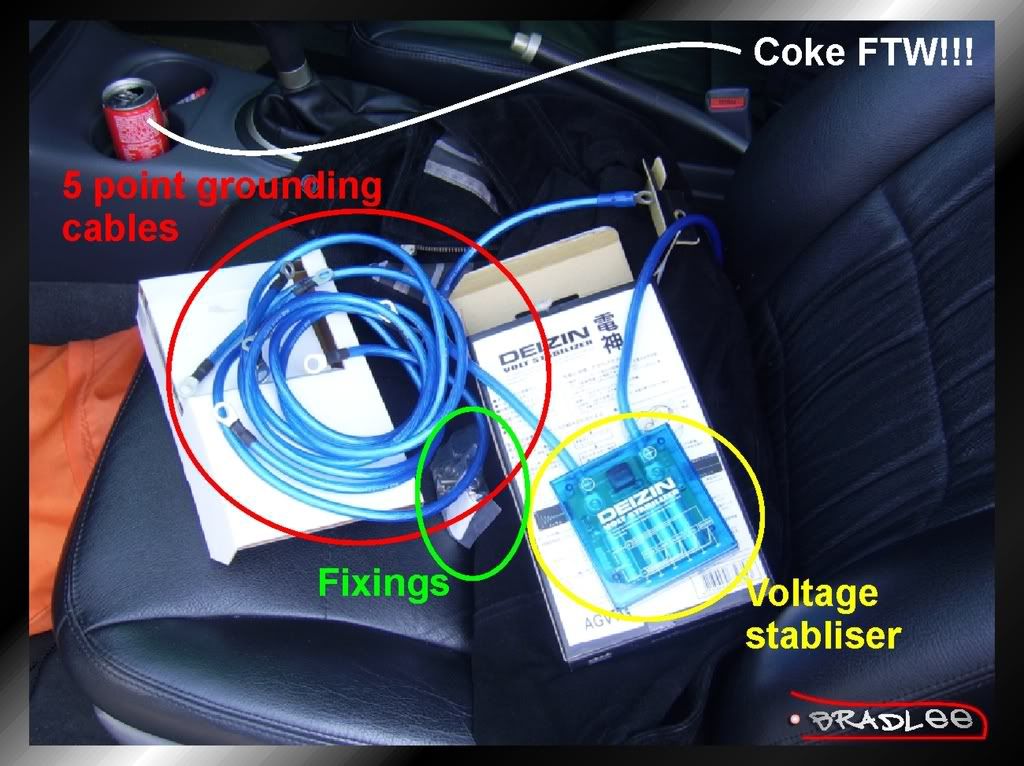
The basic kit comprises of:
- a voltage stabilizer
- Grounding point cables (5, 7 & 9 point. Mine is a 5 point)
- fixings
Standard kits contain 5 grounding cables, with terminals at either end of the cables. All cables come in various lengths for easier installation. The really expensive kits have gold plated or anodized terminals & more grounding cables.
I’m using a basic kit with 5 points for now.
Step 1:
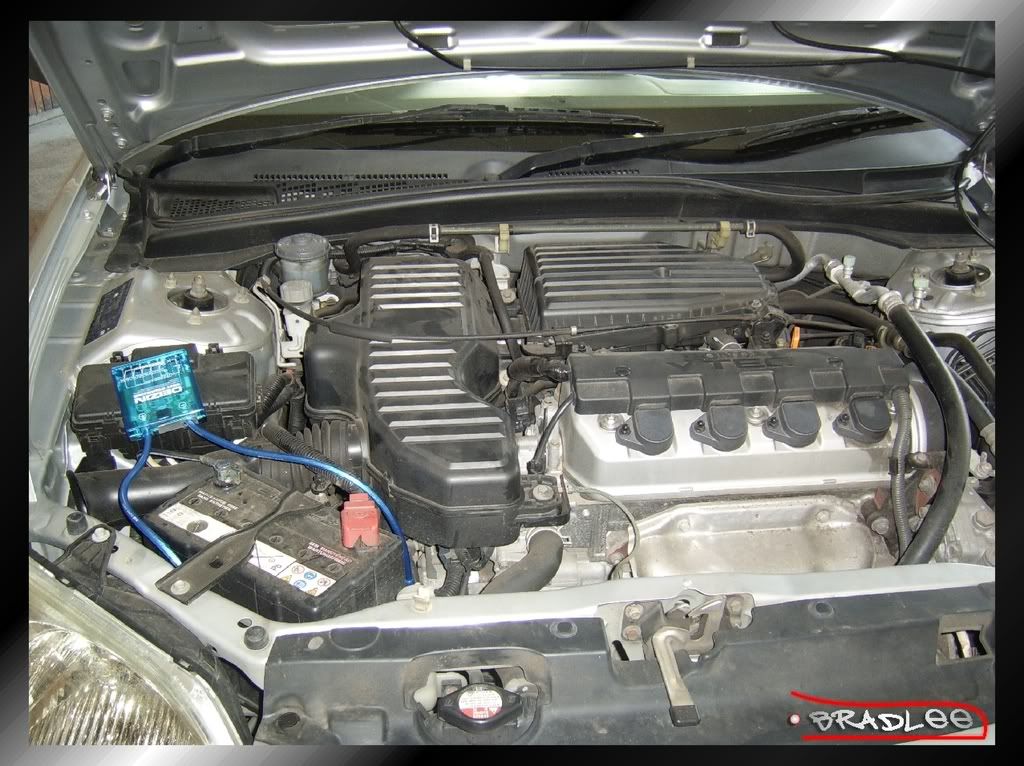
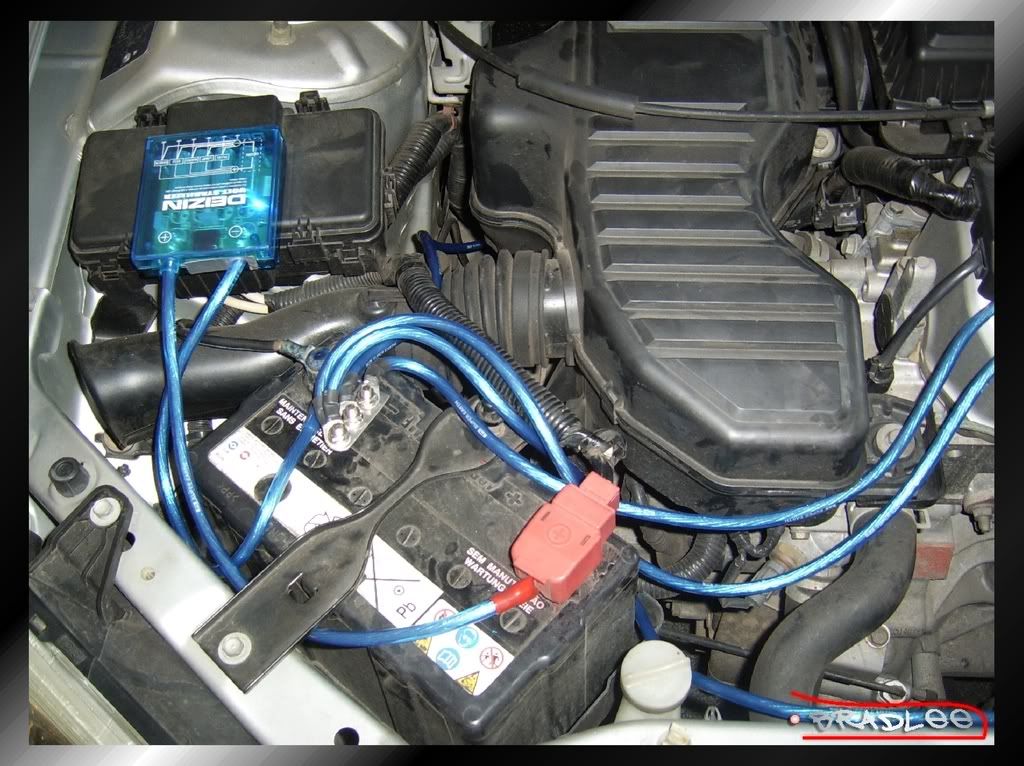
Positioning of the voltage stabilizer unit- The unit has to be fastened close to the battery as it connects to the battery. Ideally position it where the indication marks can be easily read & furthest away form the engine. As you can see I placed mine on top of my fuse box. Use double sided tape to fasten unit down.
*Important note: clean surface area onto which unit is to be fastened on.*
Step 2:
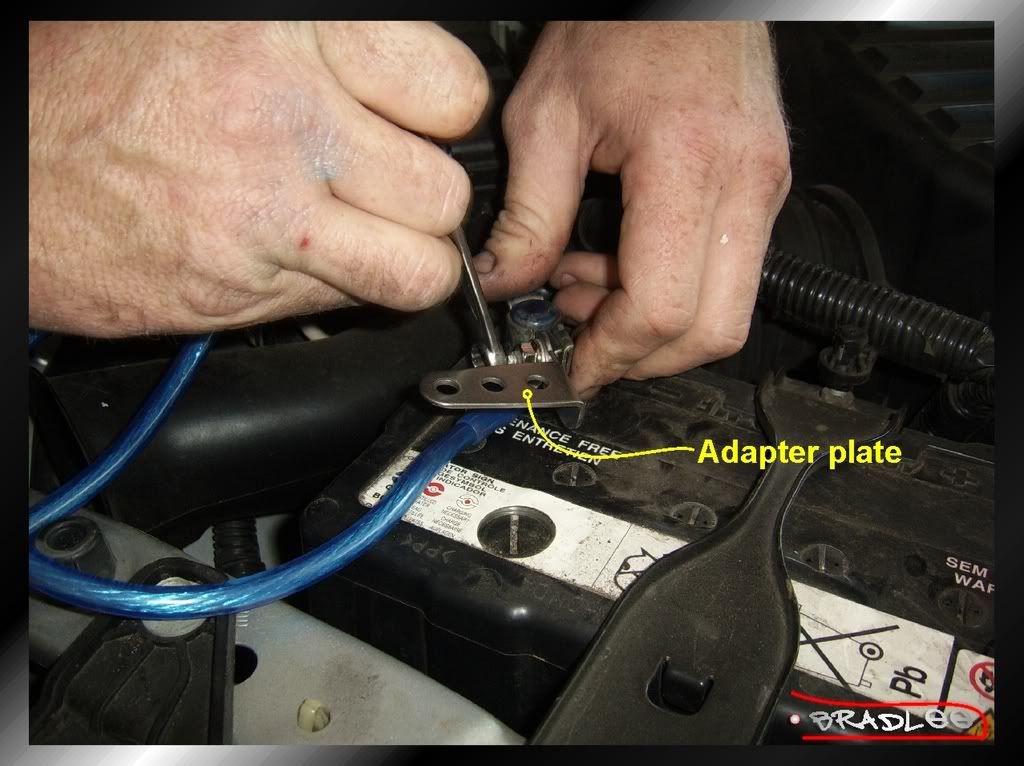
Connecting the terminals- Once the position is found connect the positive & negative terminals of the unit to the positive & negative terminals of the battery. Red for positive, & black for negative. We did the negative first. The negative terminal required the fixing of an adapter plate as well.
Adapter plates vary in size & shape, pending on kits. Mine had 3 mounting points for the grounding cables.
*Important note: ensure the car is switched off & car radio is switched off. Be careful when connecting & fastening terminals.*
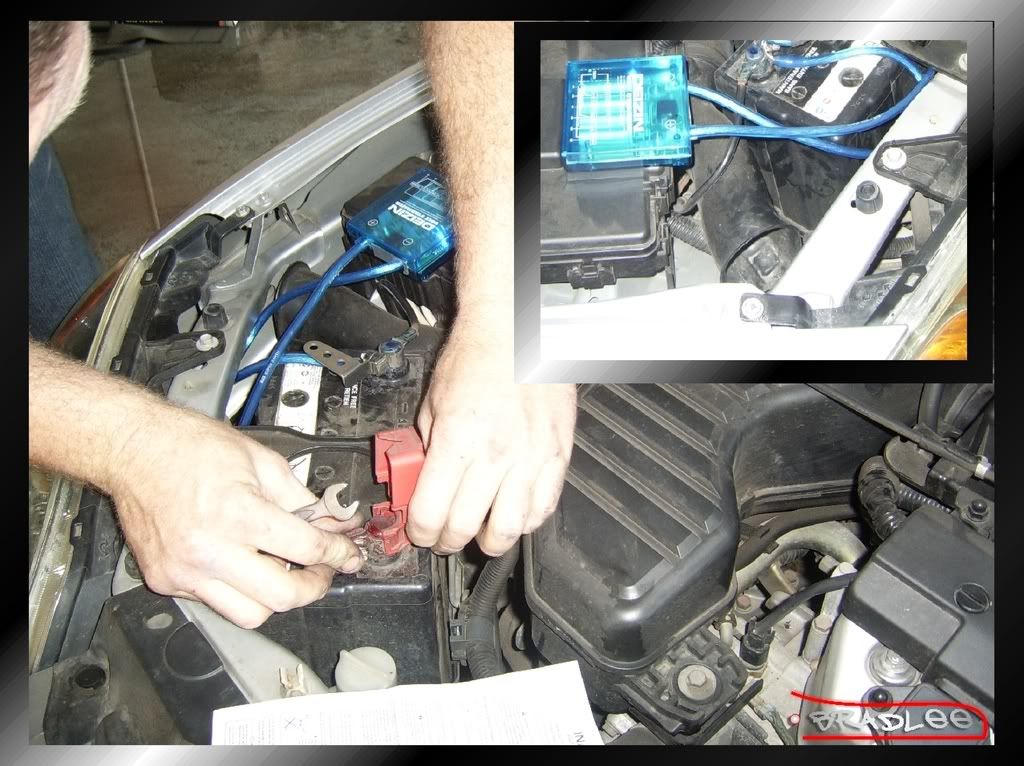
Connect the positive terminal & Oooo a cool “riced-up” light comes on.
Step 3:
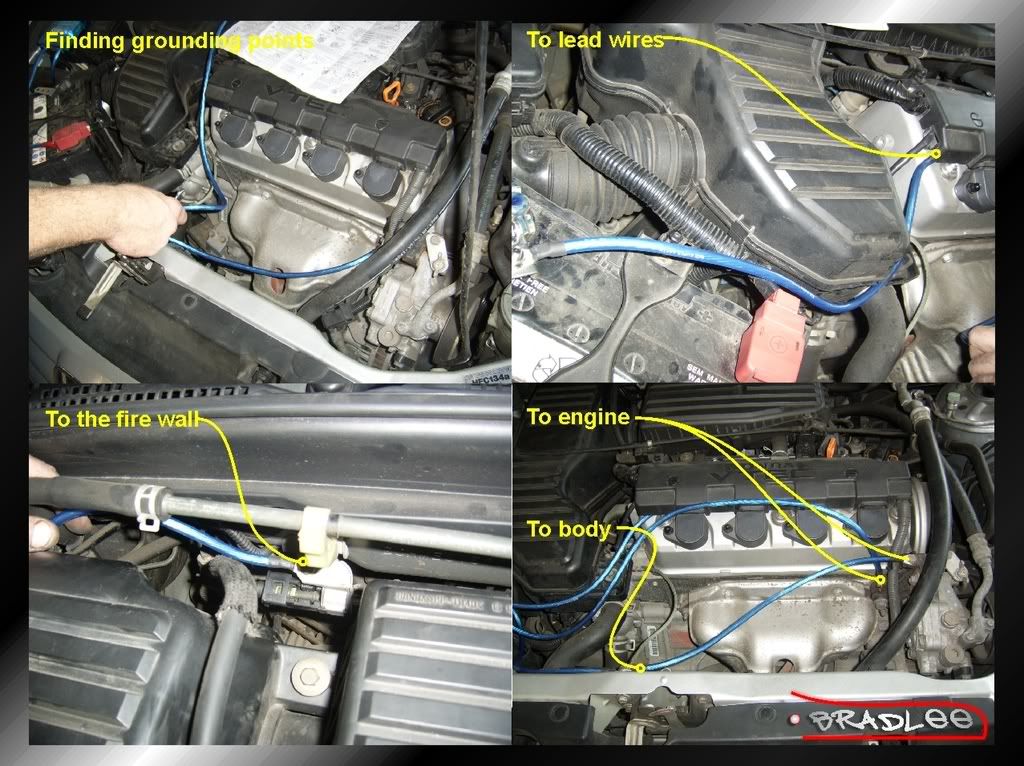
Connect grounding points- Most kits come with a basic diagram layout. Follow it as best as possible. This is a universal ideal for position of grounding points, on your car it may be different. In the case of my D17 we opted for a slightly different setup. The basic grounding points are:
- car’s body
- fire wall
- engine
- alternator
- distributor
You will find existing grounding points on these parts (pending car model). Instead of connecting to the distributor Greg connected it to the Lead wires.
* Important note: ensure the engine bay is cooled, before working on it. Again ensure all fixing points are clean/ed.*
Step 4:
Checking- check all connection, fixing & fastening points thoroughly.
Step 5:
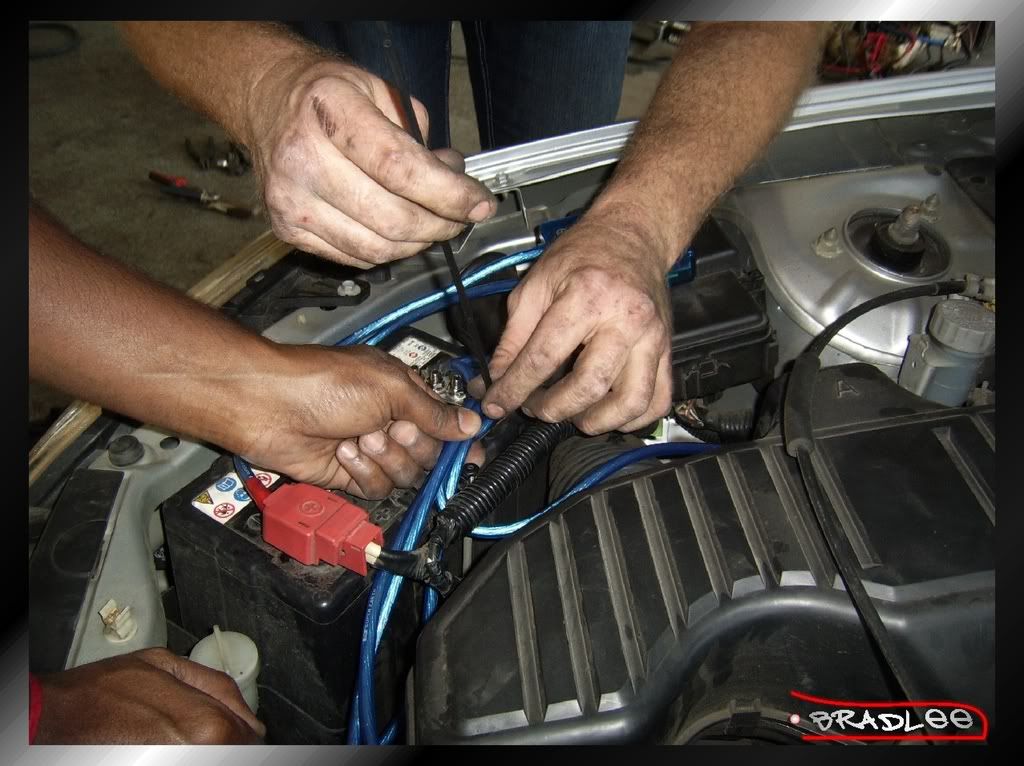
Tidying up- all I can say is, cable tires are your best friend! I know its not the prettiest sight in the world & with a 9 point grounding kit your engine bay may end looking like a Subaru’s or the inside of a PC hahahaaaaa. We made everything look as neat as possible on my car. Good thing, the King of cable tires was around to help…
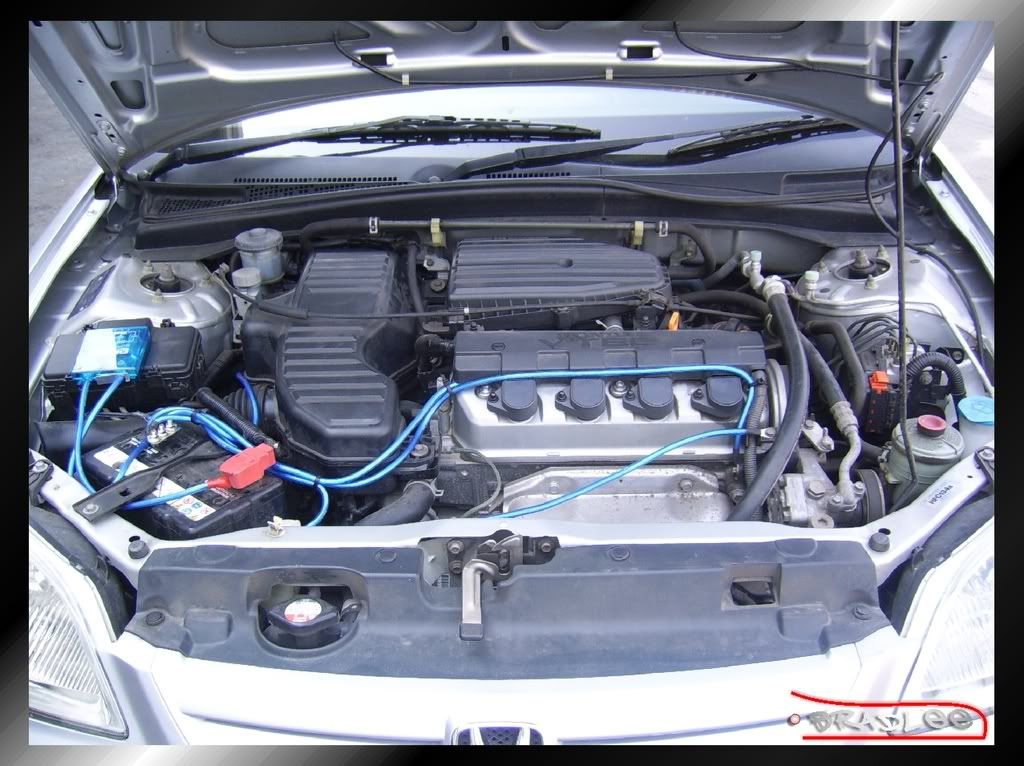
Well all is done and the end result:
# Disclaimer: this was the ideal layout for my car, on your car it may differ. This is just a guide line to follow. Read & follow the instruction accompanying your kit first before attempting to install. Kits may differ. When unsure about anything, consult professional help #
My verdict on the product:
So I had it on for just less than 2 days & I noticed the following:
- The headlights on the car were brighter, especially the brights.
- My audio system is more clearer & crisp sounding
- The electric windows run better than previously
- The idle is smoother
- I can feel my vtec change over more than before. (for sohc vtec motors that’s great)
- Throttle response has increased a bit as well.
Again I will state that this is NOT a performance gain mod so do not expect an extra kw or 2. It’s a unit that improves the overall running of one’s car.
I highly recommend this for guys with older model cars & those who have done engine transplants & Frankenstein conversions, you will defiantly notice the difference!
Credit to hondaracingcrew


0 comments:
Post a Comment